Businesses
Lacey Act Declaration Requirement; Plants and Plant Products
LAWGS - 2021-05 - Importer and Broker Screenshots submitted
Businesses
OMB: 0579-0349


LAWGS – Importer and
broker
screen shots

Prepared by

May 7th, 2021
Table of Contents
3 E-Authentication for Importer Org 3
5 Creation of Importer User for Filer Org 8
6 Manage Importer/Broker Relationship 26
7 E-Authentication for Broker Org: 28
8 Creation of Broker user for Broker Org 33
The purpose of this document is to provide screenshots regarding including LAWGS introduction, Creation of customer eAuth login, Importer and Broker user orgs, Declaration forms and the connection to Importer and Broker users. This document outlines an overview of LAWGS.
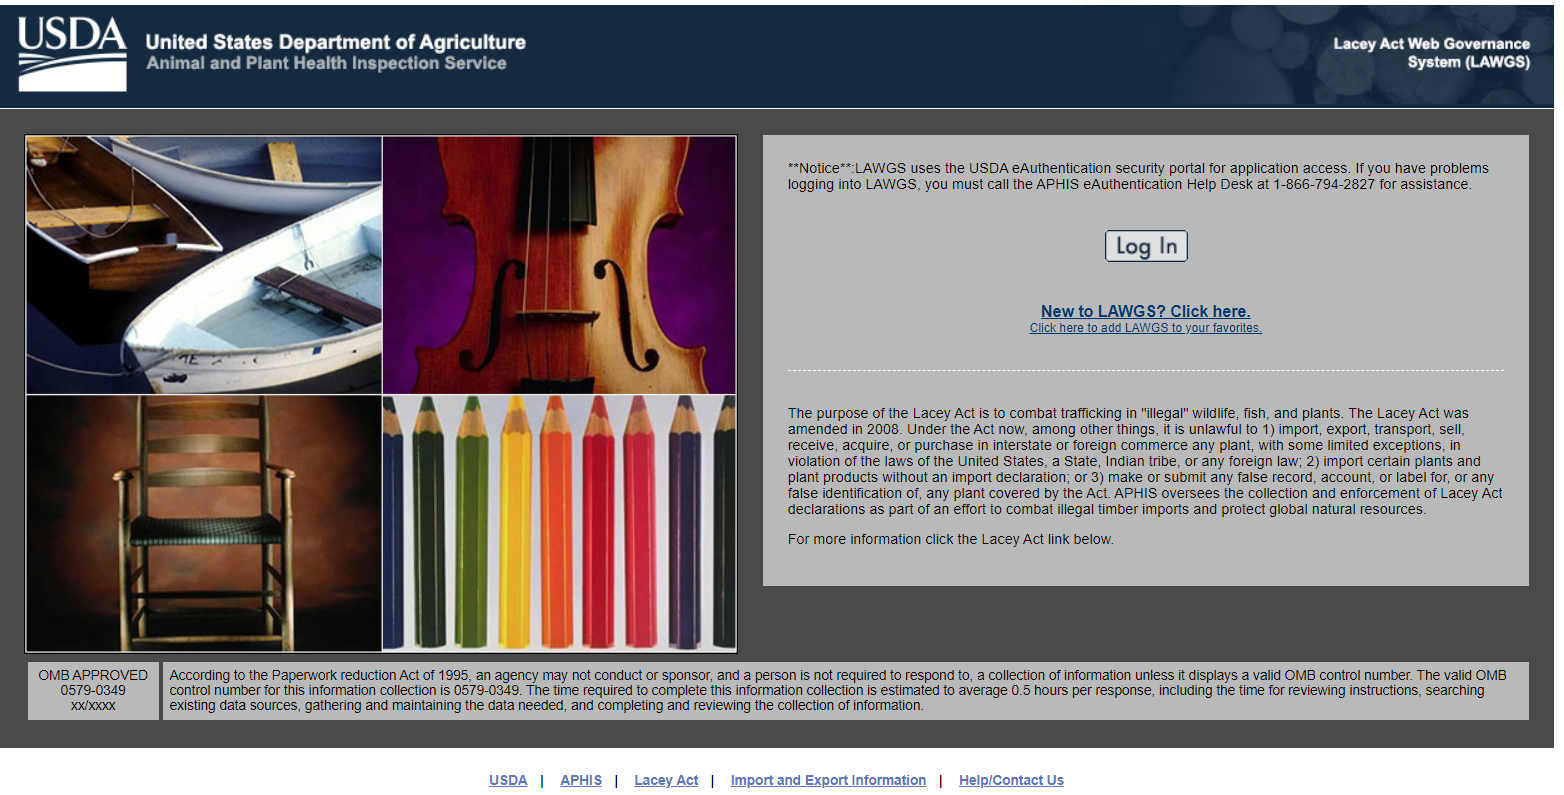
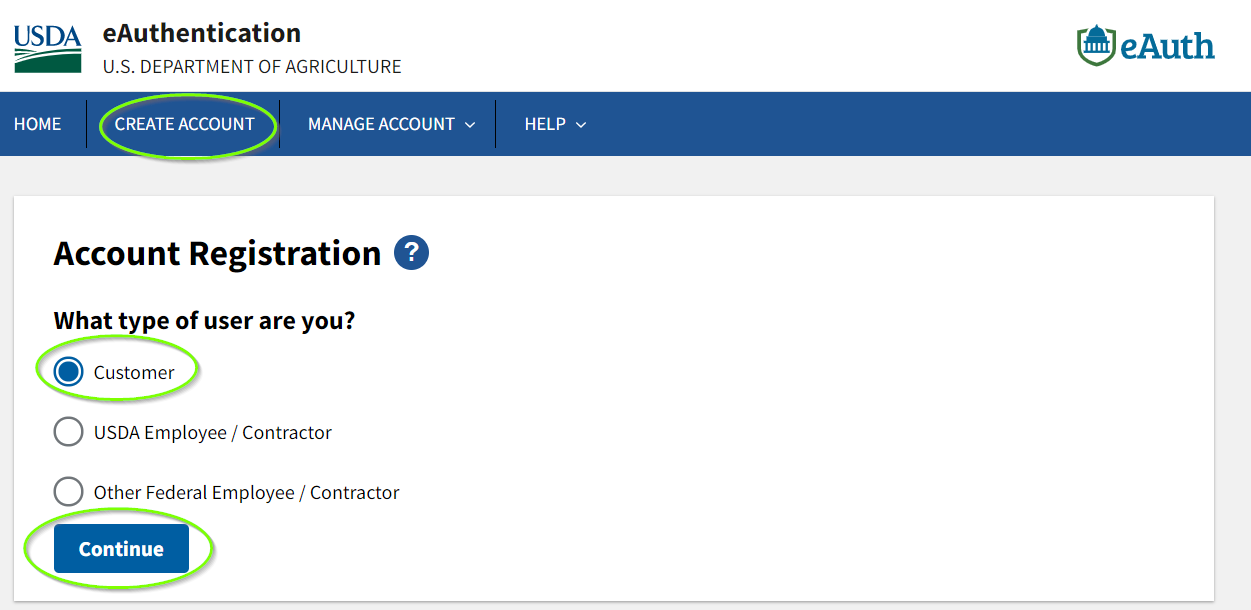
Step 1: All Users must be e-Authenticated to gain access to USDA APHIS sites.
Link: https://www.eauth.usda.gov
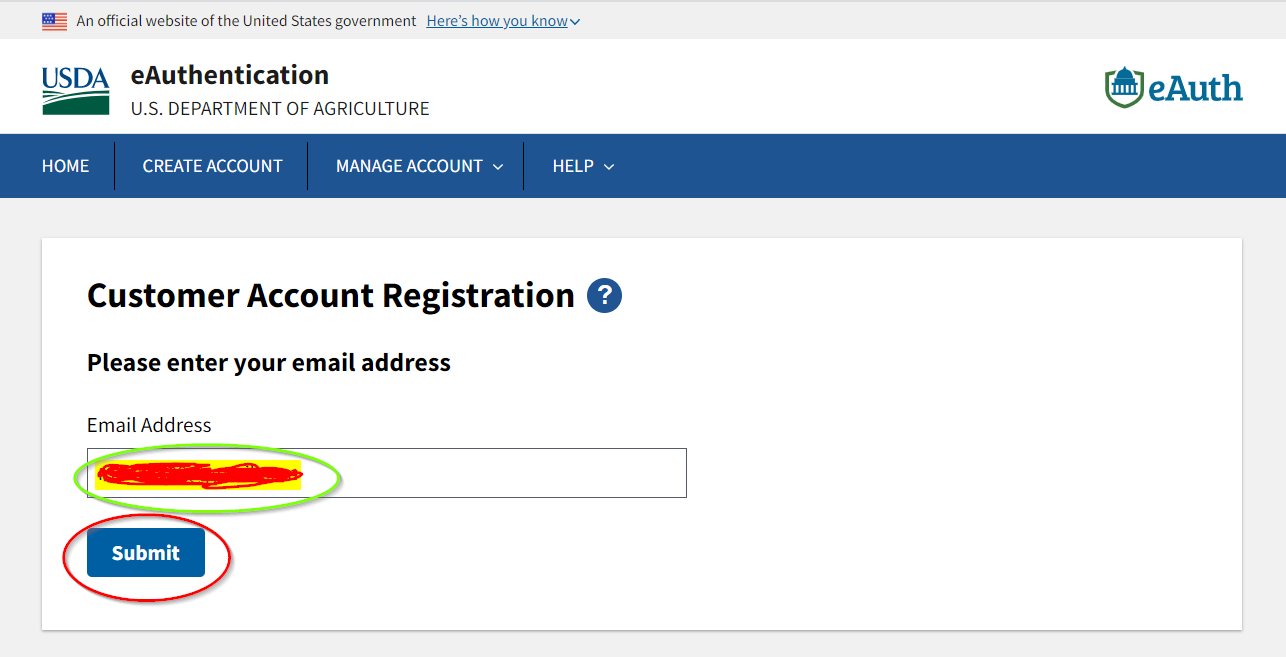
Step 2: Please enter email address.
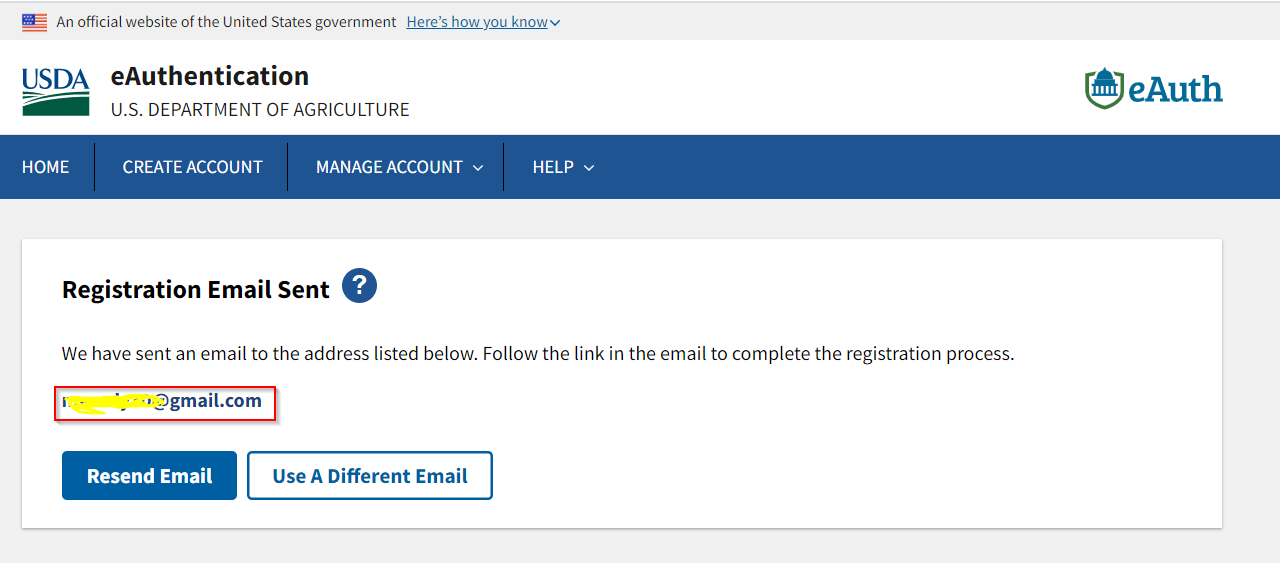
Step 3: The confirmation has sent to your email address. Follow the link to complete the registration process.
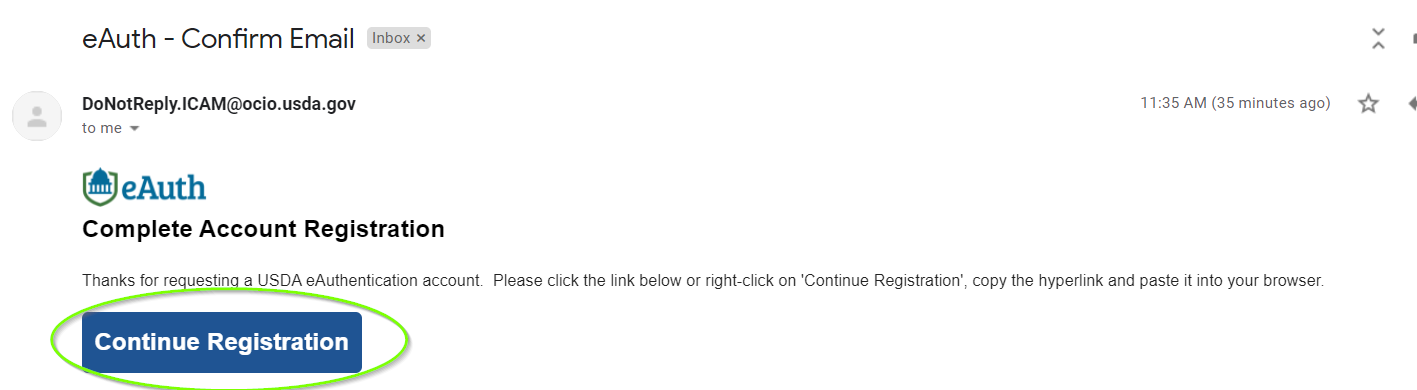
Step 4: Click “Continue Registration” from your email.
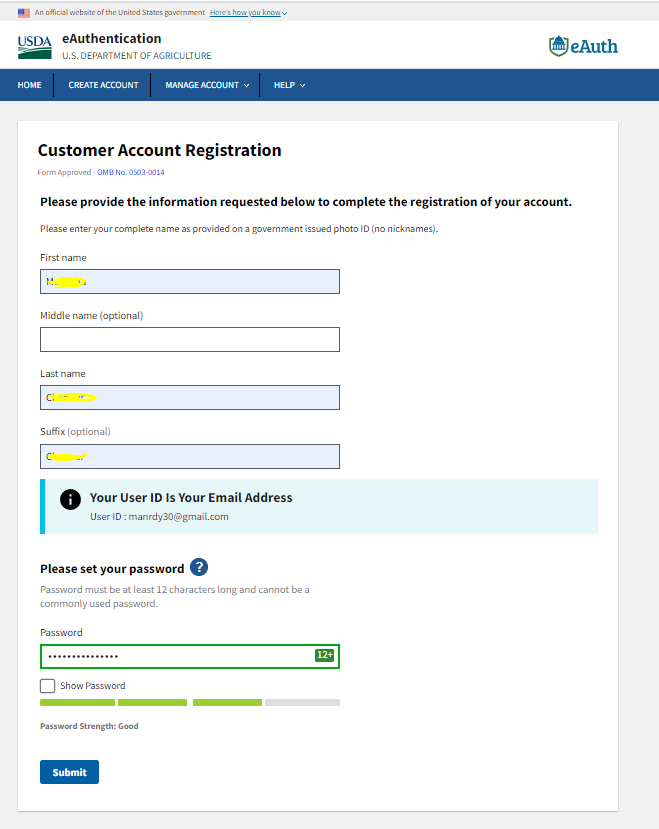
Step 5: It will open the link with USDA eAuthentication Customer Account Registration form. Please fill out and click “Submit” button.
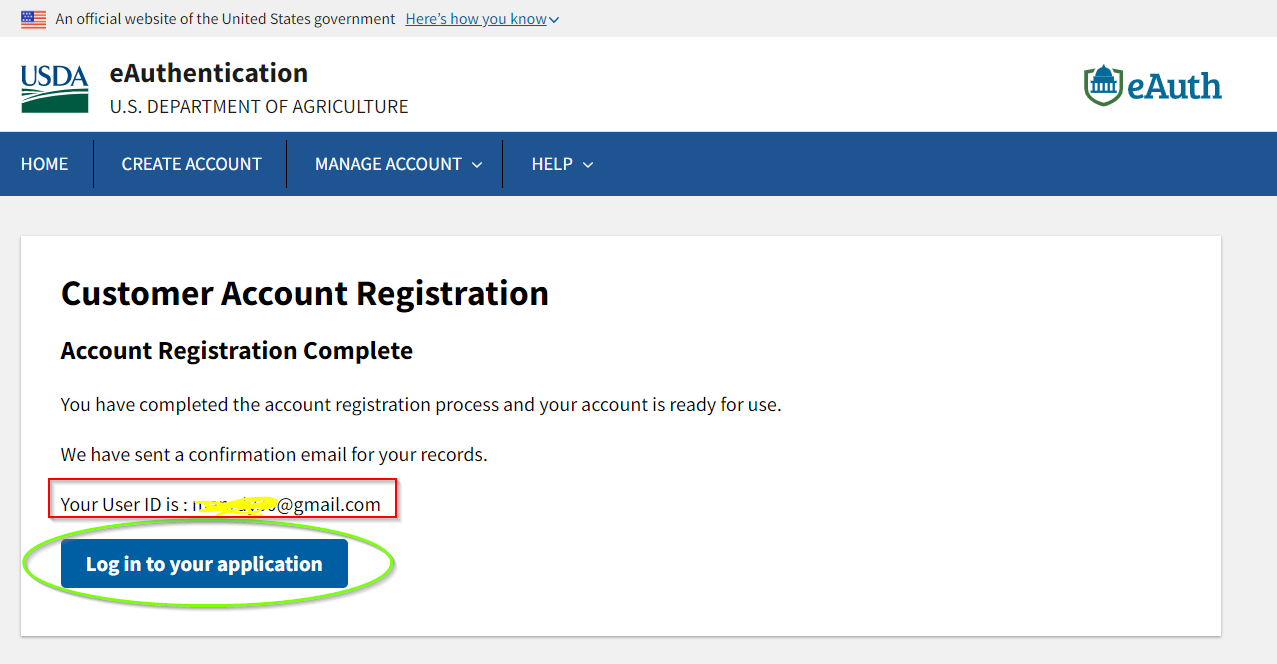
Step 6: Once you submit the form, it will direct you to the window called “Account Registration complete”. Click “Log in to your application” button or use the below link to login to LAWGS using your eAuth user id and Password.
https://lawgs-training.aphis.usda.gov/lawgs/faces/login_initial.jsf
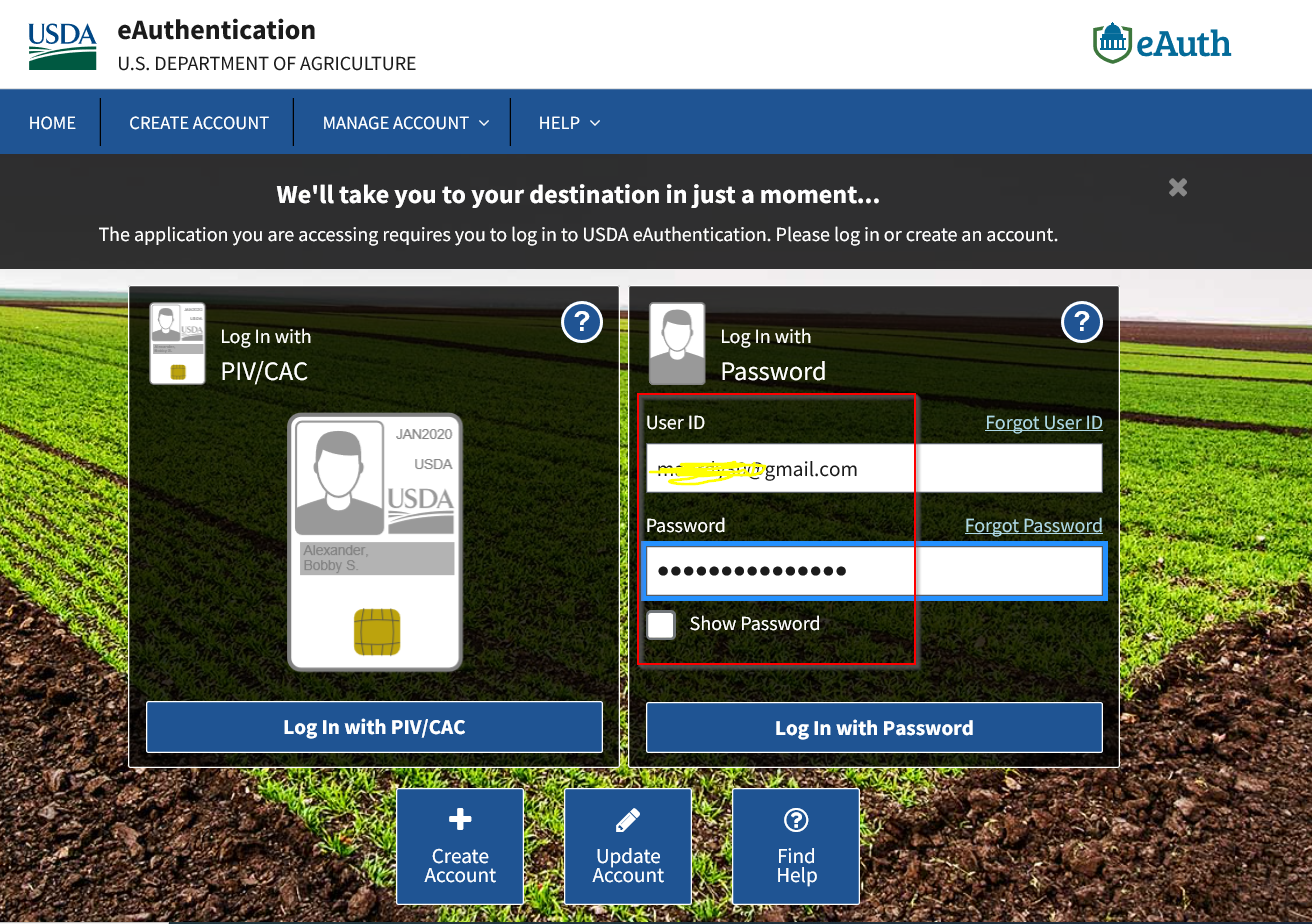
Step 7: Login to your application using the below link:
Link: https://lawgs-training.aphis.usda.gov/lawgs/faces/login_initial.jsf
Please use your eAuth login credentials to “Log in with your password”.
USDA eAuth login window will direct you to the LAWGS Home Screen. Click “Log In”.
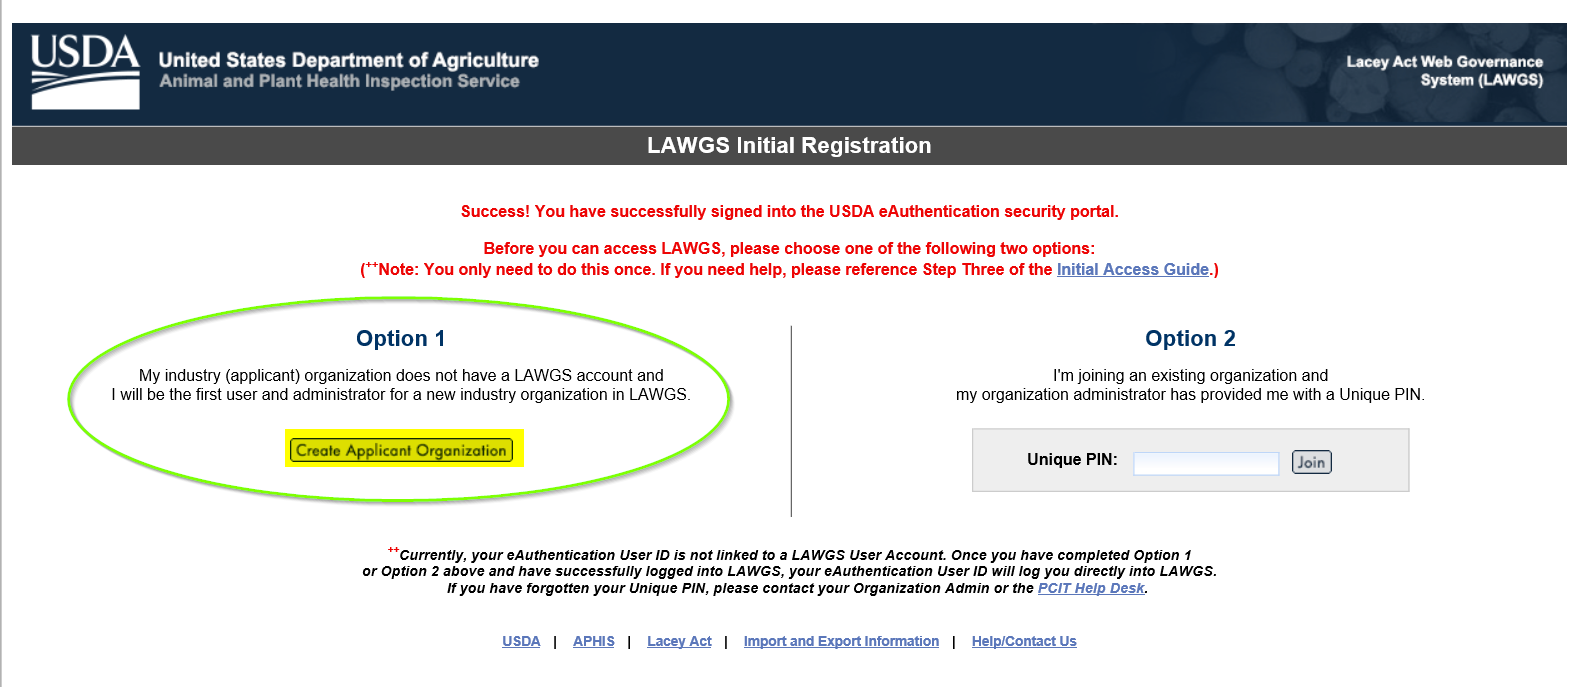
Step 1: Use option 1 to create Applicant Organizations.
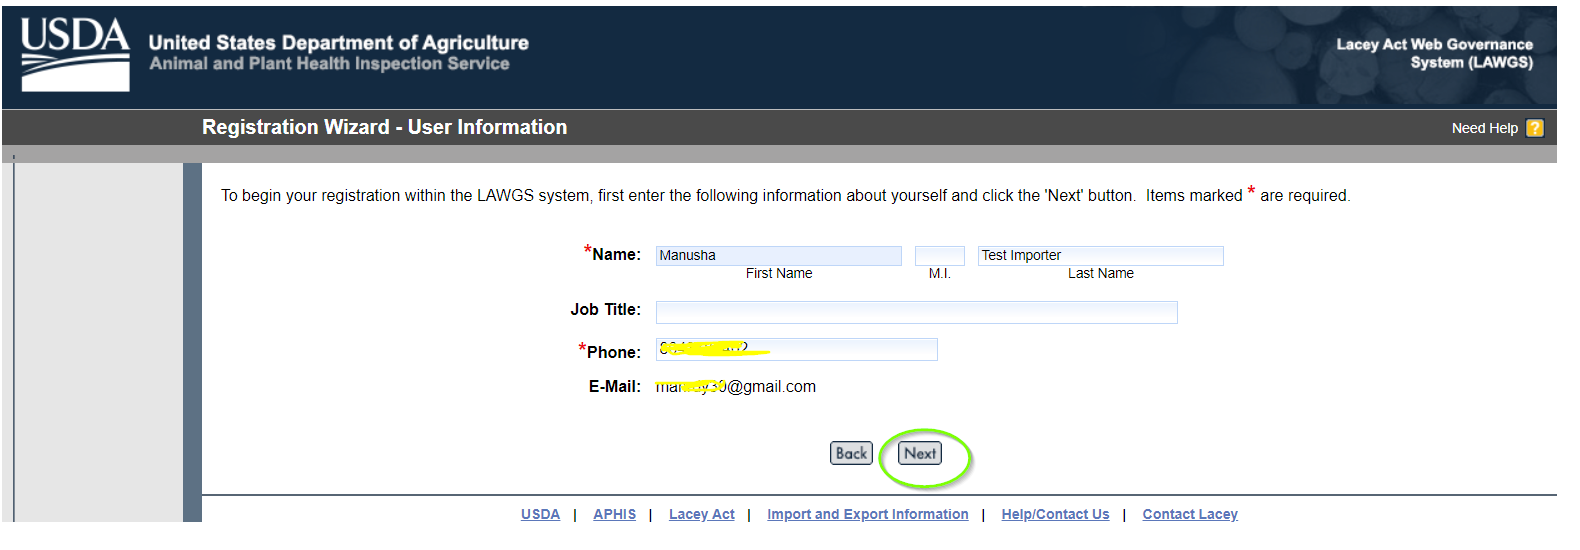
Step 2: Fill the mandatory fields and click next.
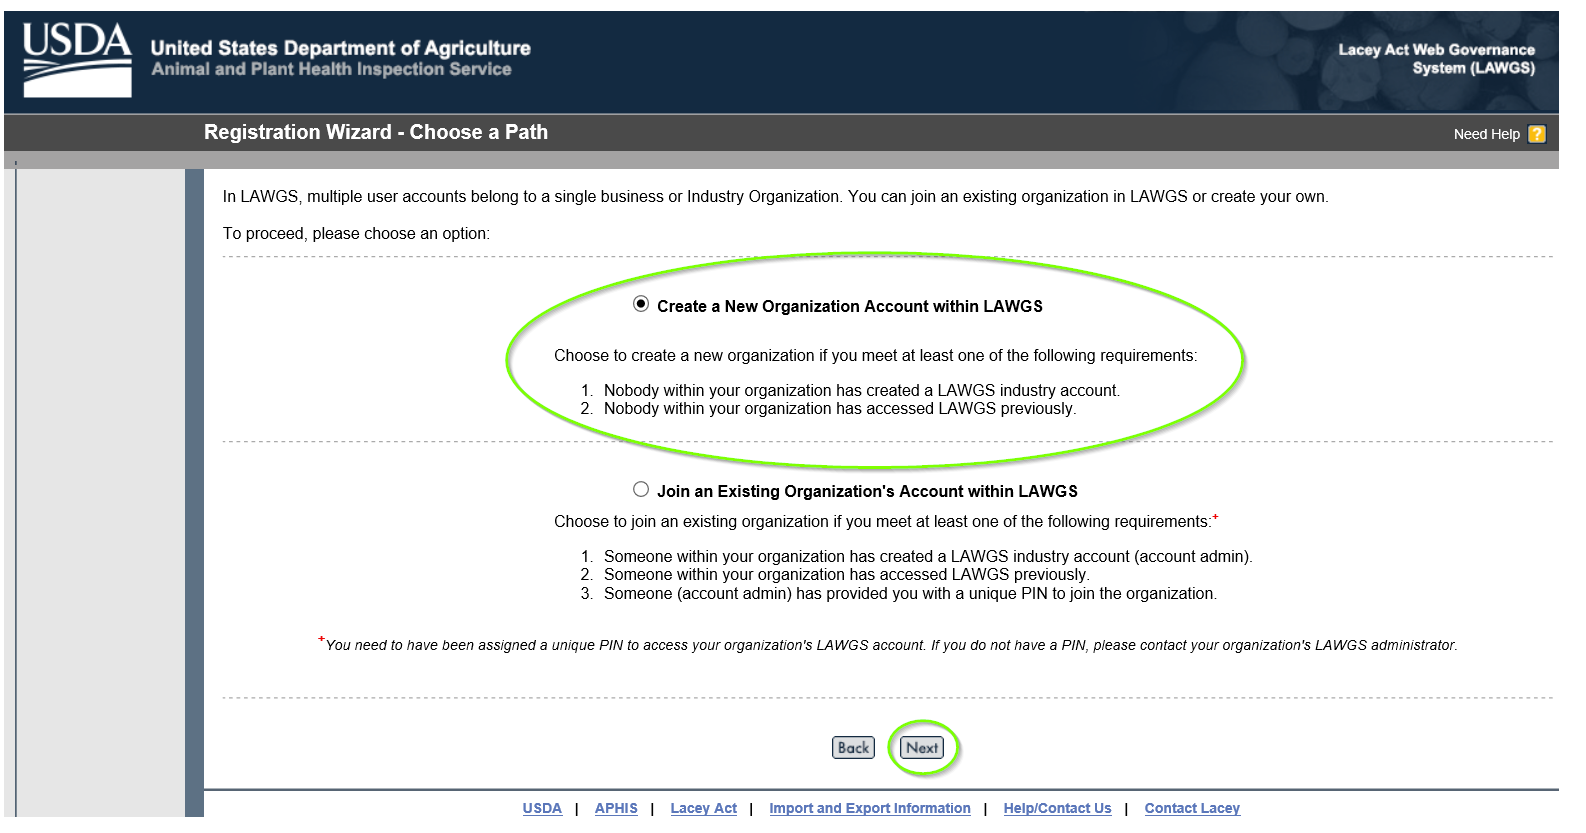
Step 3: Please make sure to click “Create a New Organization’s Account within LAWGS and click “Next”.
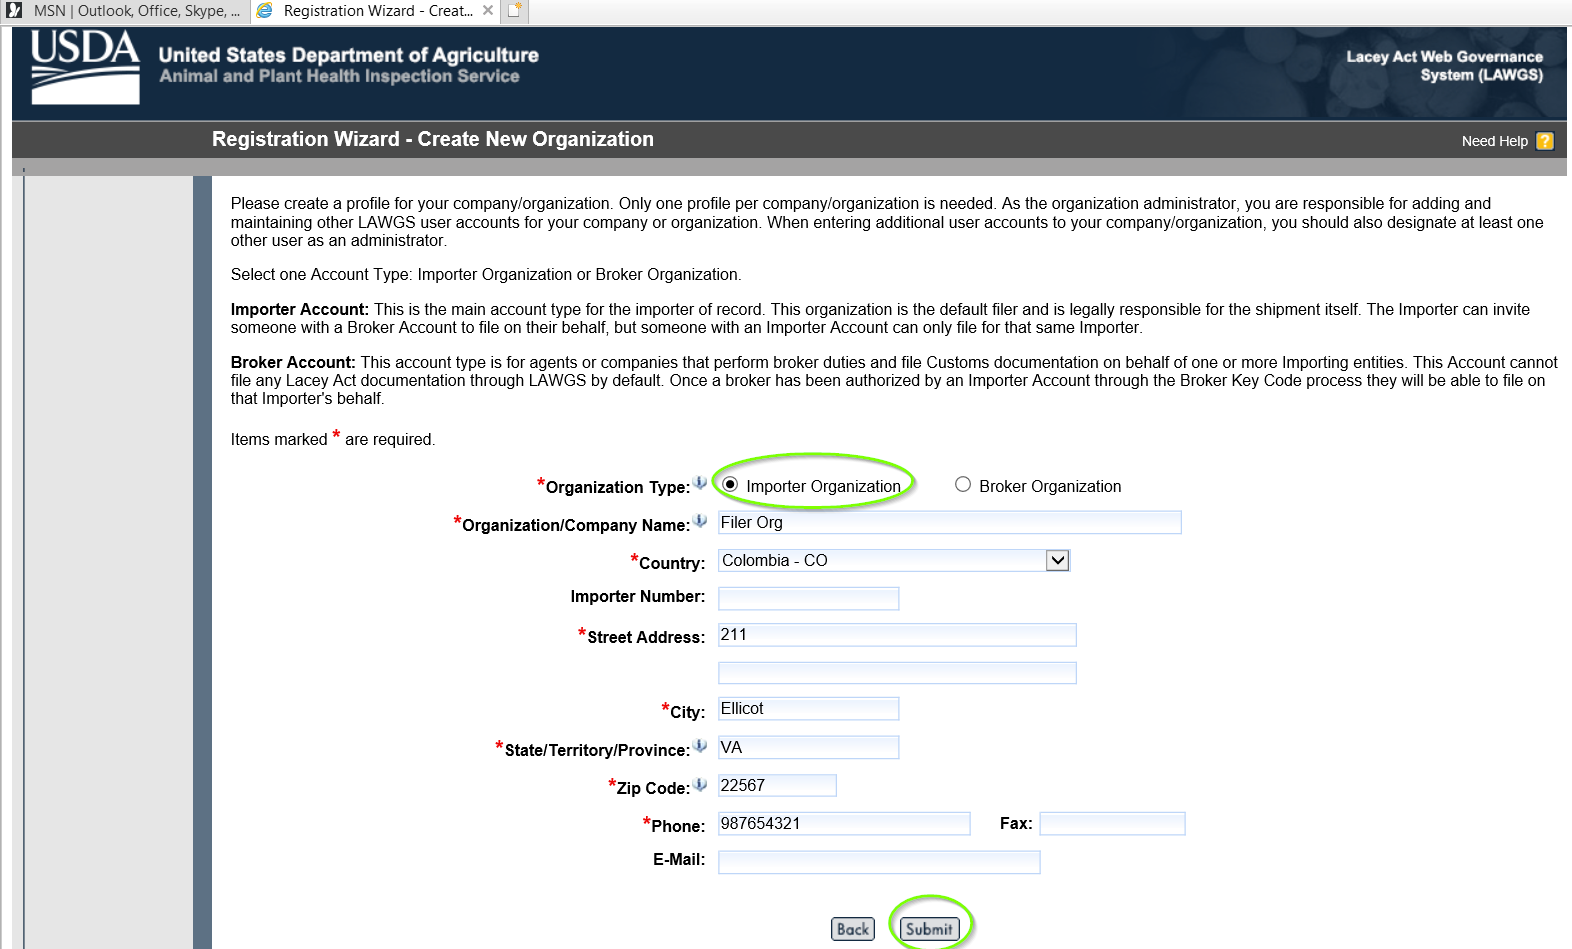
Step 4: Select one Account type “Importer Organization”, fill the rest and click “Submit”
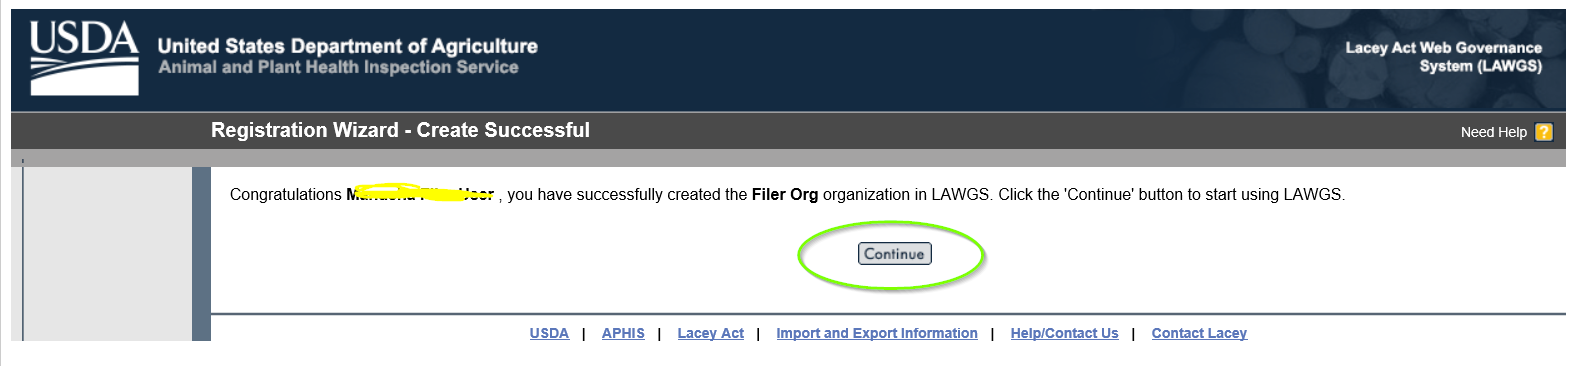
Step 5: Importer user organization has created and click “Continue” to start using LAWGS.
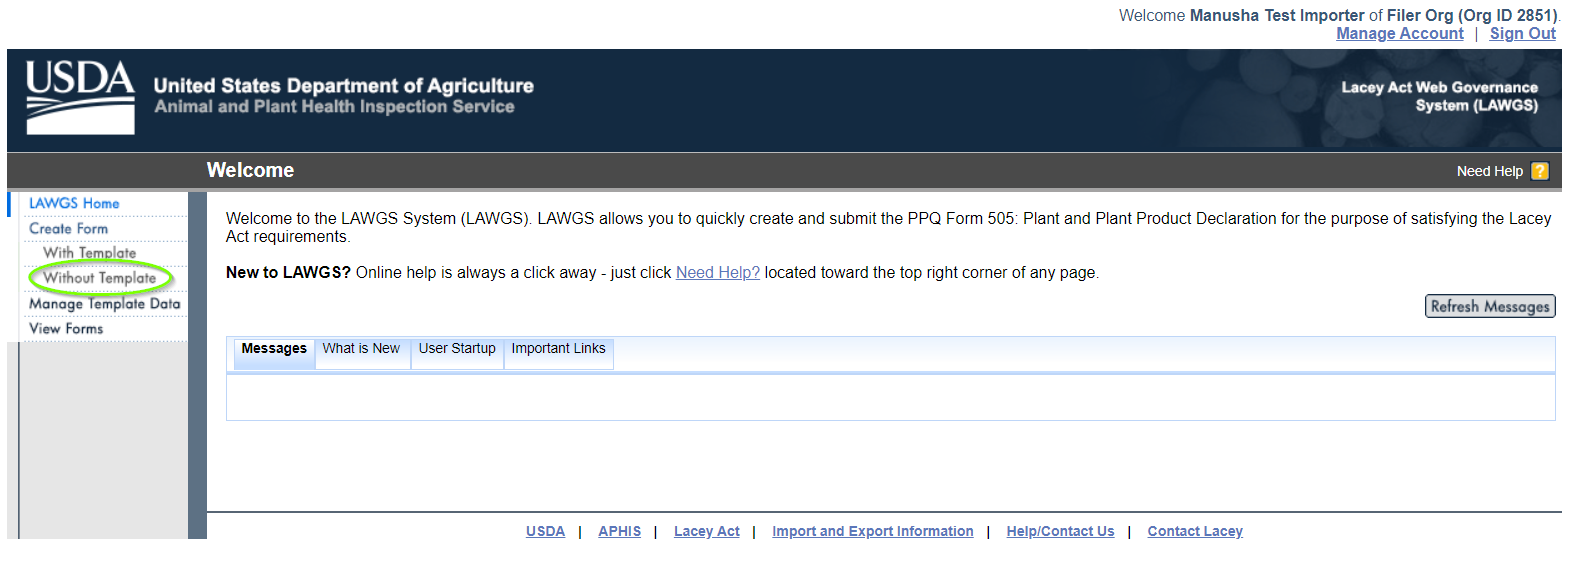
Step 6: LAWGS Home Screen for Importer
Click “With out Template” File a declaration form.
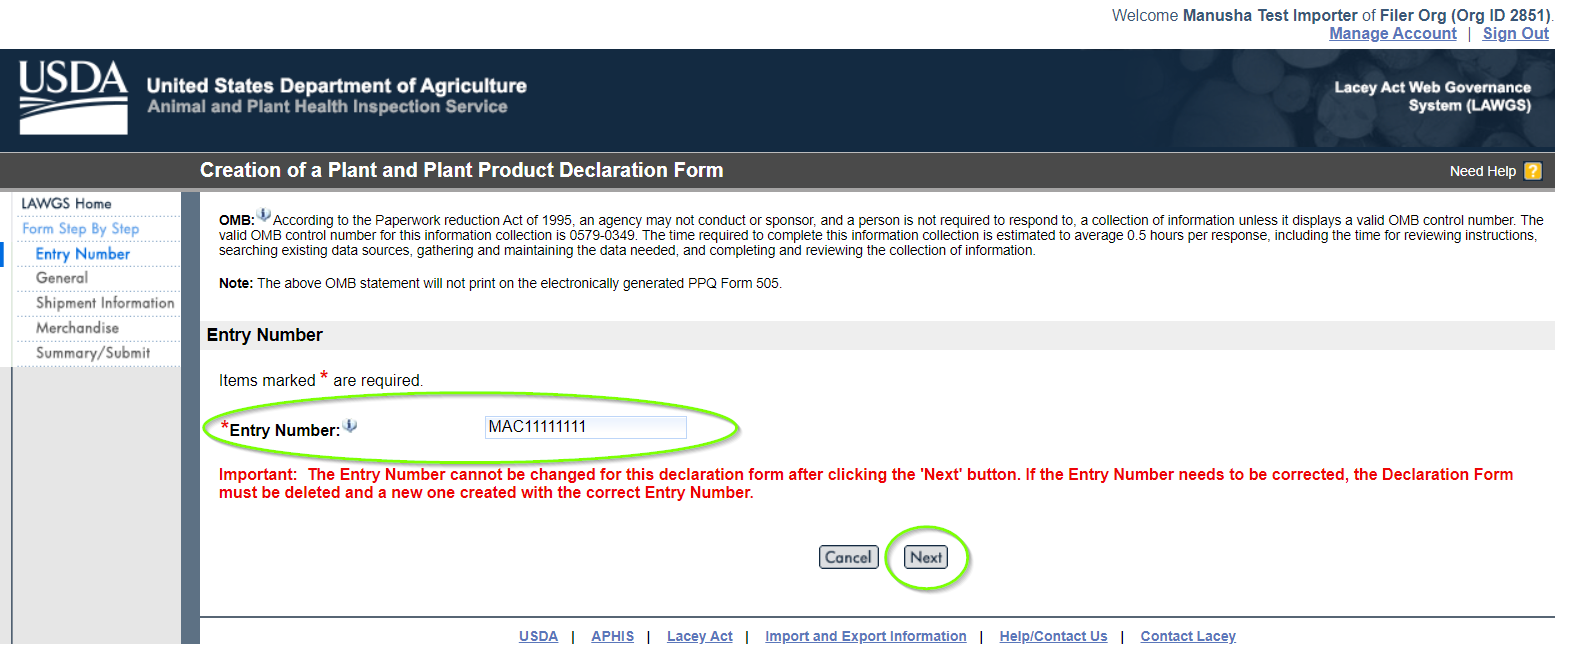
Step 7: Enter the Entry Number (3 Alphanumeric and 8 Numbers) and click next.
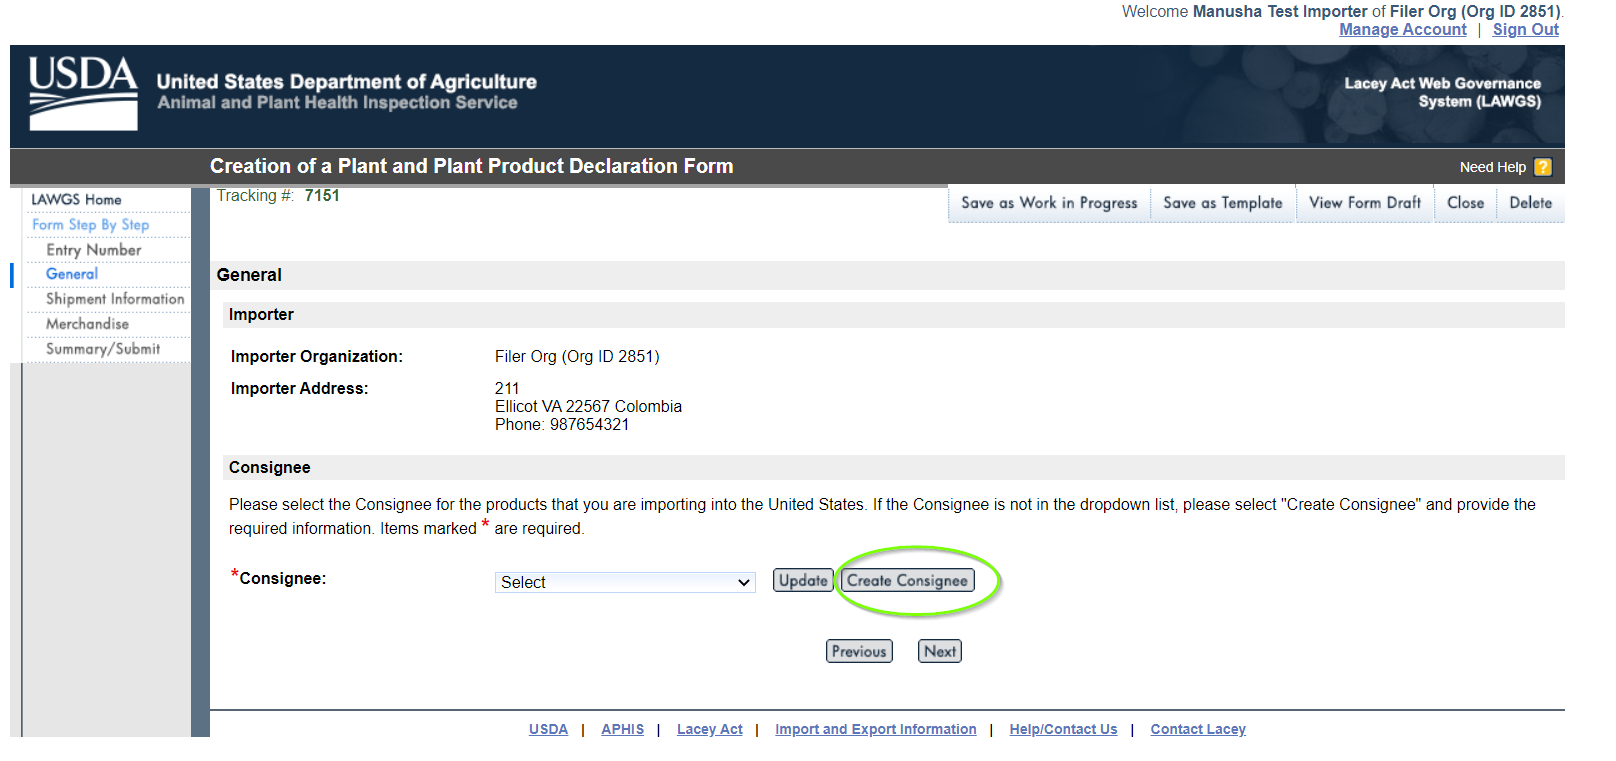
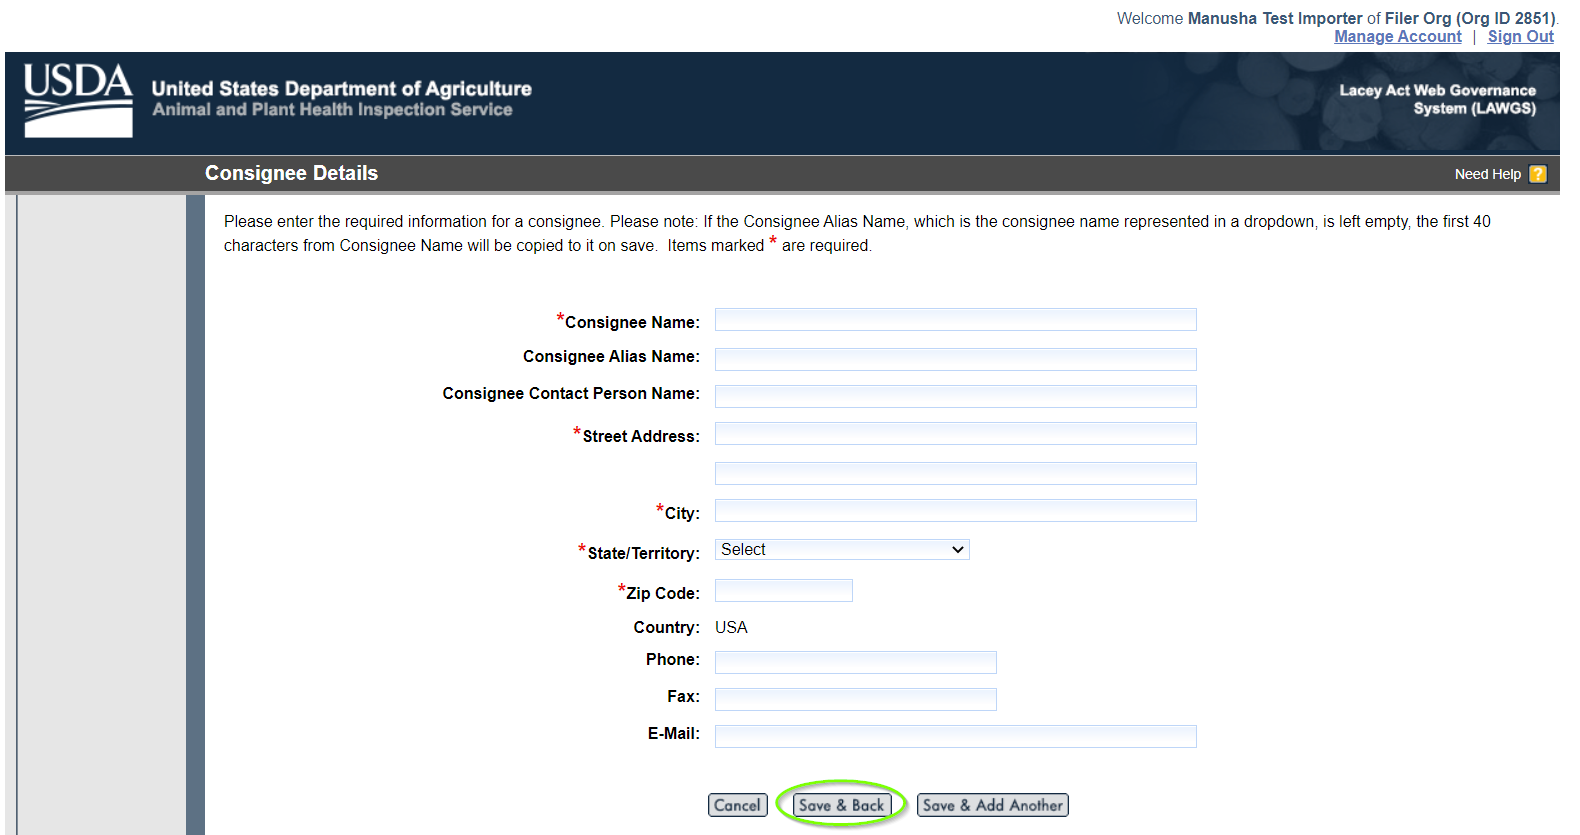
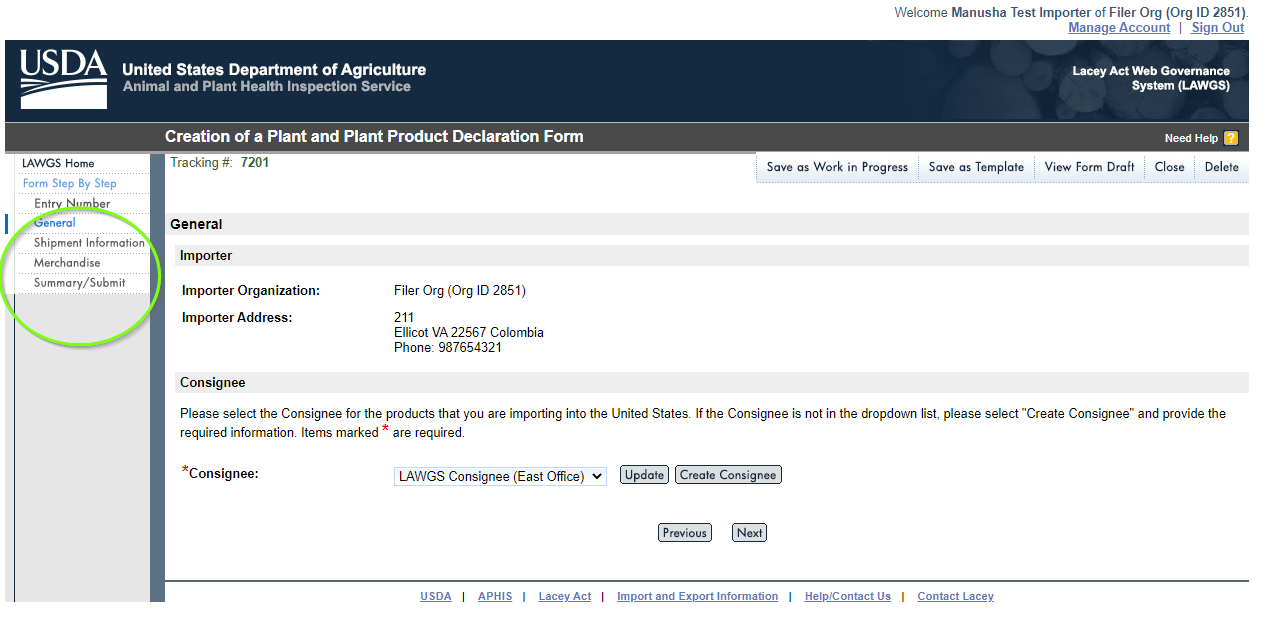
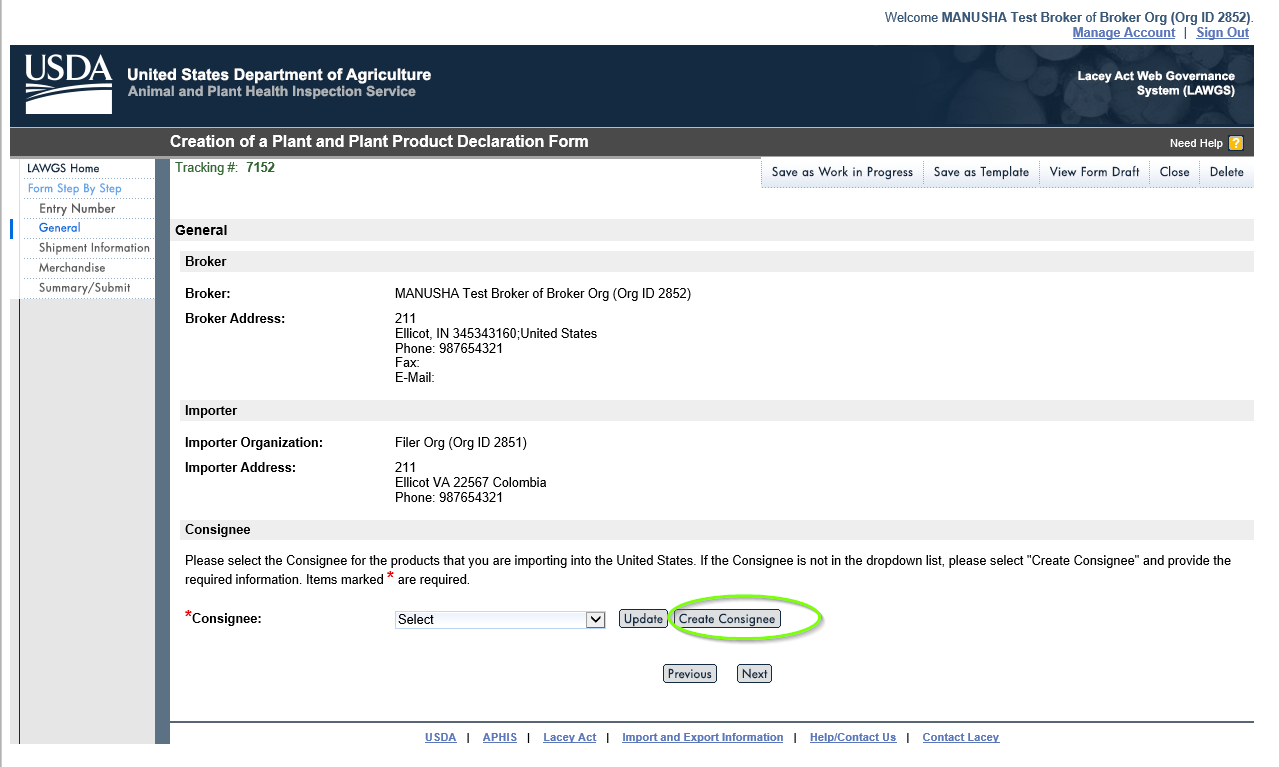
Step 8: Create a Consignee.
Step 9: Fill the Consignee details and click “Save & Back” button.
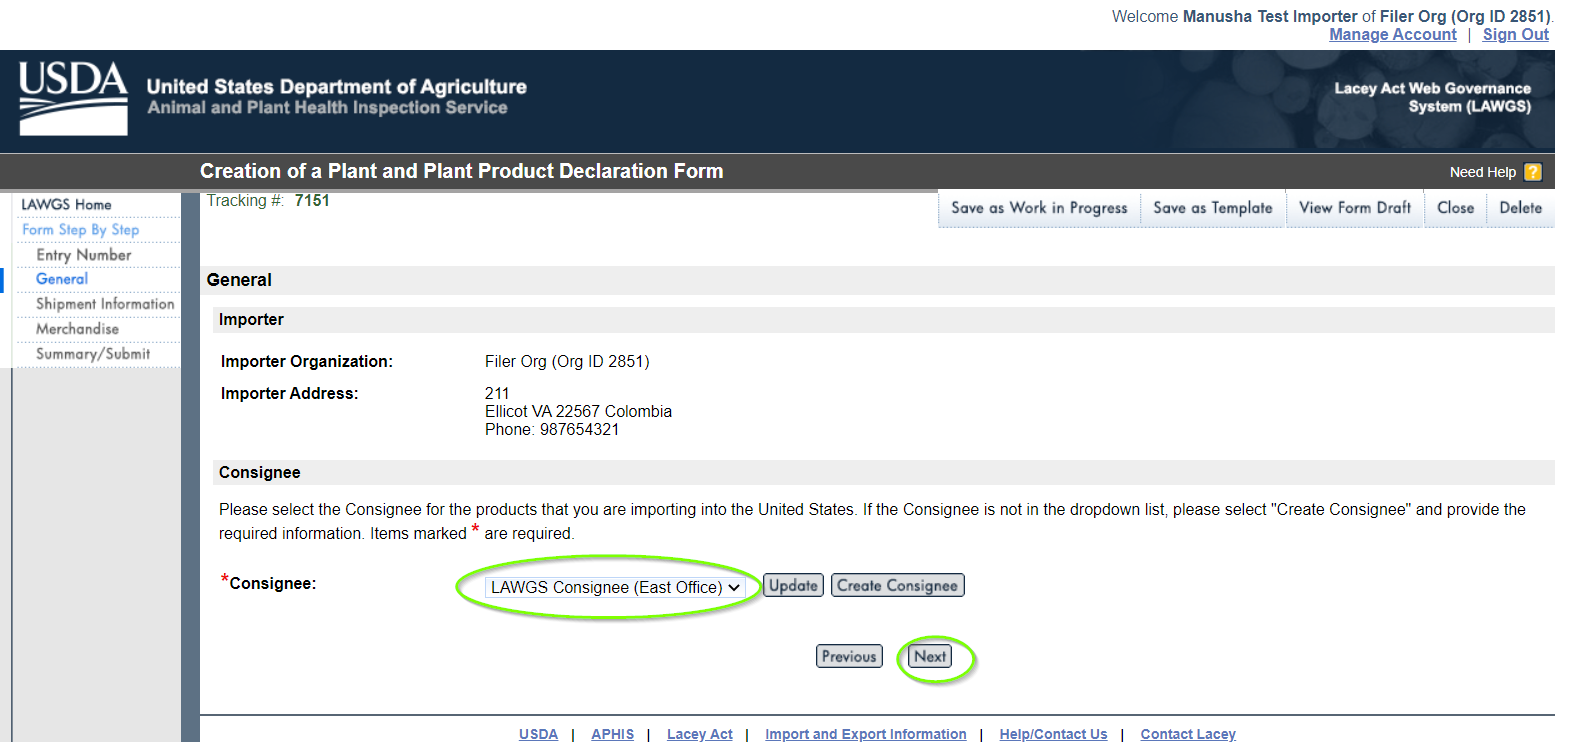
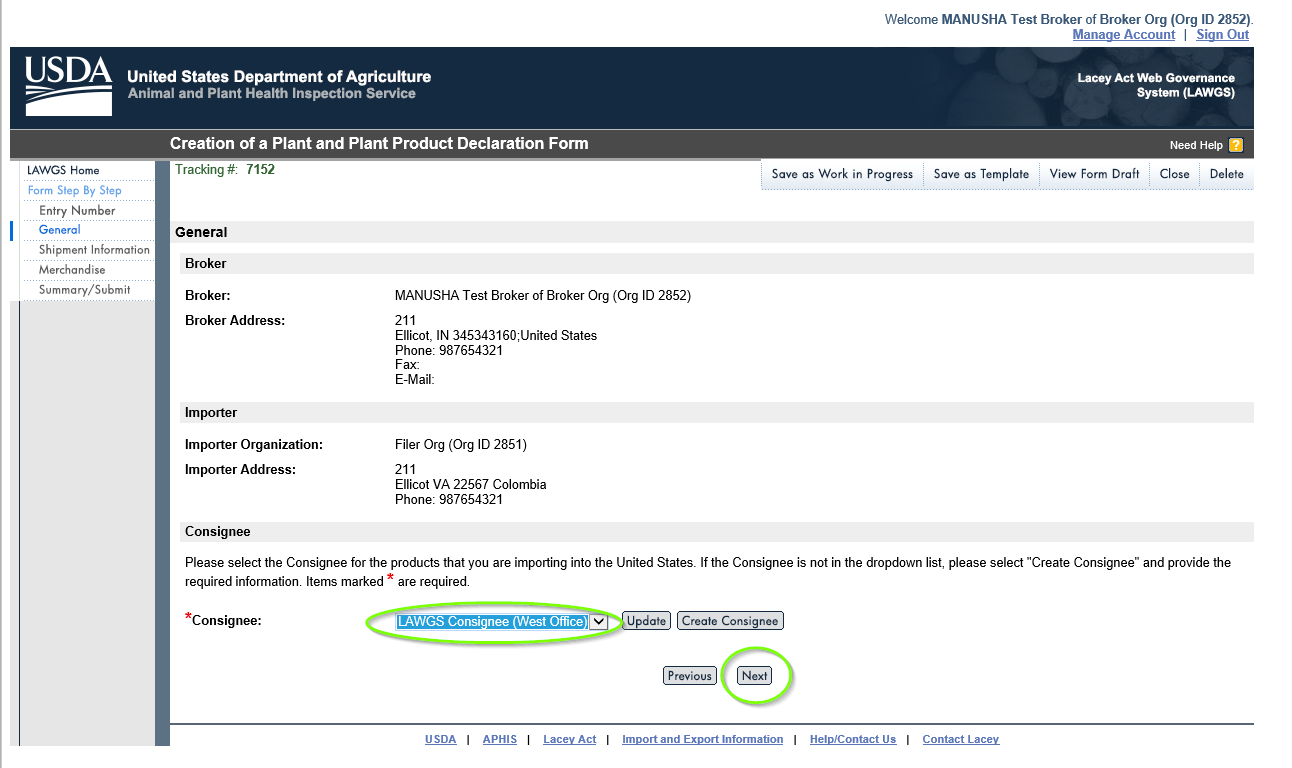
Step 10: You can see the Consignee information in the drop down. Select the Consignee for the products that you are importing into the United States and click “Next”.
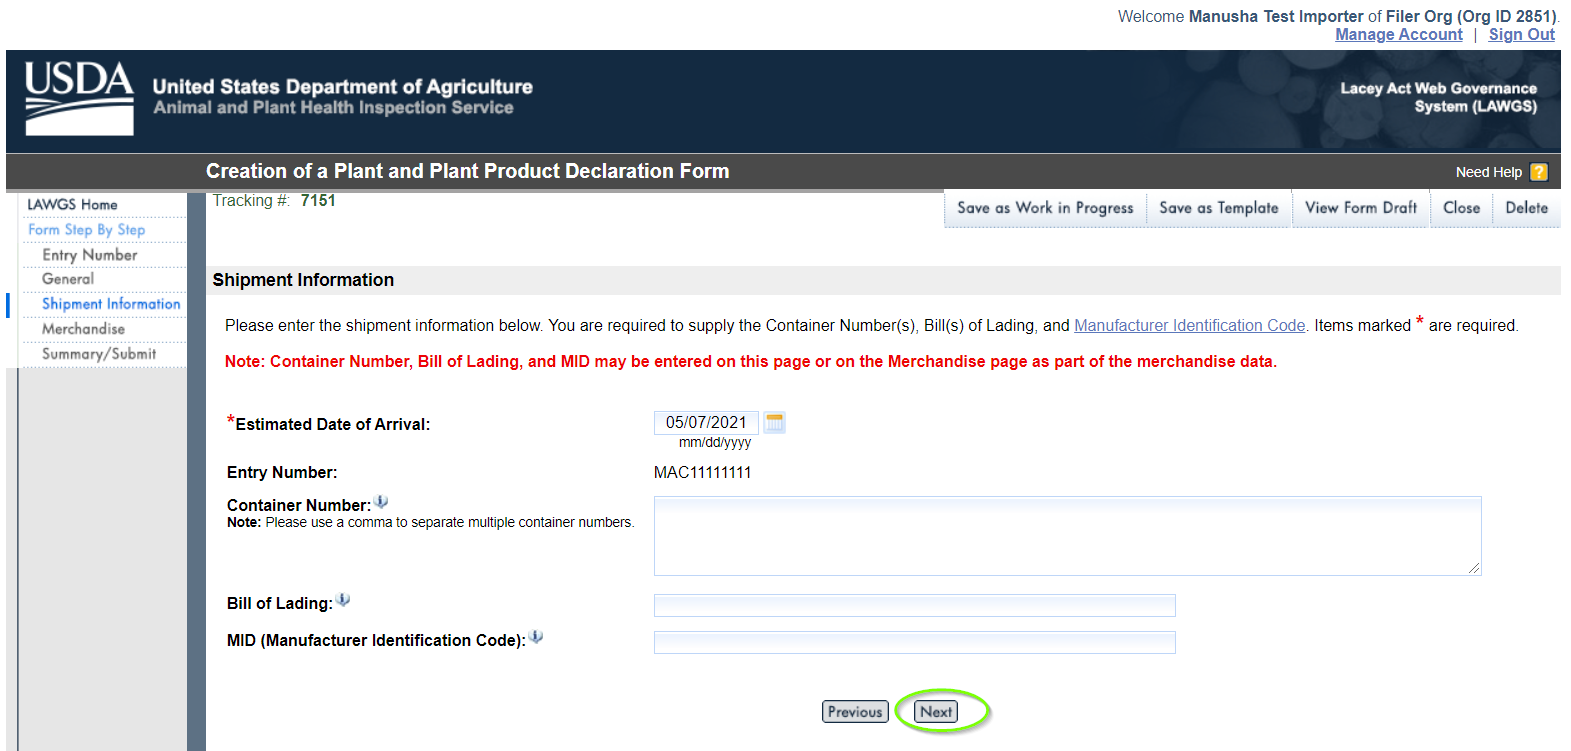
Step 11: Please fill the Shipment information and click “Next”.
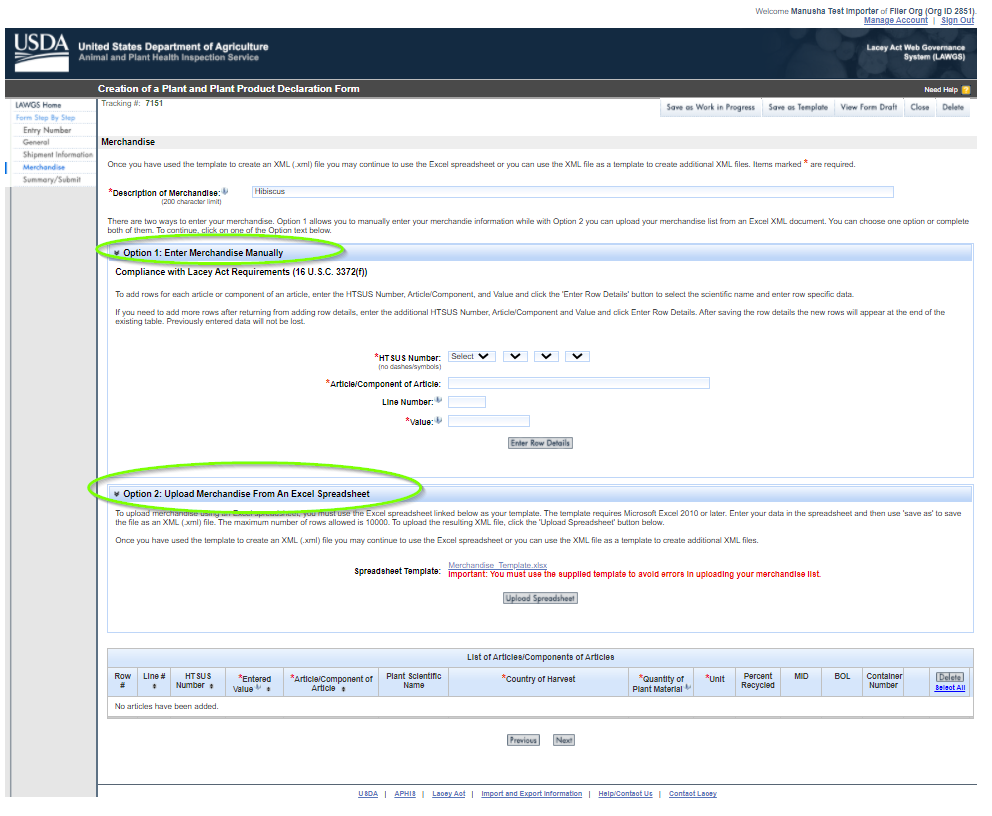
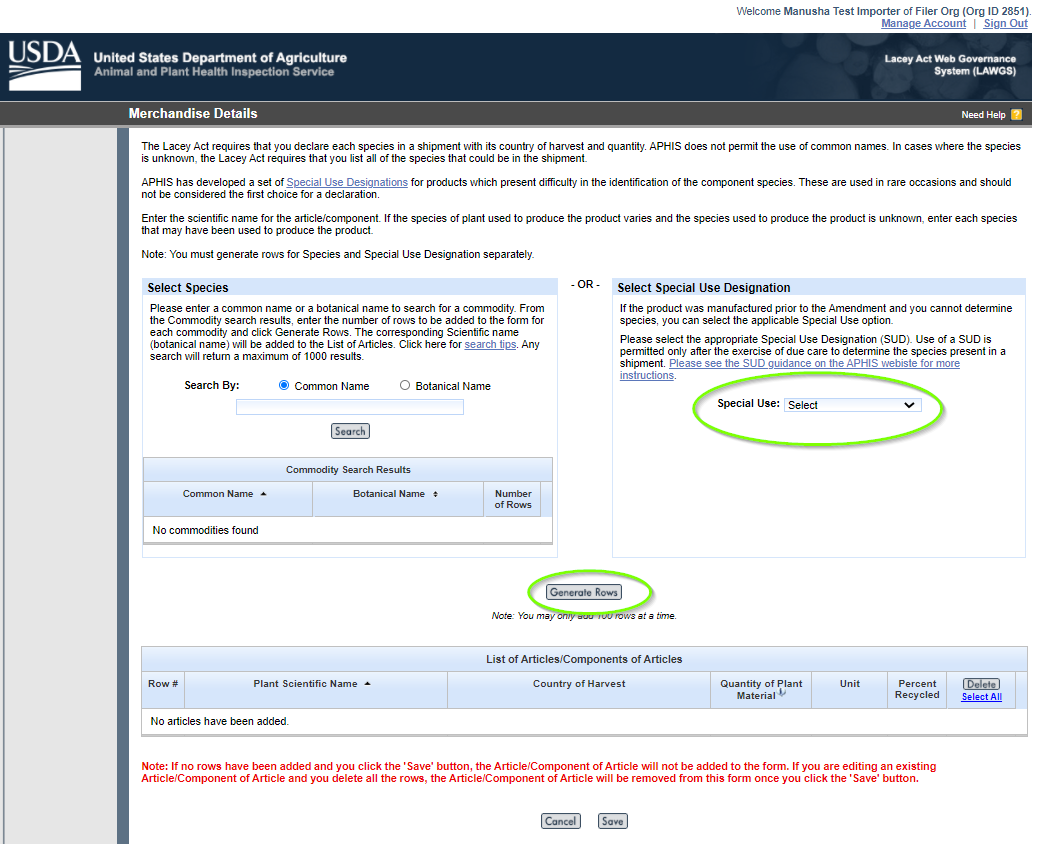
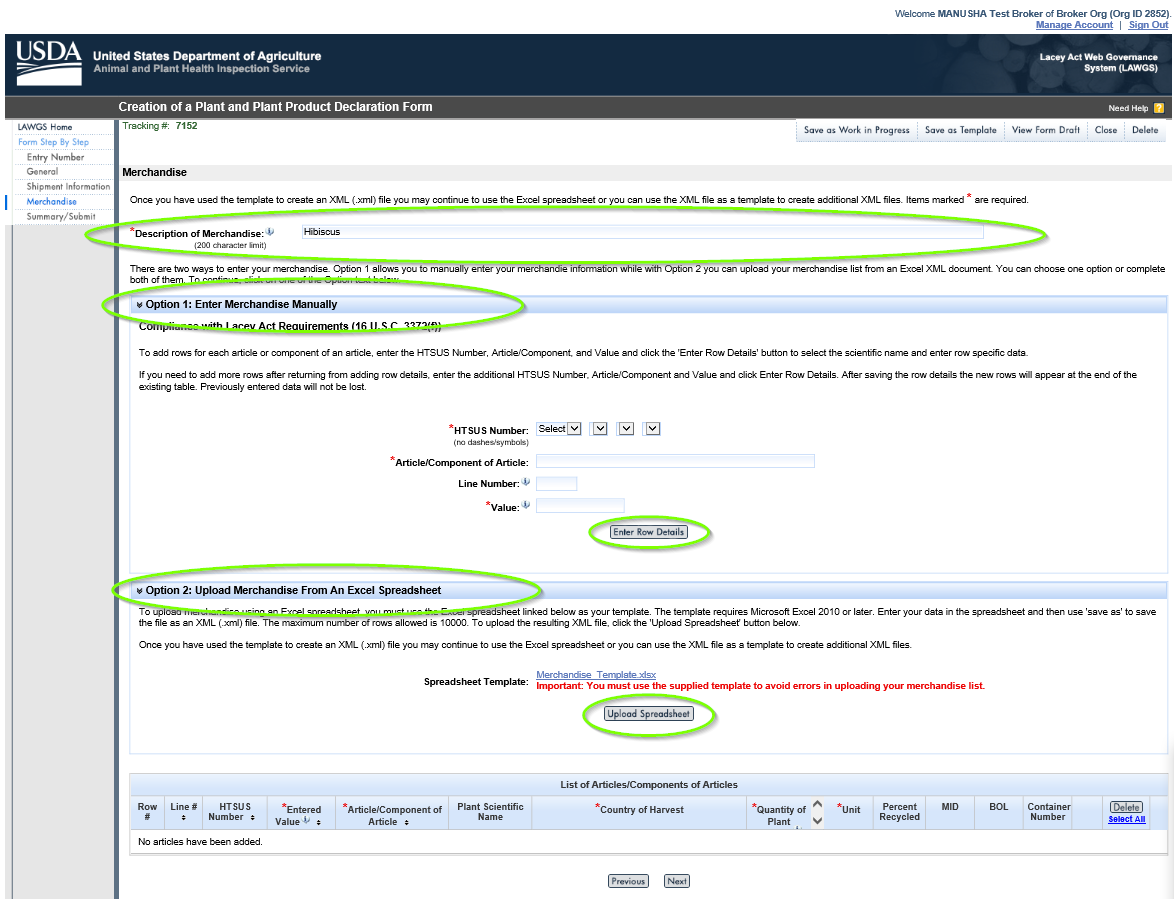
Step 12: Merchandise Information
Please add the “Description of Merchandise” and Choose Option 1 or Option 2 to provide Merchandise information.
Click Option 1: Enter Merchandise Manually, fill the fields and click “Enter Row Details”.
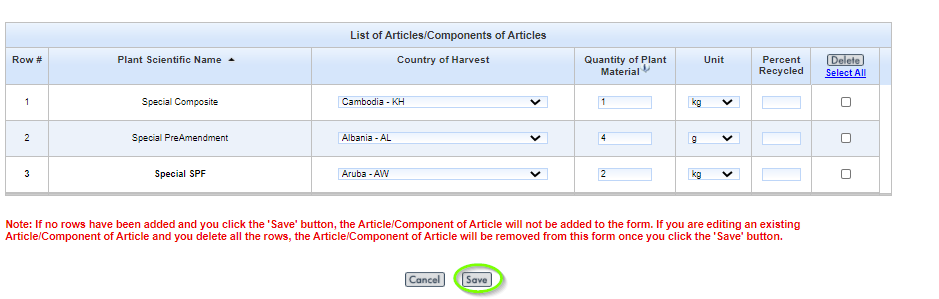
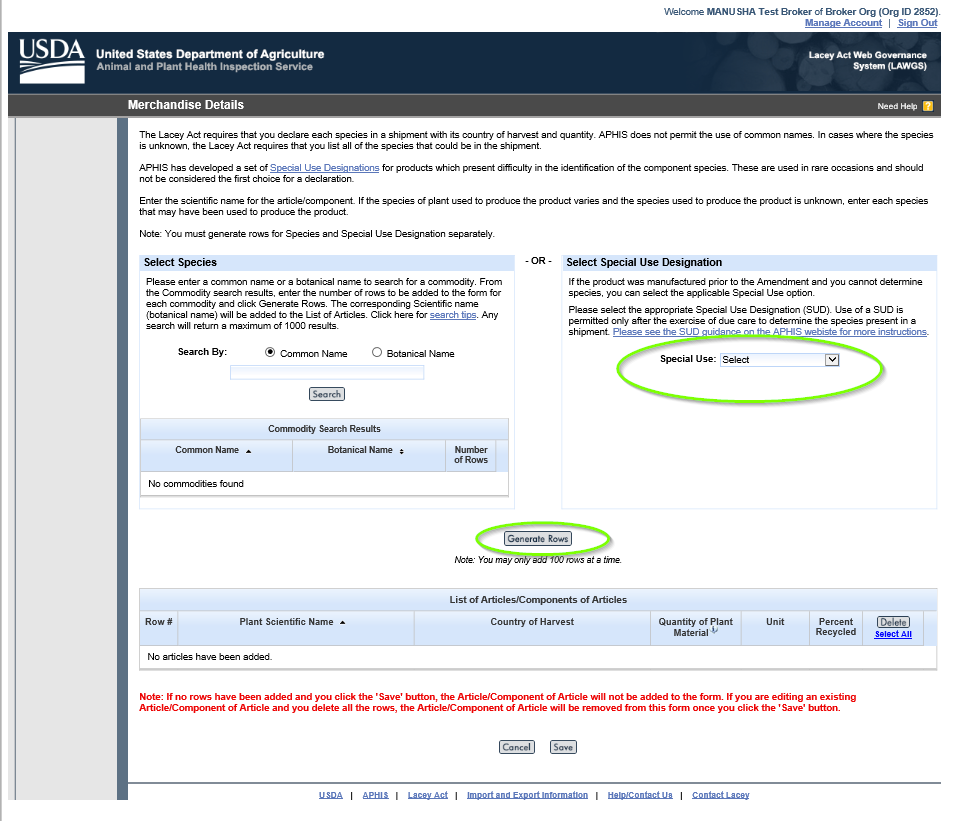
Step 13: Select Special Use Designation and click “Generate rows”.
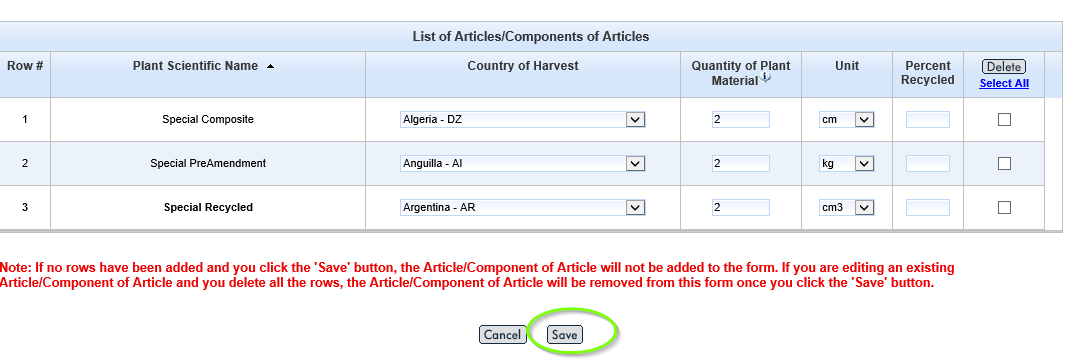
Step 14: Click “Save”
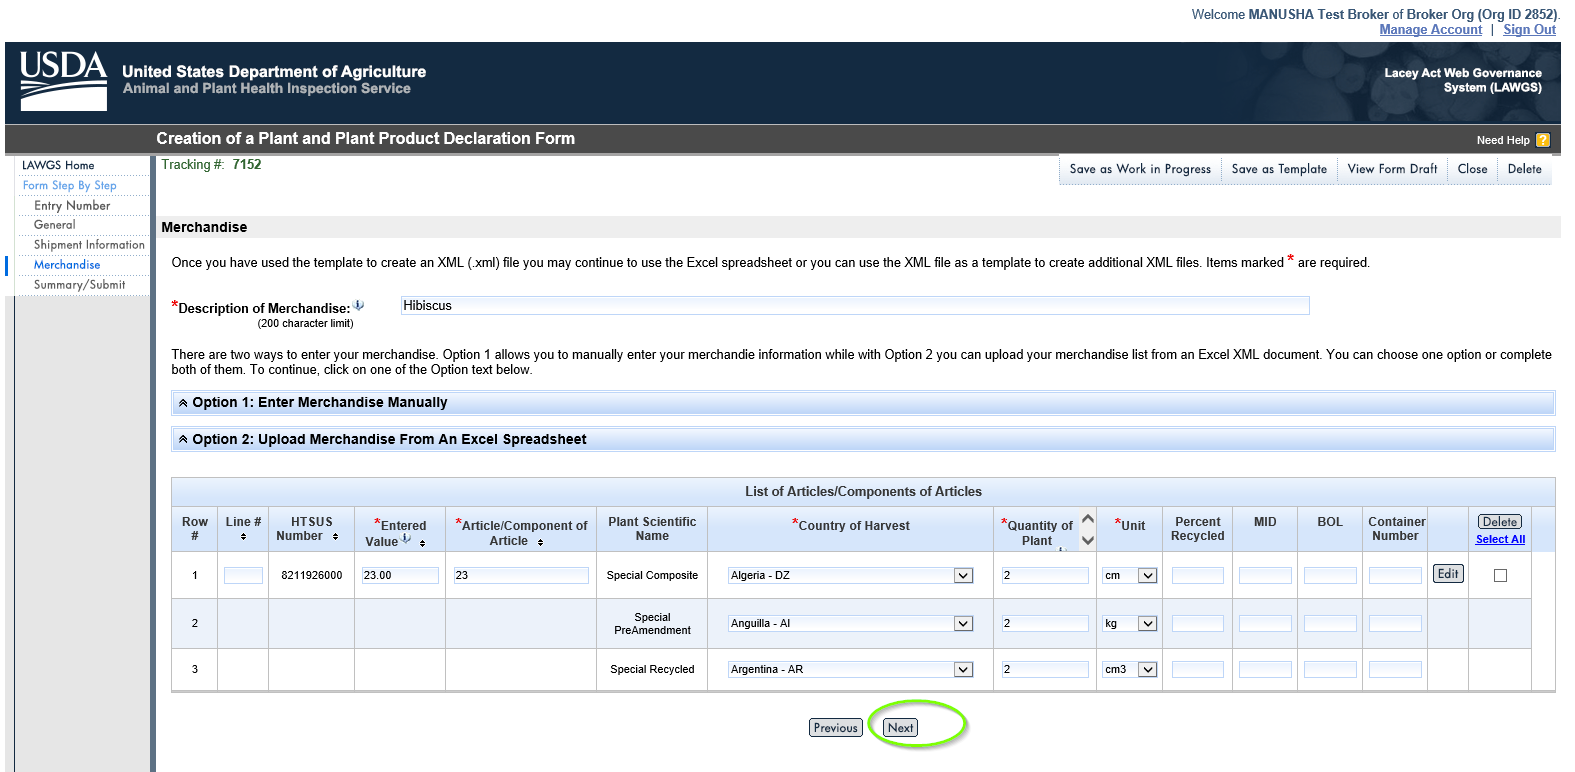
Step 15: Click “Next”
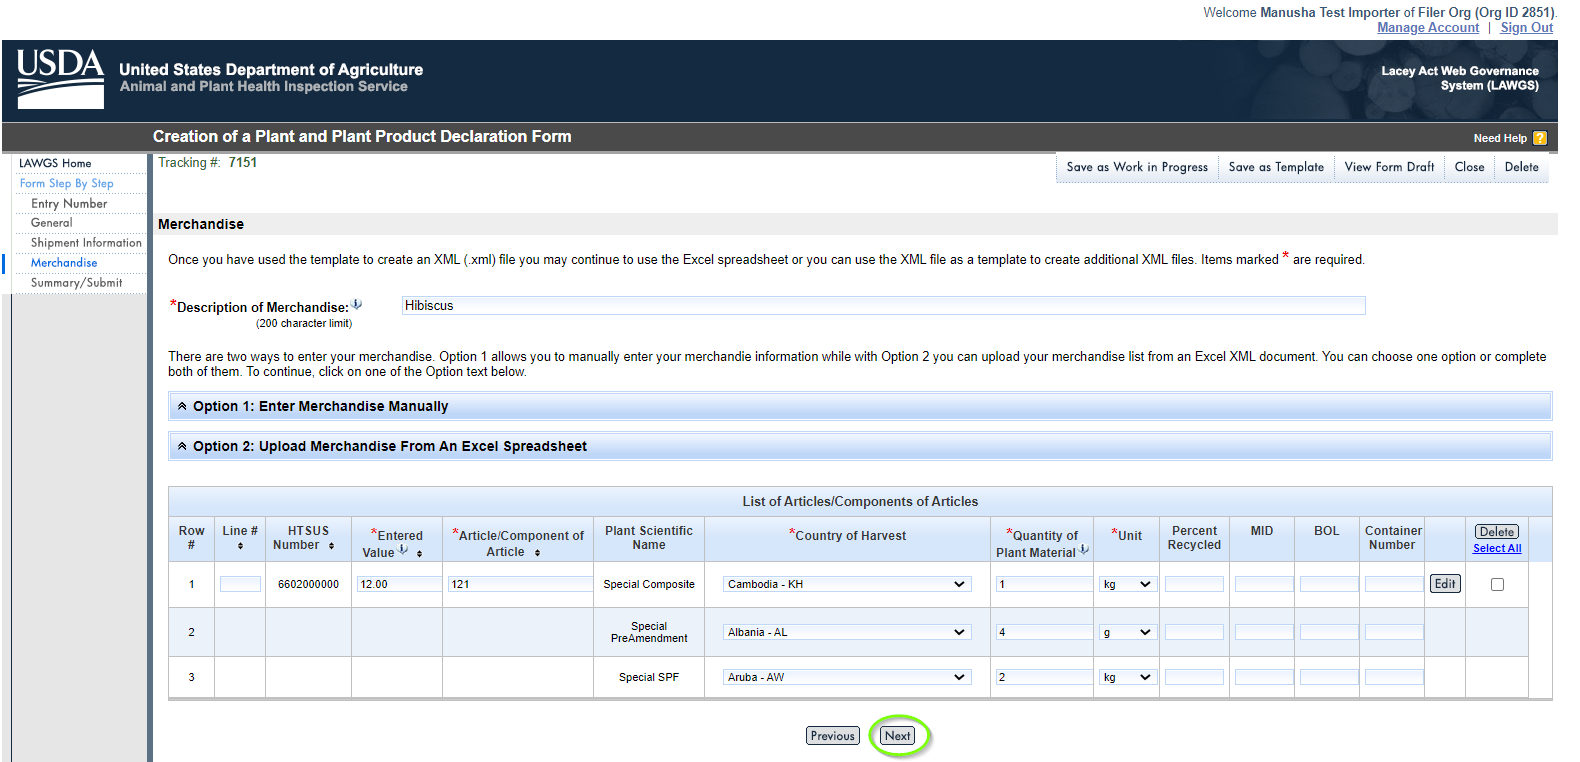
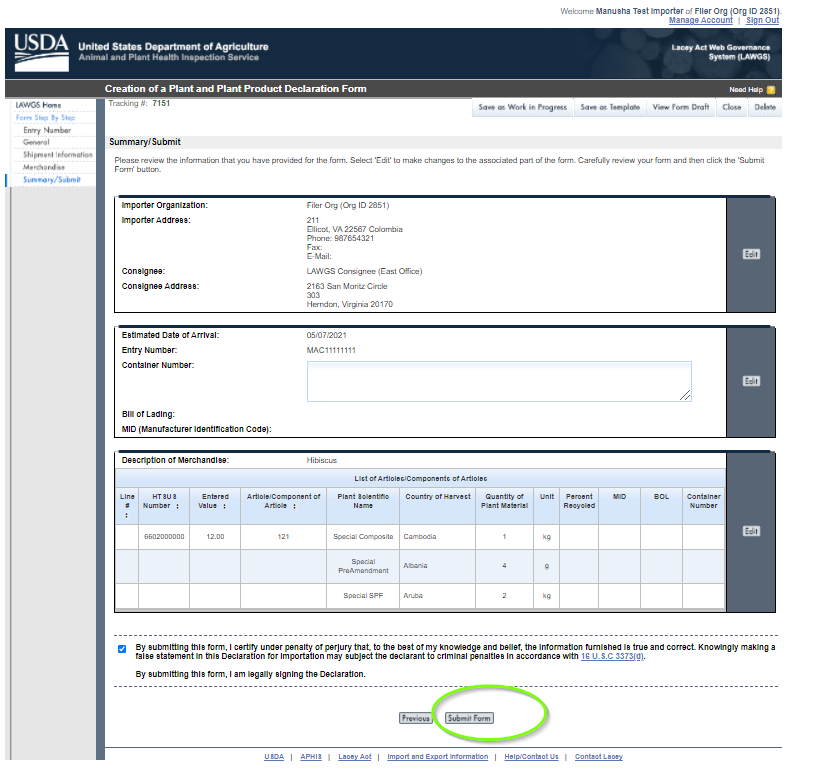
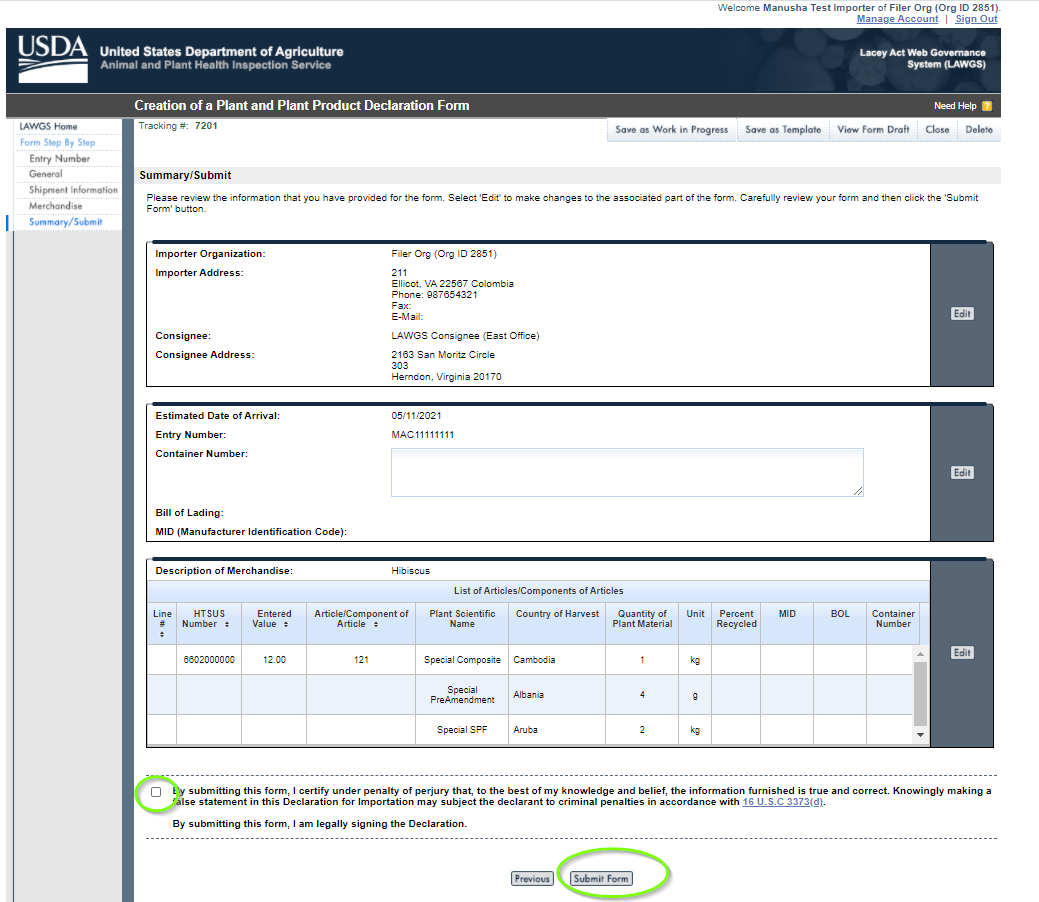
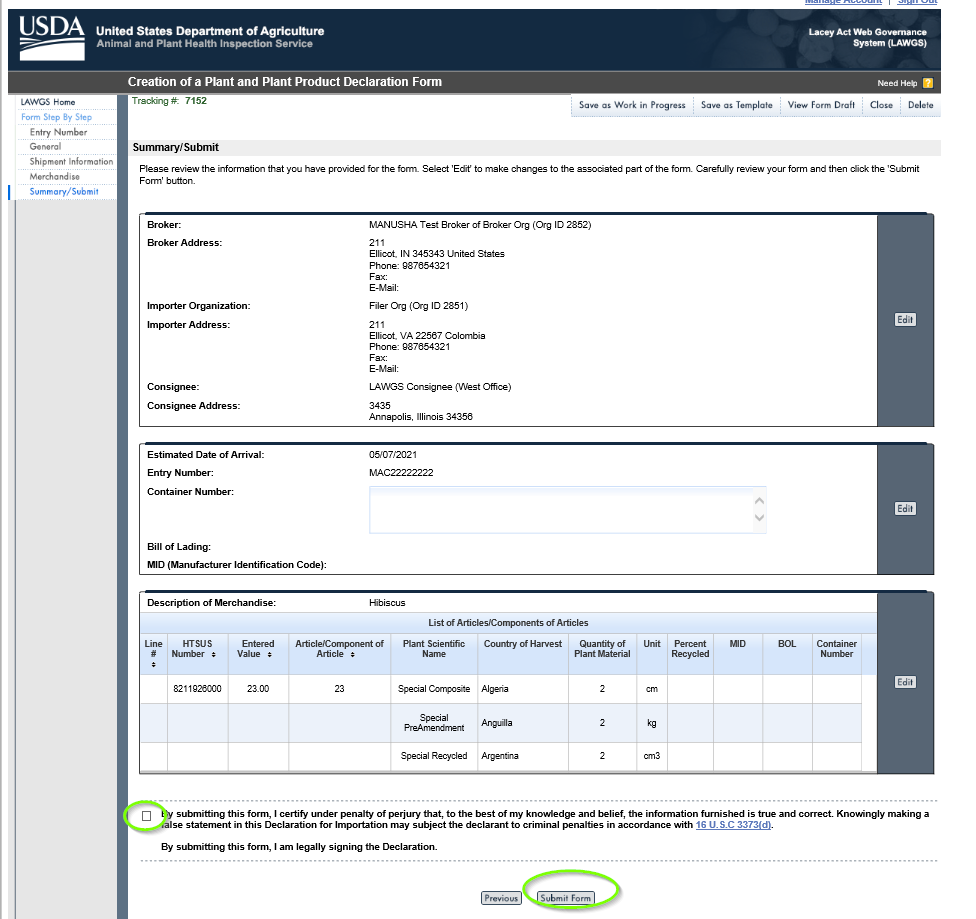
Step 16: Summary/Submit window
Please review the information that you have provided for the form. Select “Edit” to make changes to the associated part of the form. Carefully review and click “Submit Form” button.
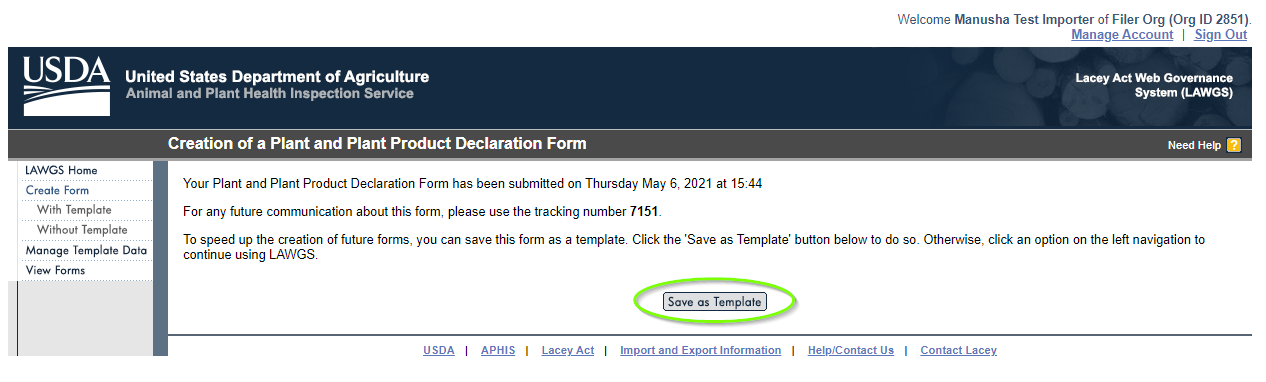
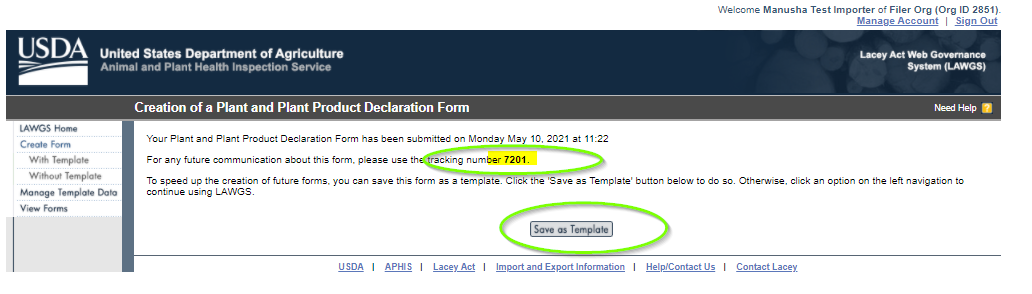
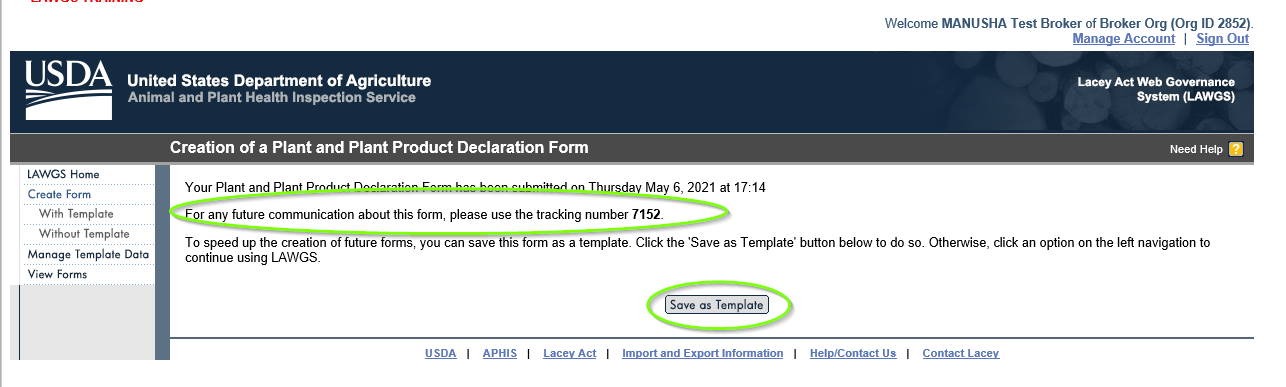
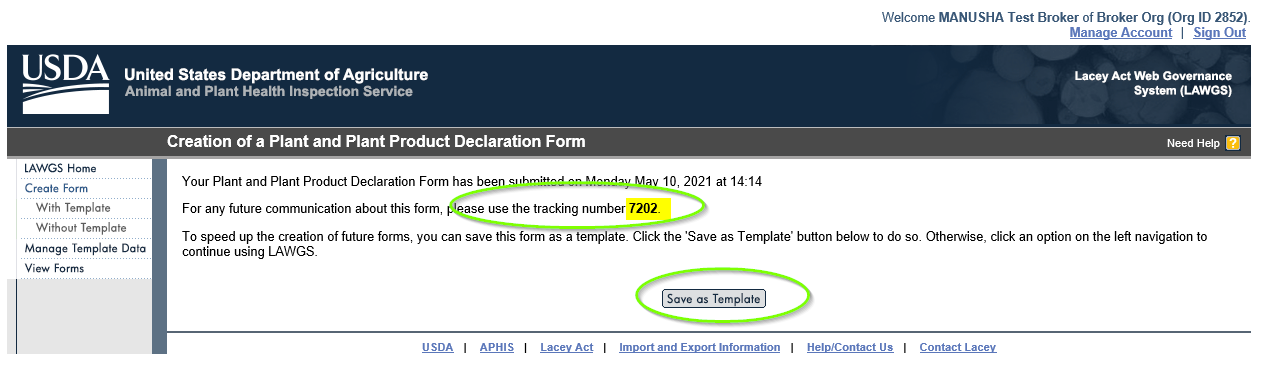
Step 17: Your Plant and Plant Production Declaration From has been submitted and please save the tracking number for future reference. To speed up the creation of future forms, click “Save as Template” button to do so.
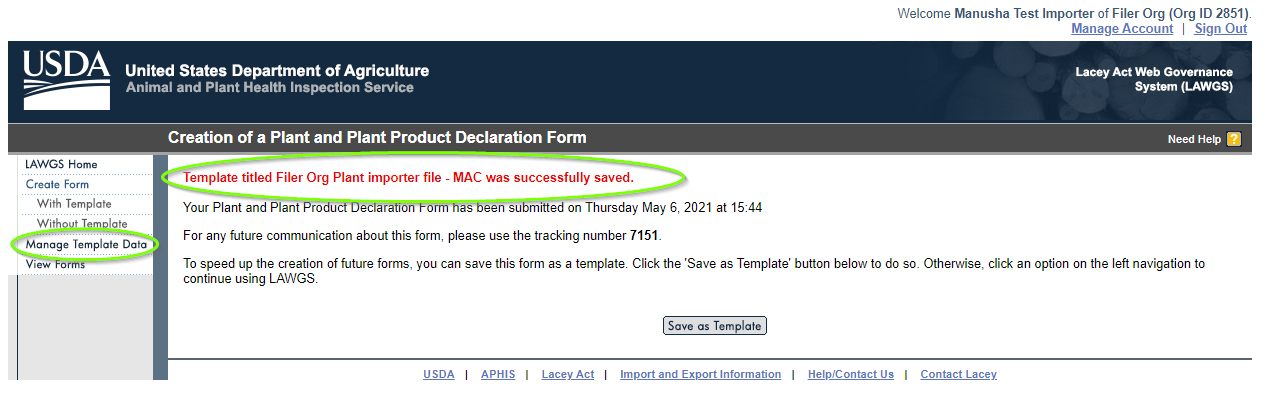
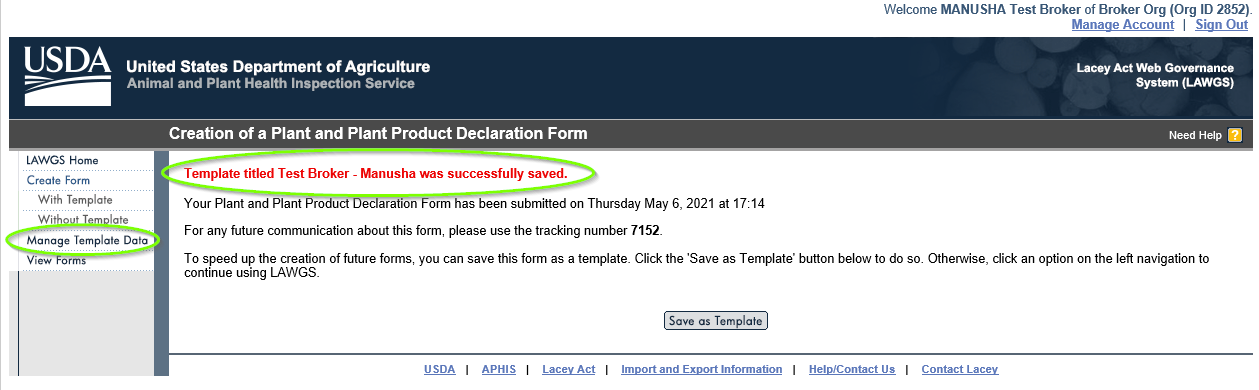
Step 18: Click “Manage Template Data” from the left navigation menu. There is a message displayed in red colour “Template tiled “your file name” was successfully saved.”
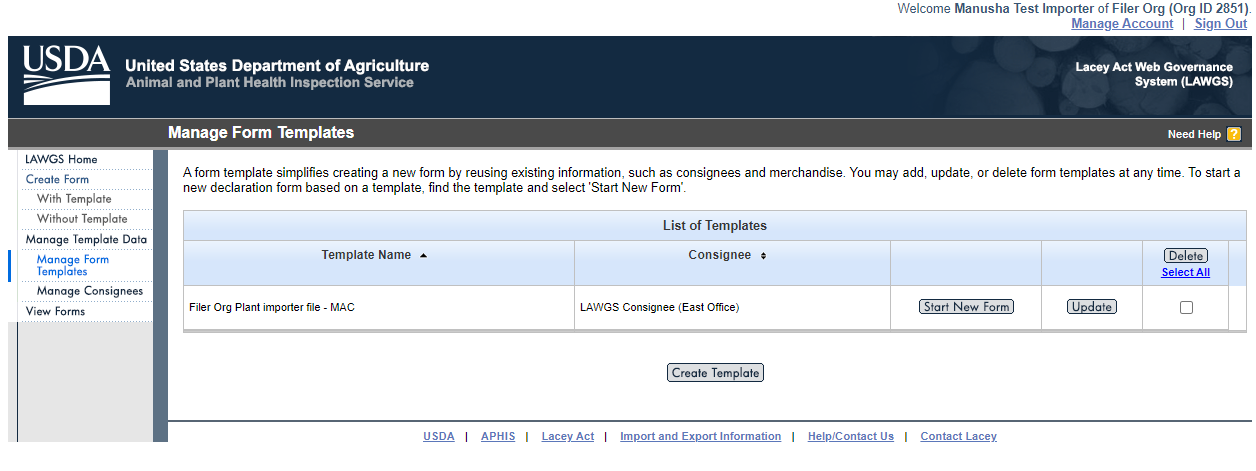
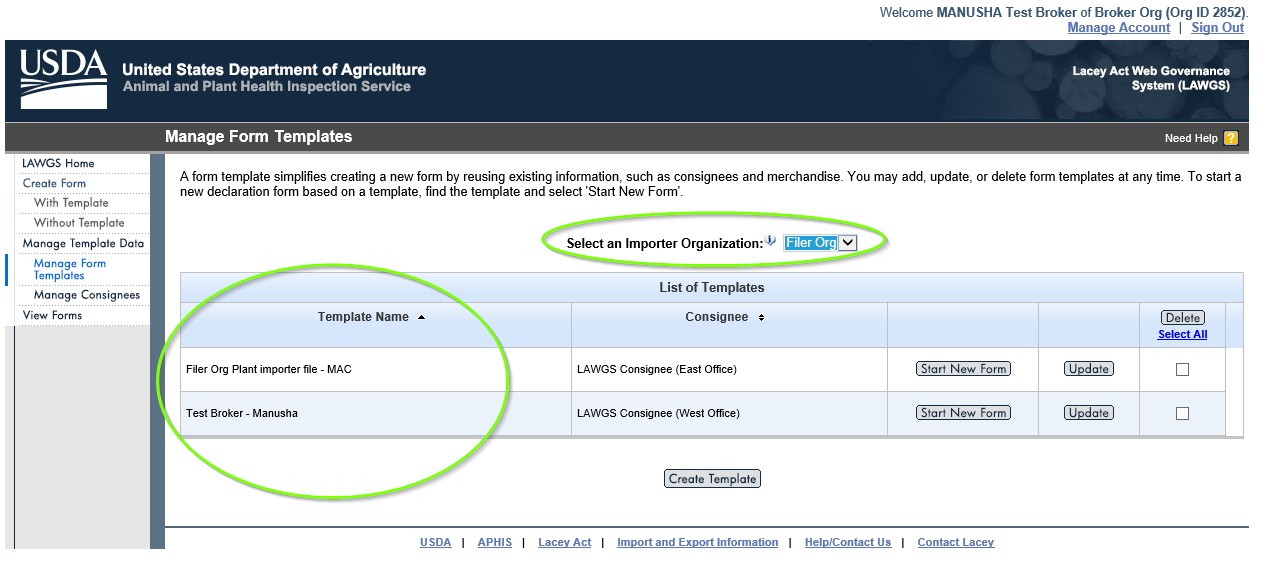
Step 19: Manage Form Templates
You can see your template that you have saved under “List of Templates”.
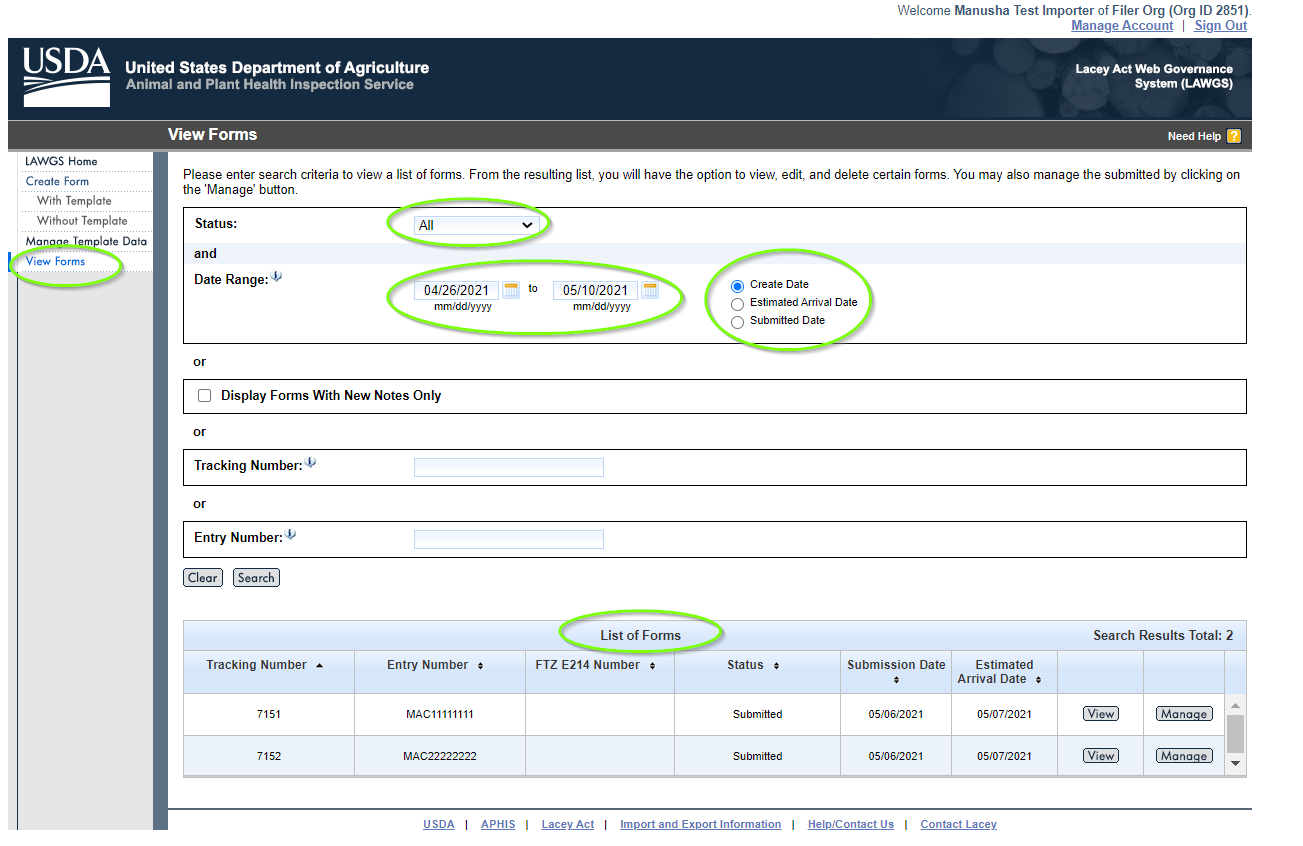
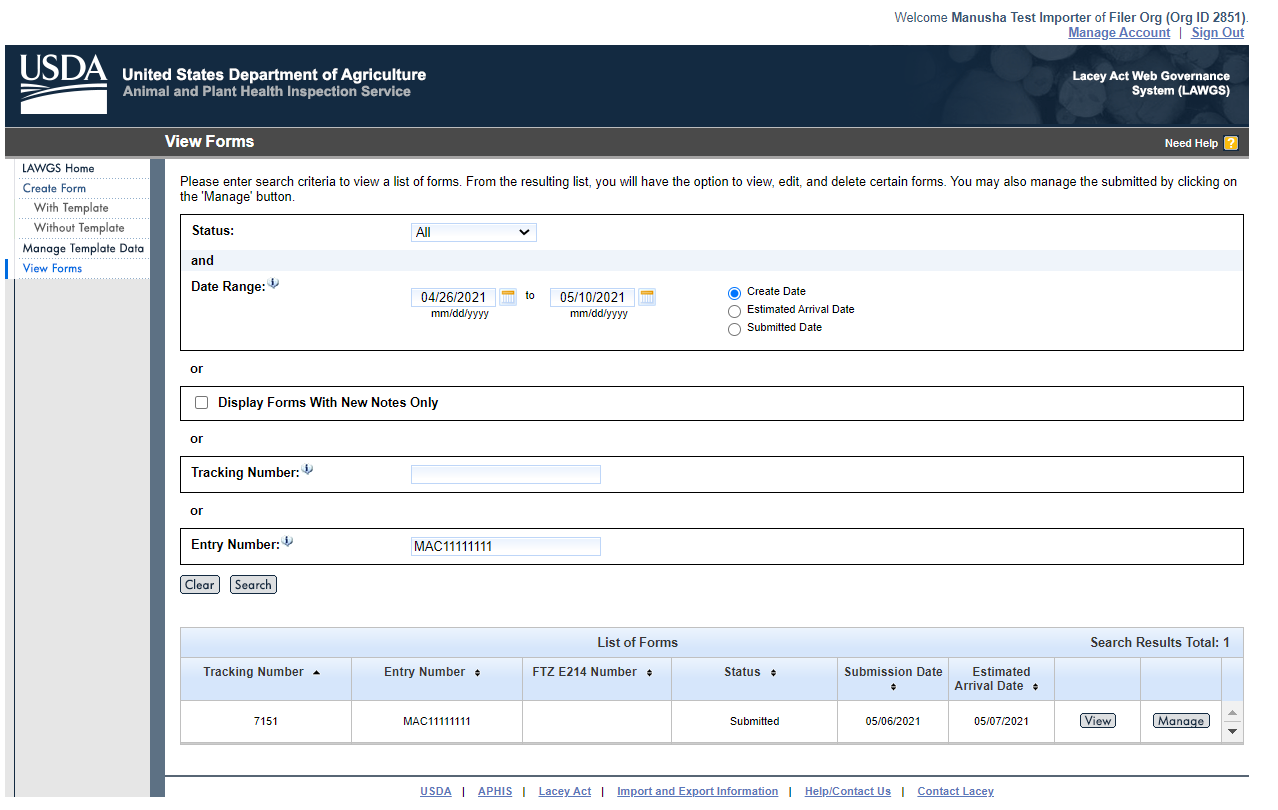
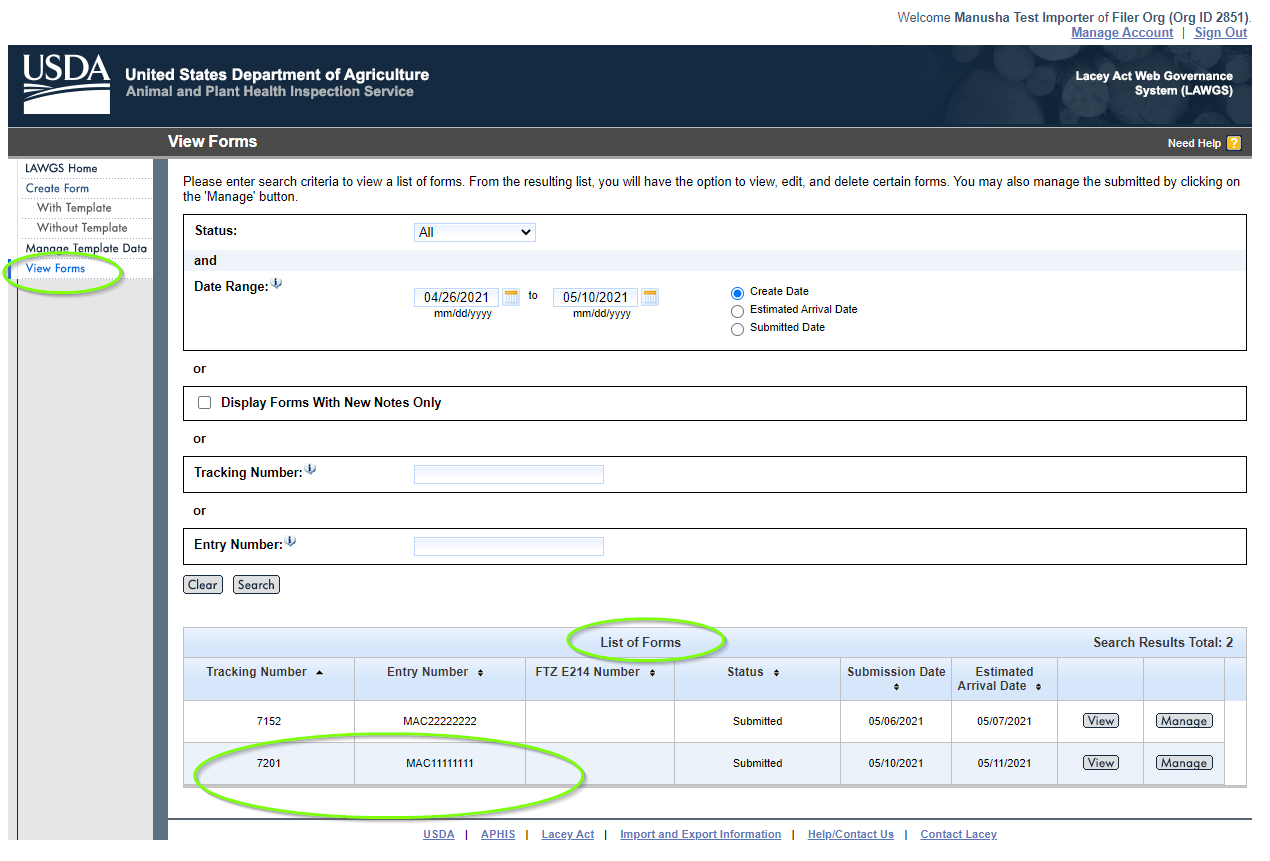
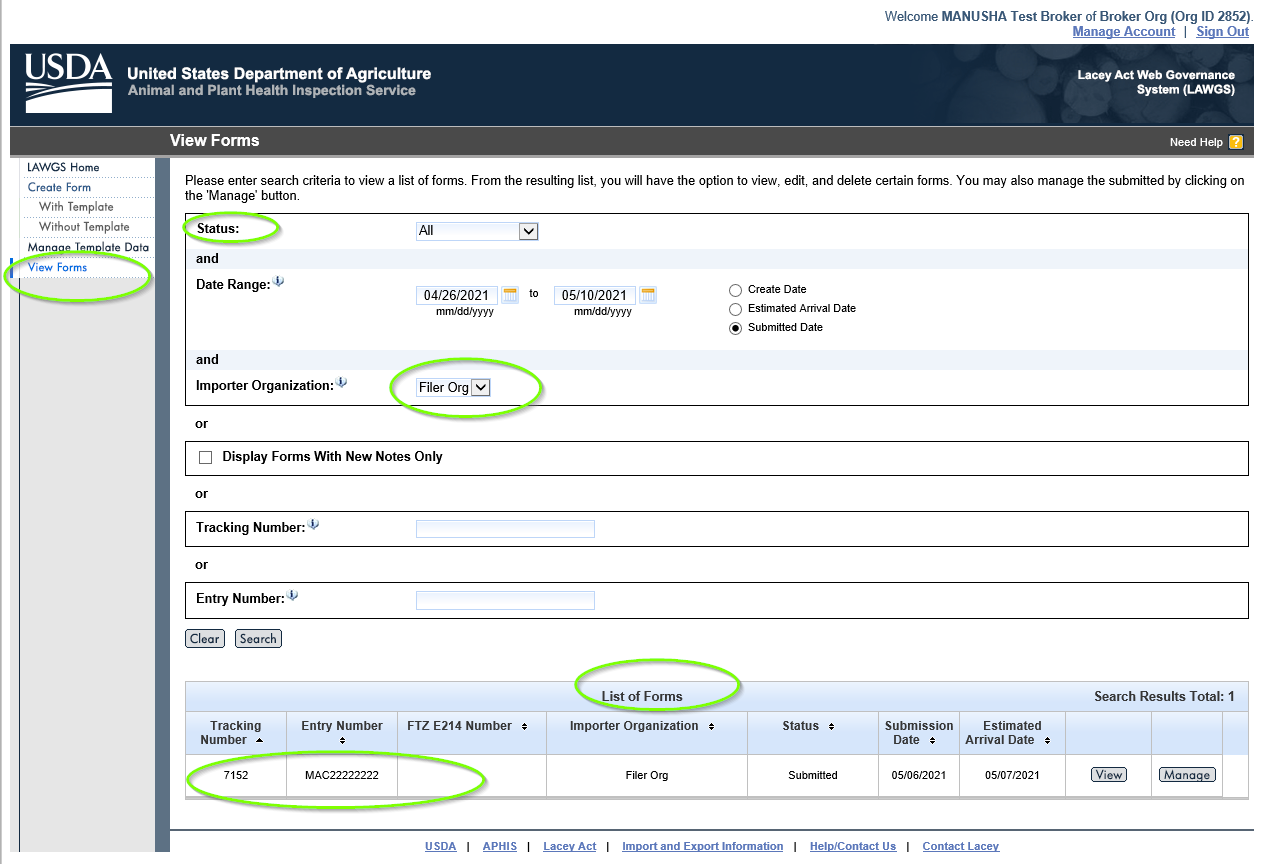
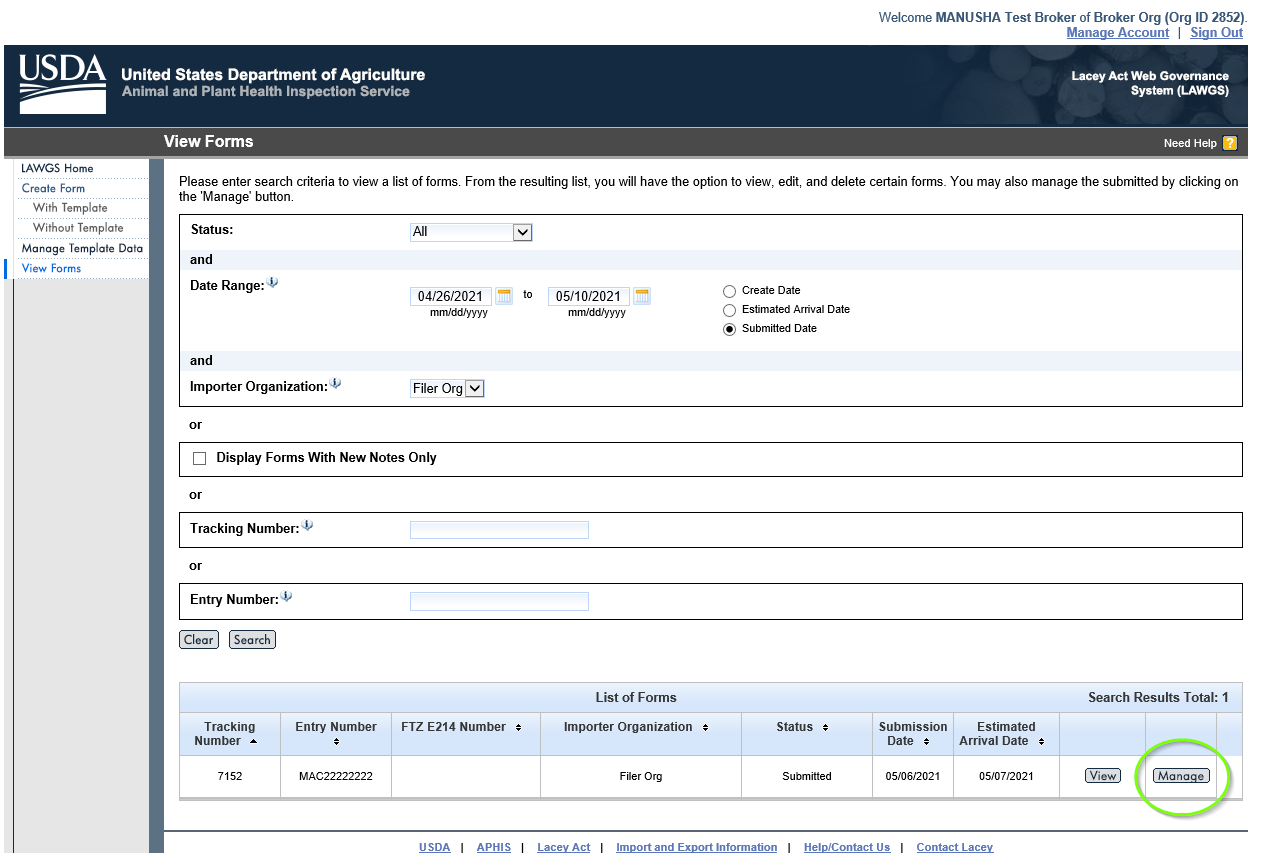
Step 20: View Forms
There are multiple options to view forms.
View Form with “Status”
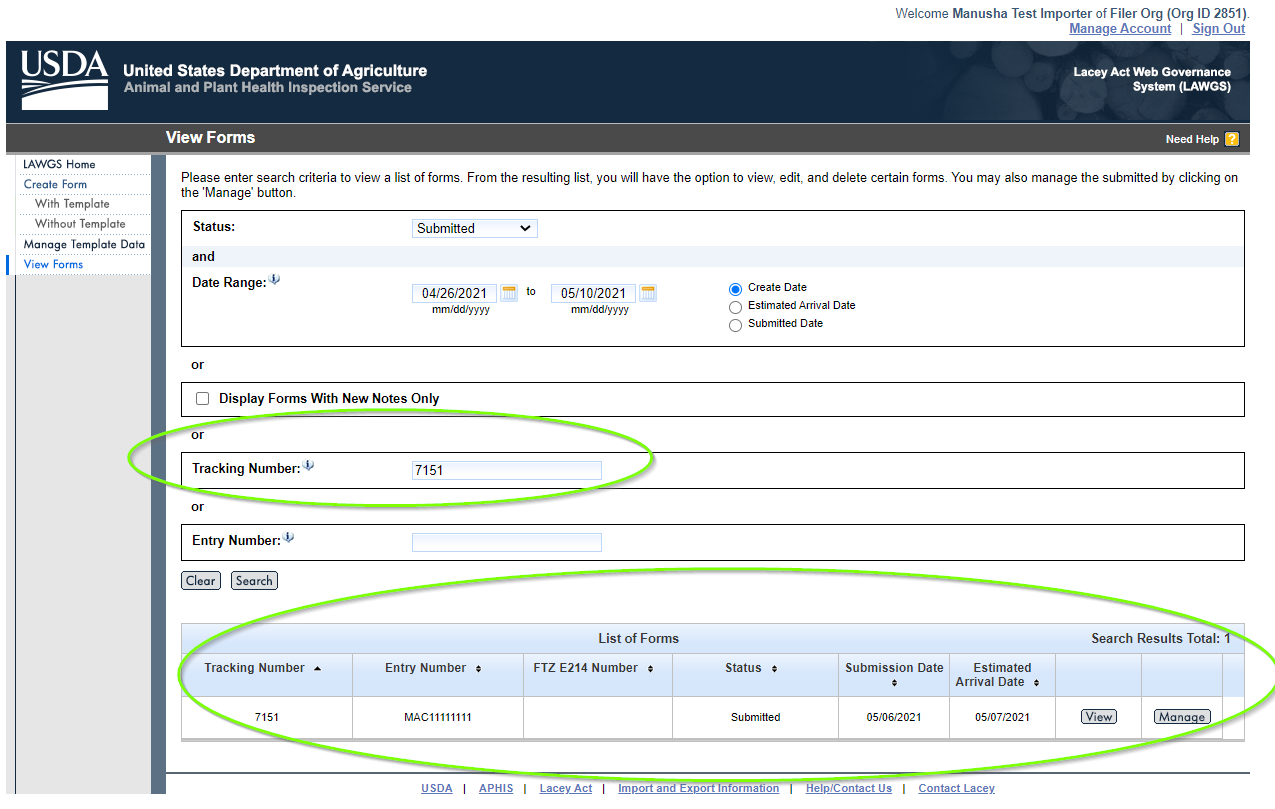
Step 21: View forms with “Tracking Number”.
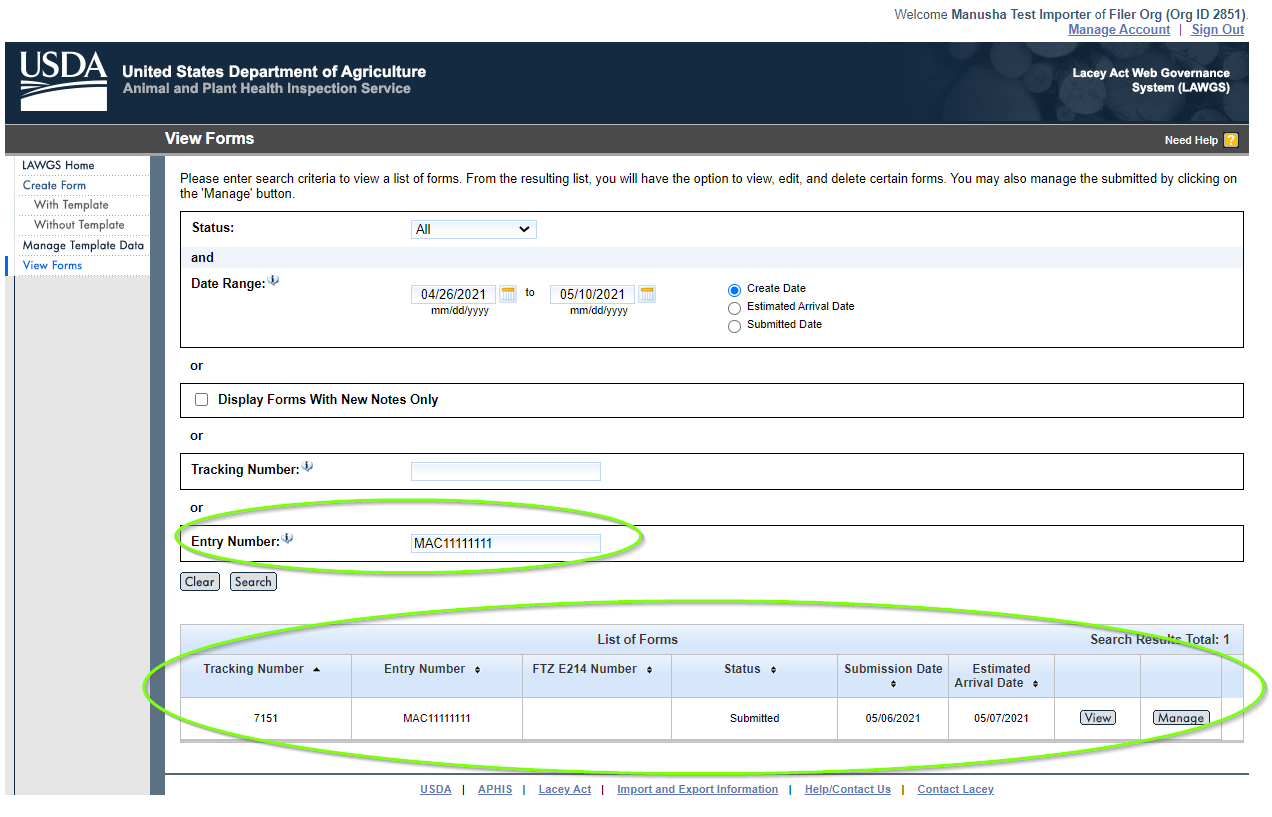
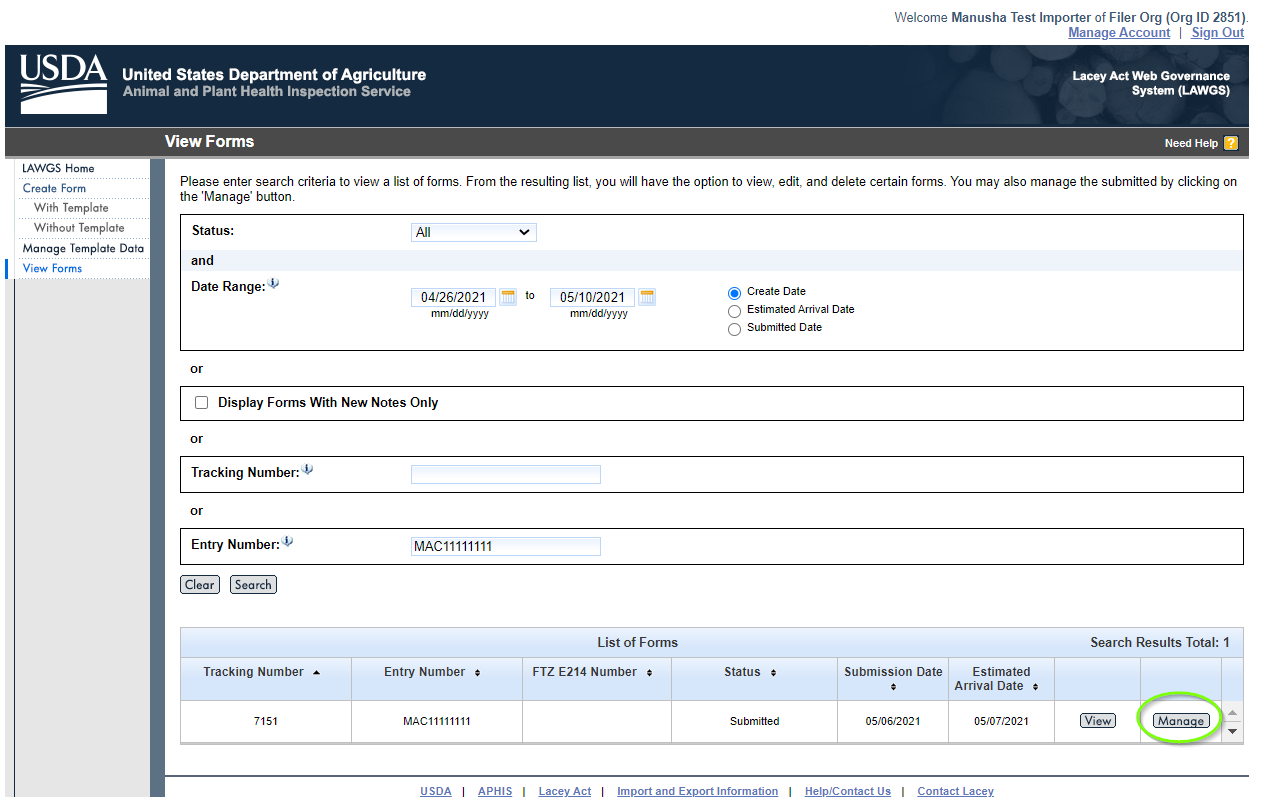
Step 22: View Forms with “Entry Number”
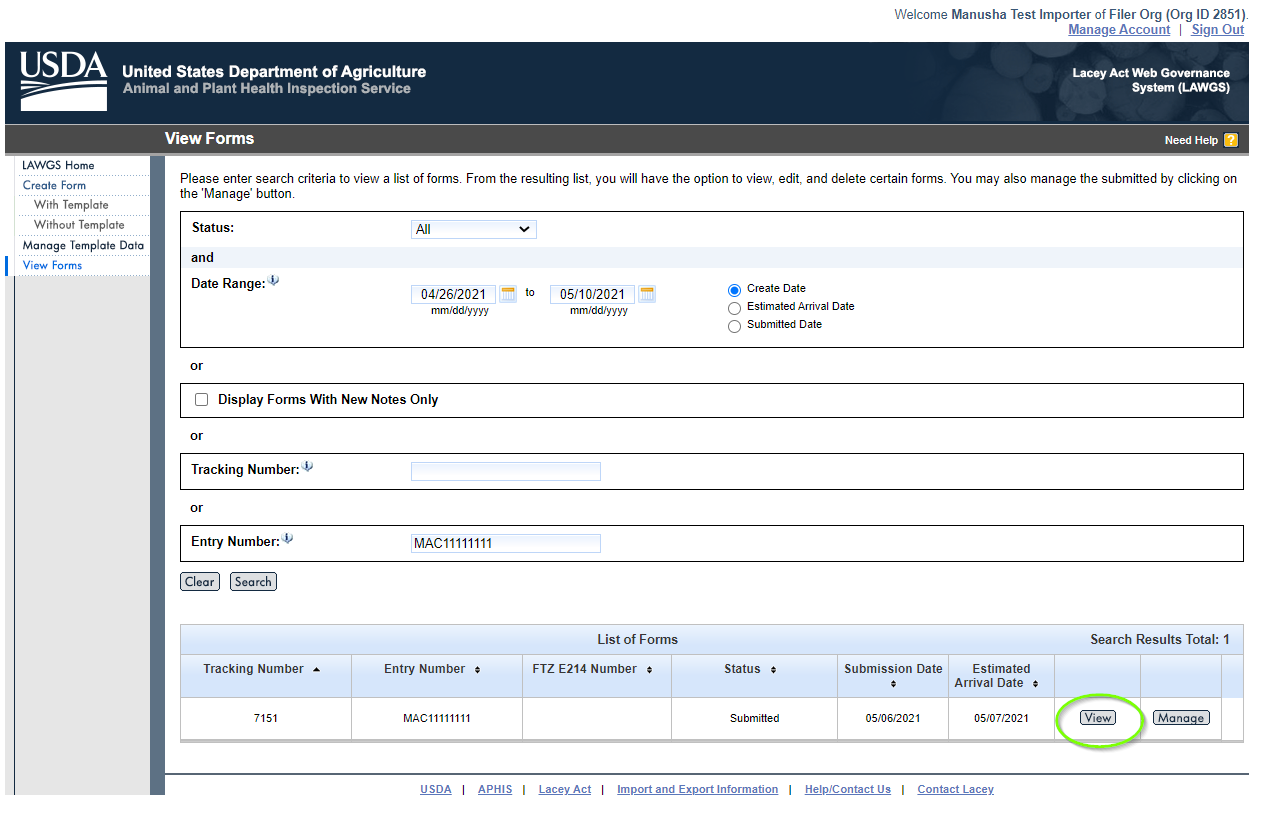
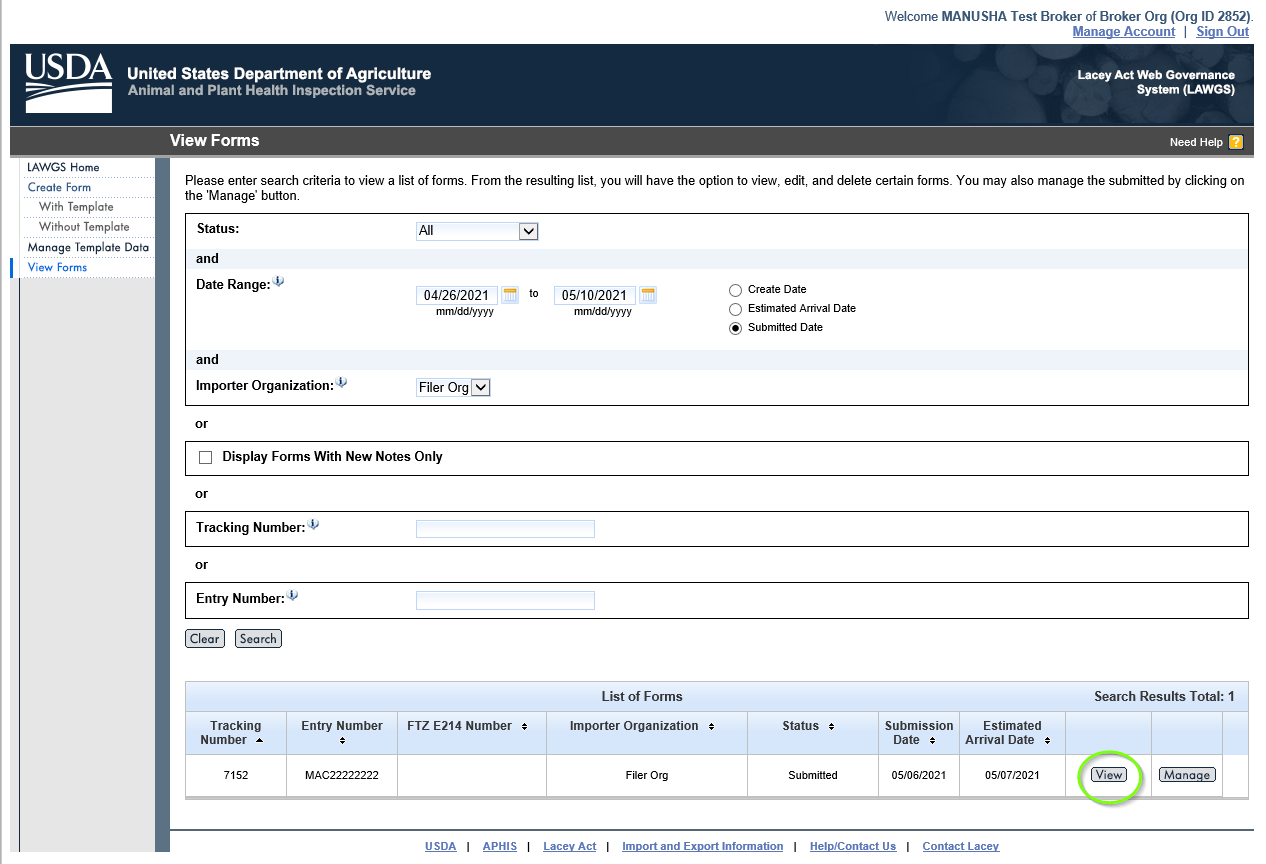
Step 23: Click “View” button from the resulting list.
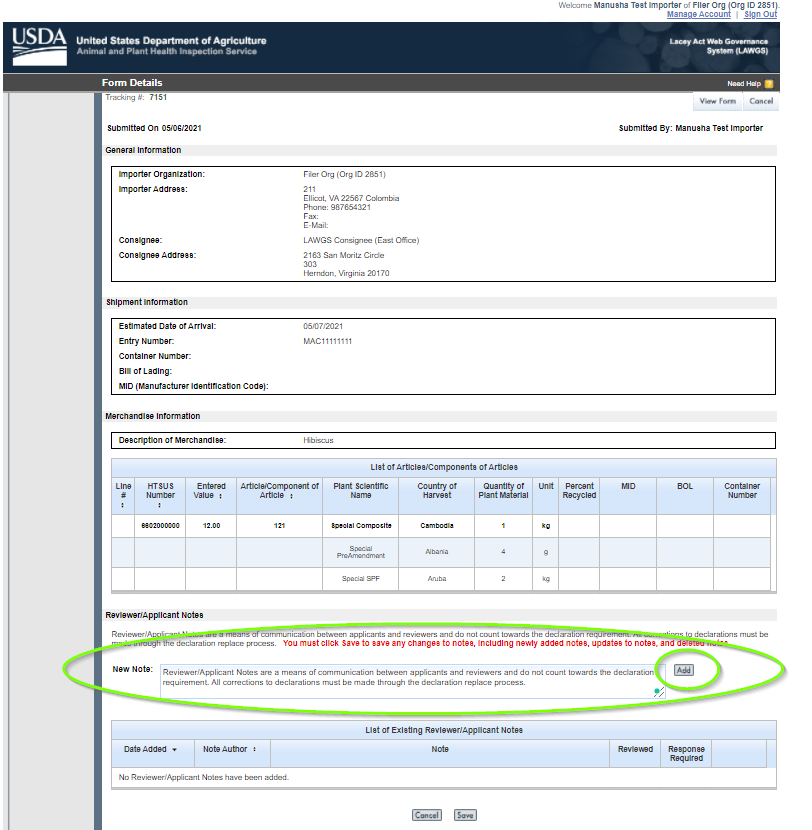
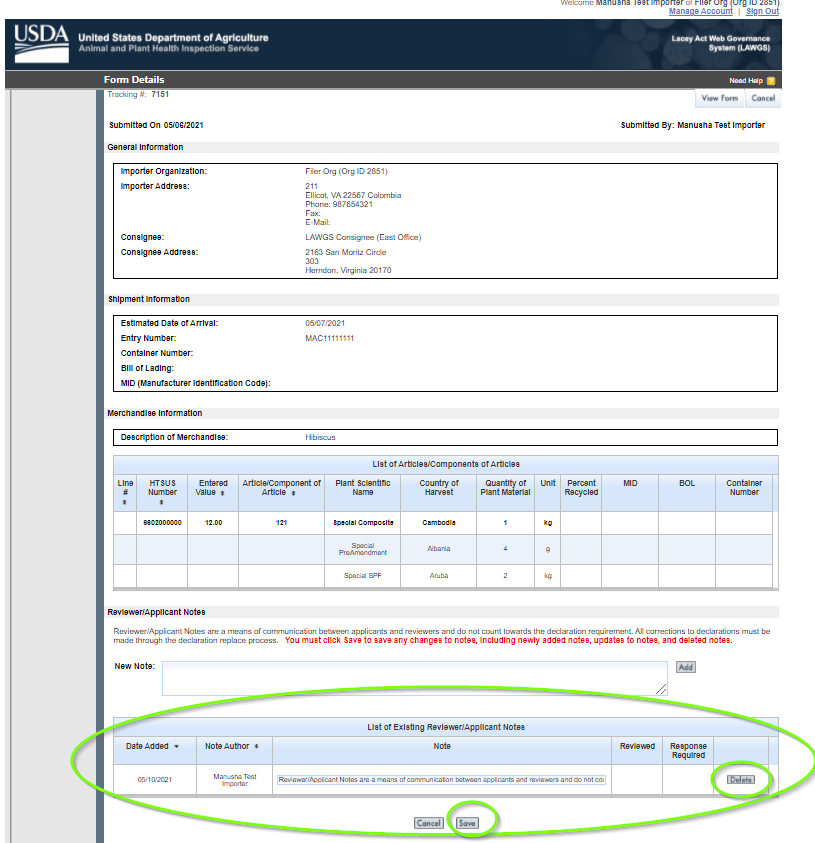
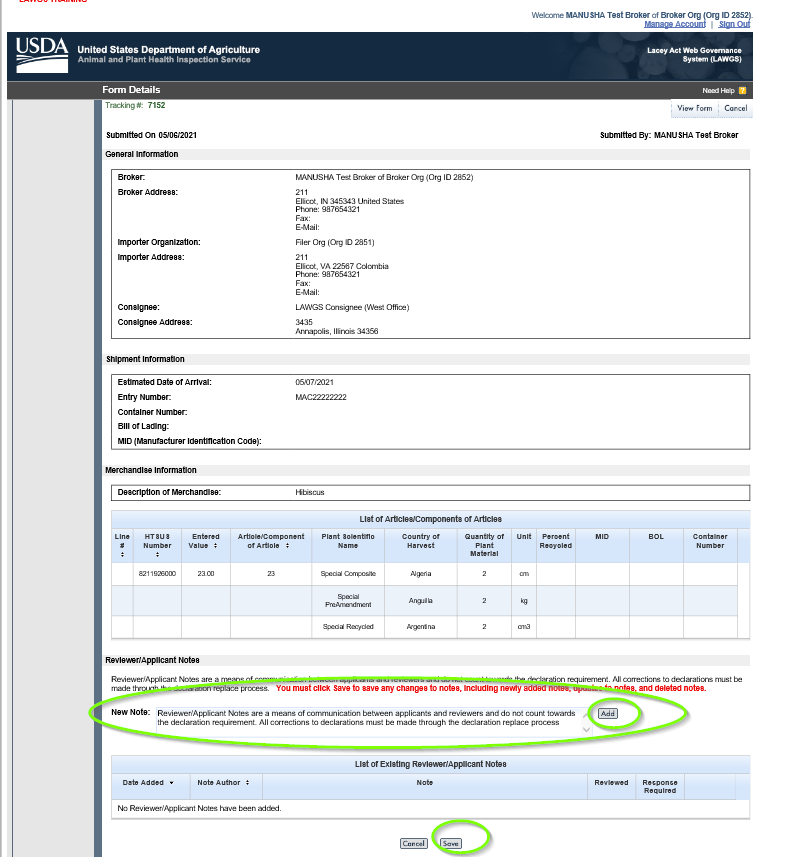
Step 24: Under “Reviewer/Applicant Notes”, you can add the notes that you want to make communications with Reviewer. Click “Add”.
Step 25: Click “Delete” if it is not necessary and then click “Save”.
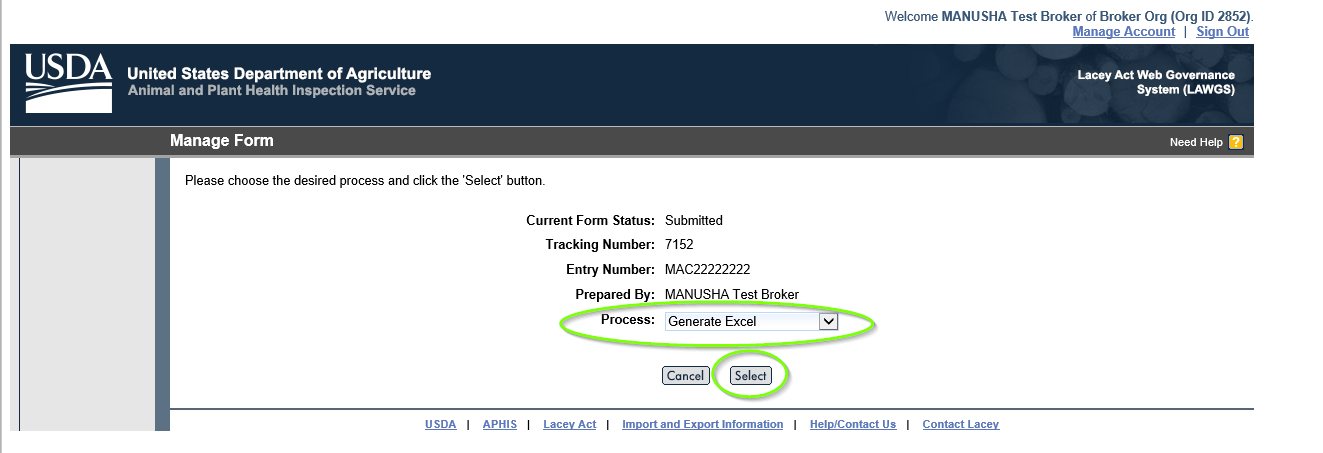
Step 26: Click “Manage” button to manage the submitted form.
Step 27: Choose the desired process “Generate Excel” and click “Select”.
The Declaration form of Excel sheet will be generated.

Step 30: Choose the desired process “Generate PDF” and click “Select”.
The Declaration form of PDF will be generated.

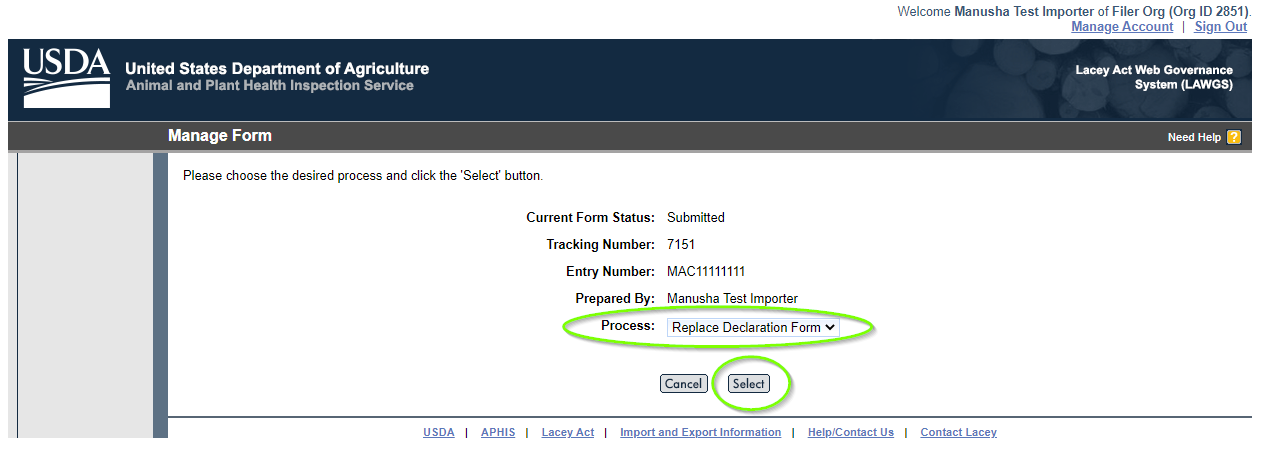
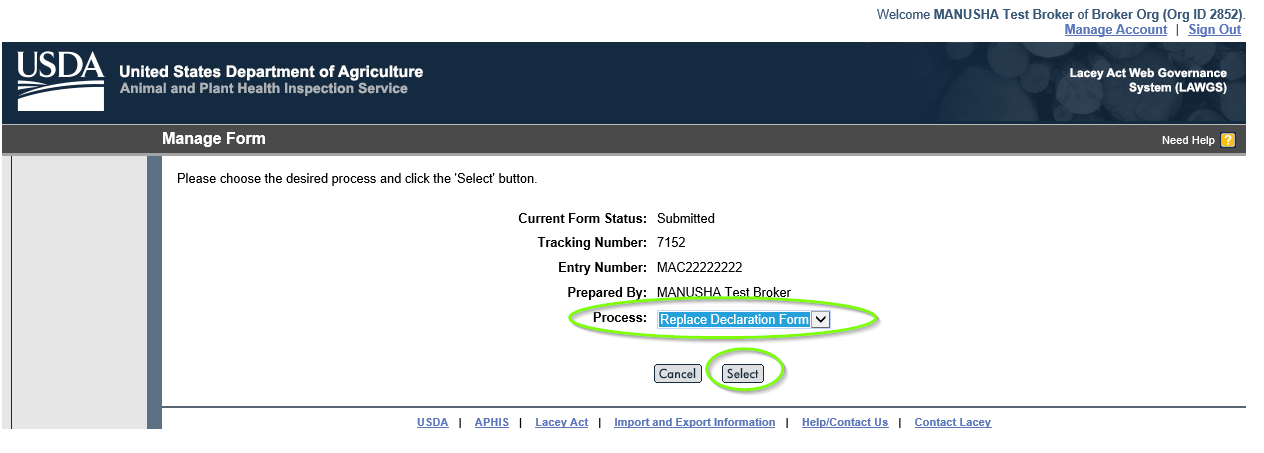
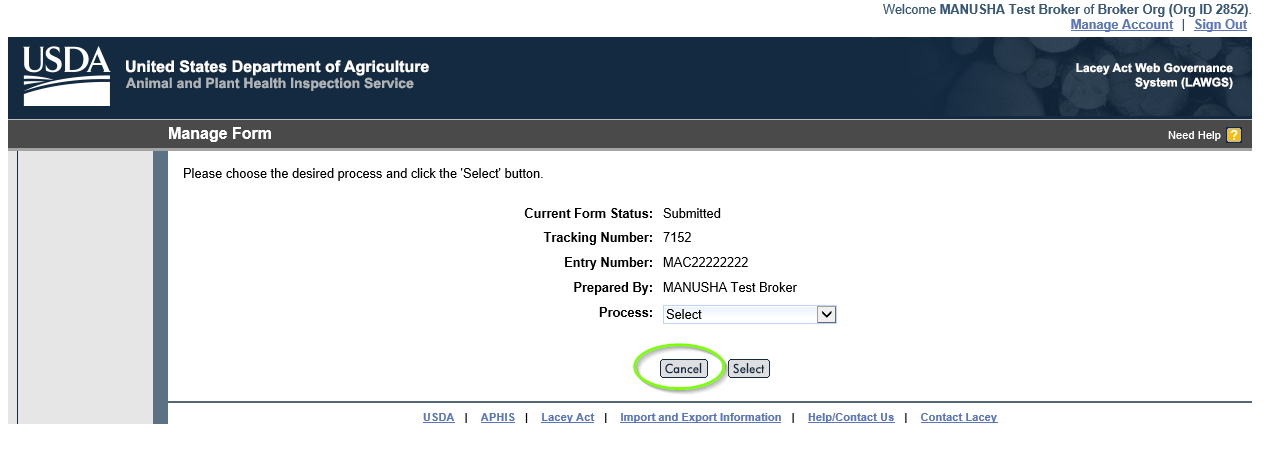
Step 31: Choose the desired process “Replace Declaration Form” and click “Select”.
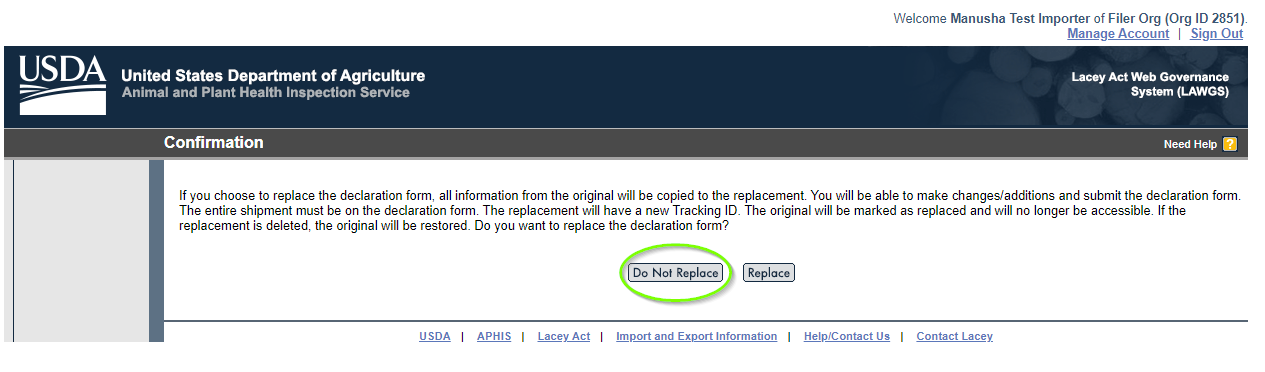
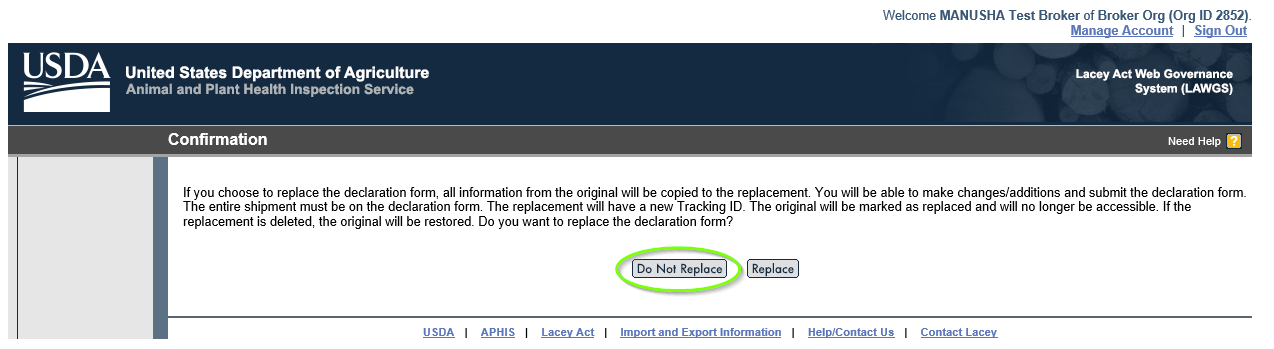
Step 32: Do you want to replace the declaration form?
Click “Do not Replace”, if you choose not to replace.
Step 33: Click “Cancel”
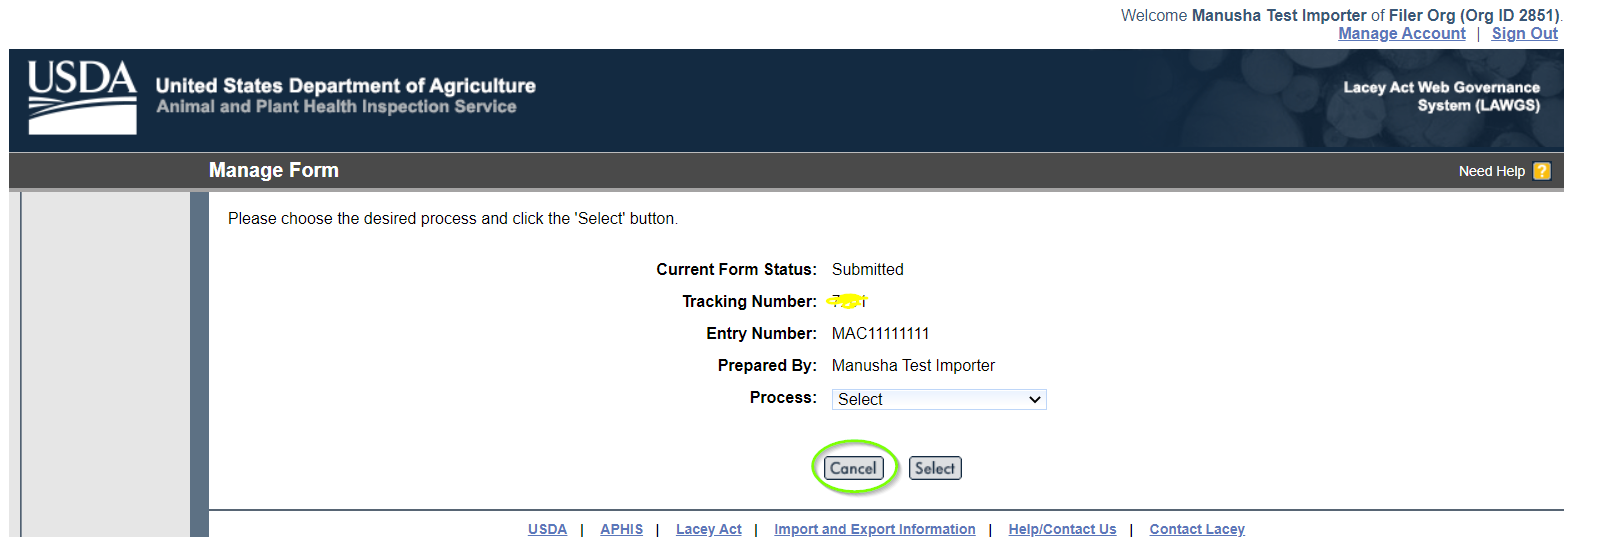
Step 33: You will be directing to the “View Forms” window.
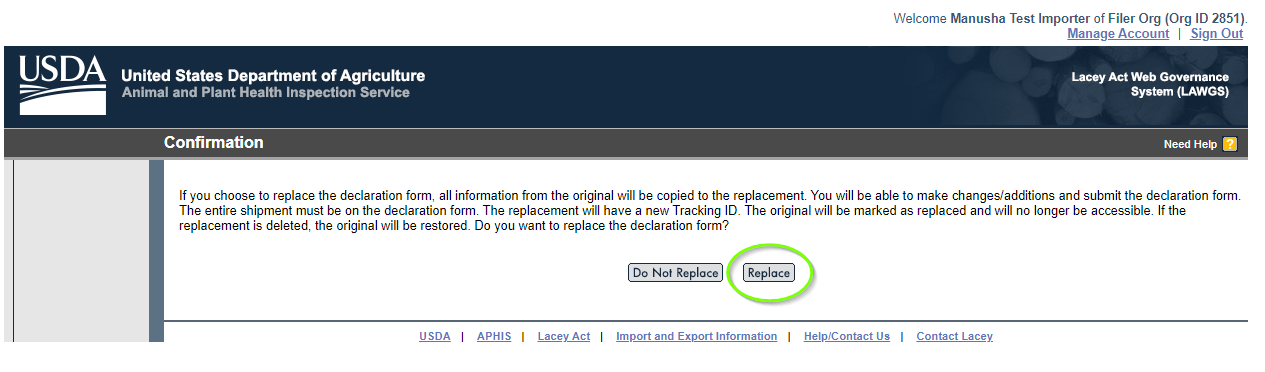
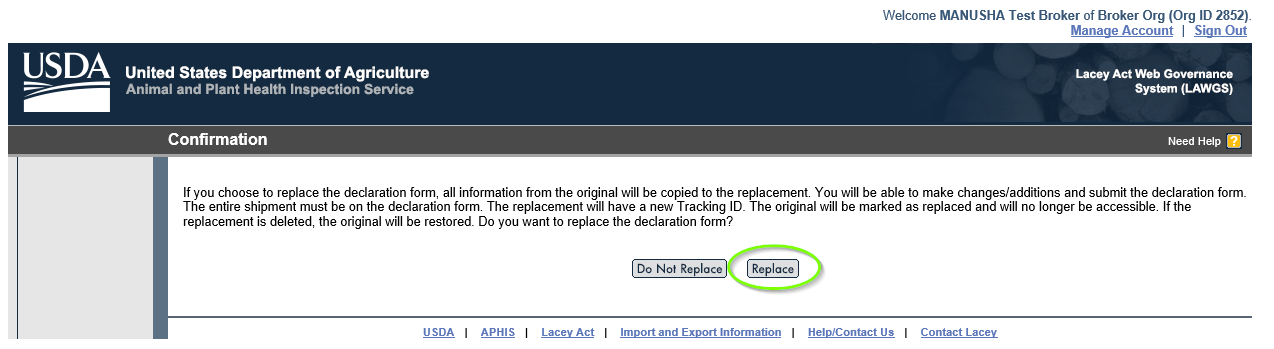
Step 34: Click “Replace” button to replace the declaration form.
Note: The replacement will have the new Tracking ID. The original will be marked as replaced and will be no longer accessible.
Step 35: Follow the same process of Creation of Plant and Plant production form submission.
Step 36: Make changes where you would like to update or replace the information, check the box and then click “Submit Form”.
Step 37: The new tracking number has created and click “Save as Template” to save for future reference.
Step 38: Click “View Forms” to view the replaced form. Below you can see the form with update tracking number and the submission date as Today.
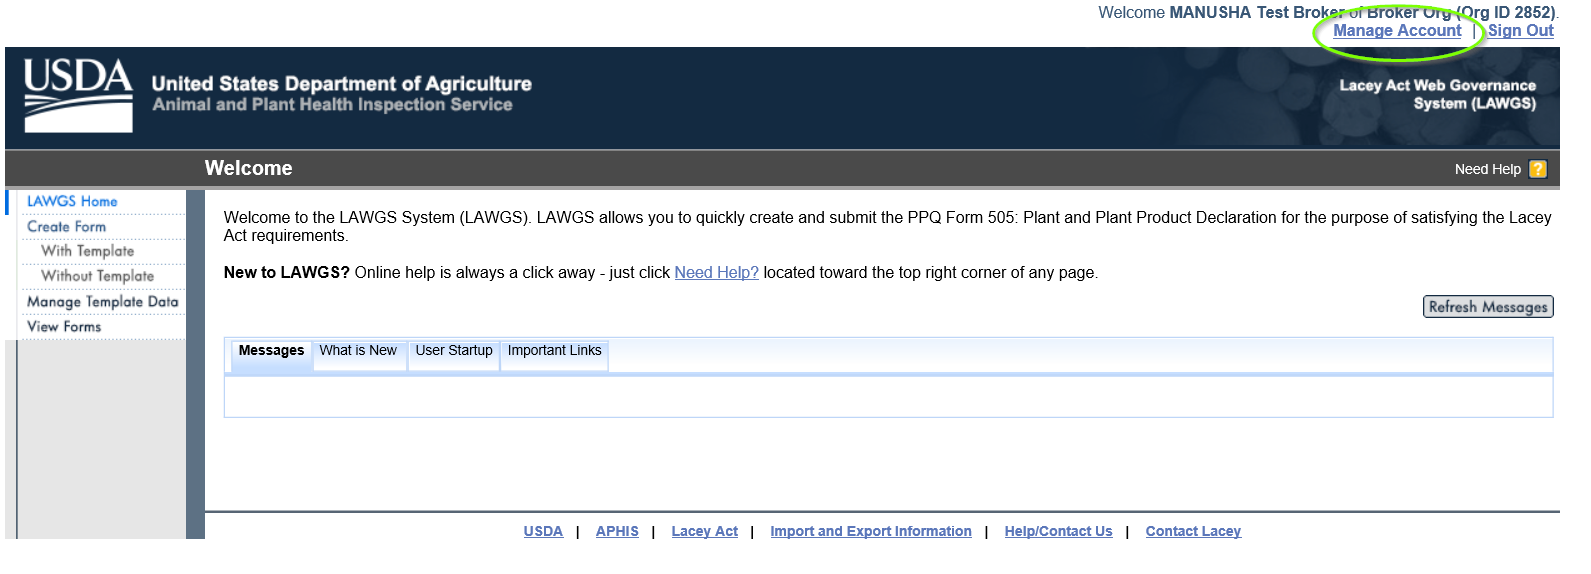
Step 1: LAWGS Home Screen
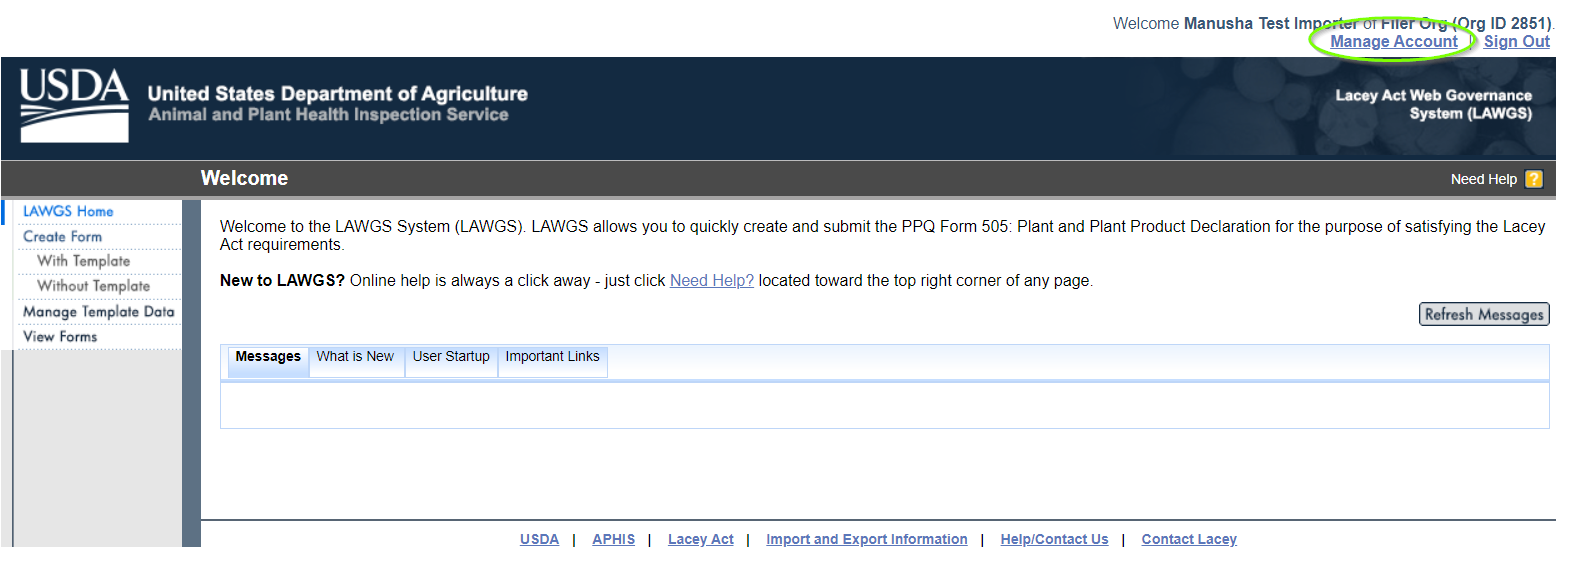
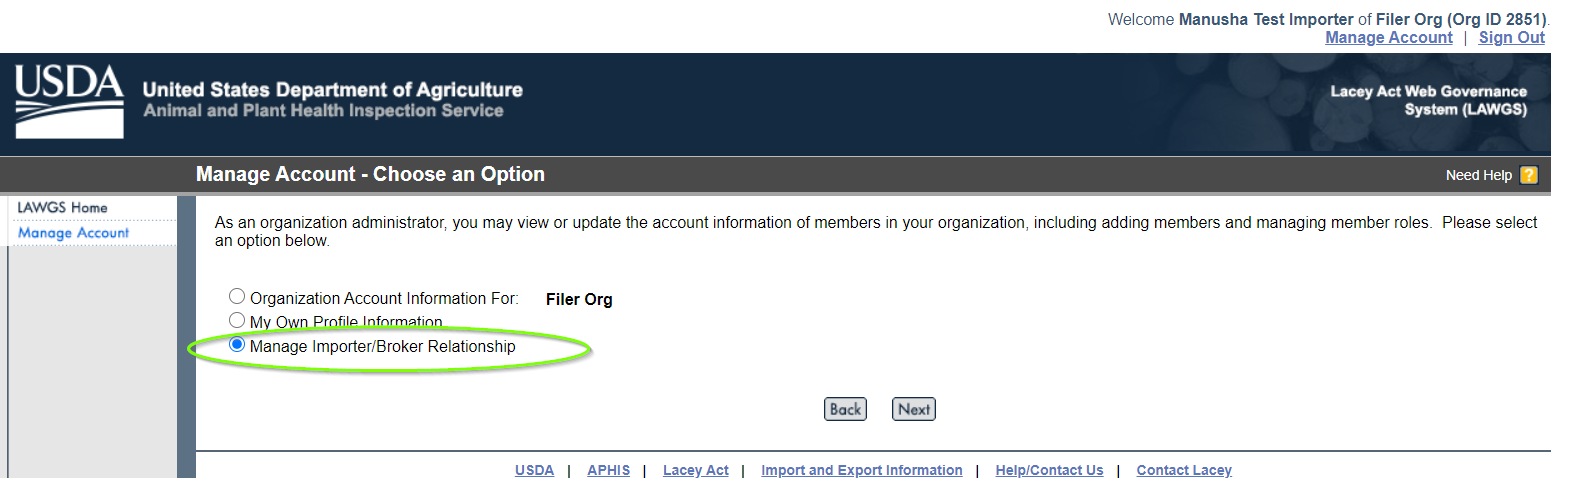
Step 2: Click “Manage Account” on top Right corner and click Manage Importer/Broker Relationship and click “next”.
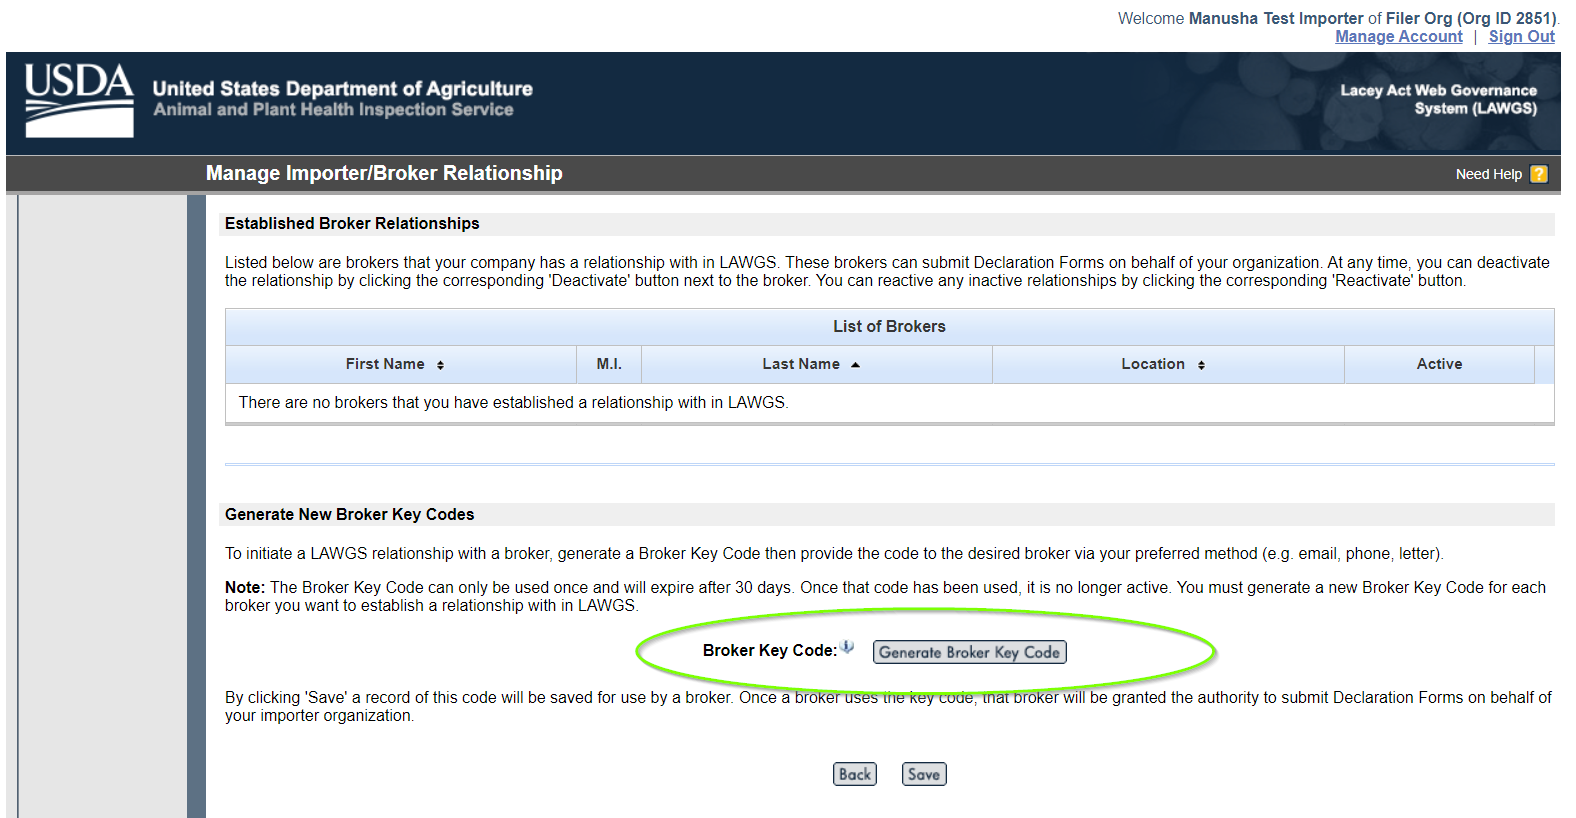
Step 3: Click “Generate New Broker Key Code”
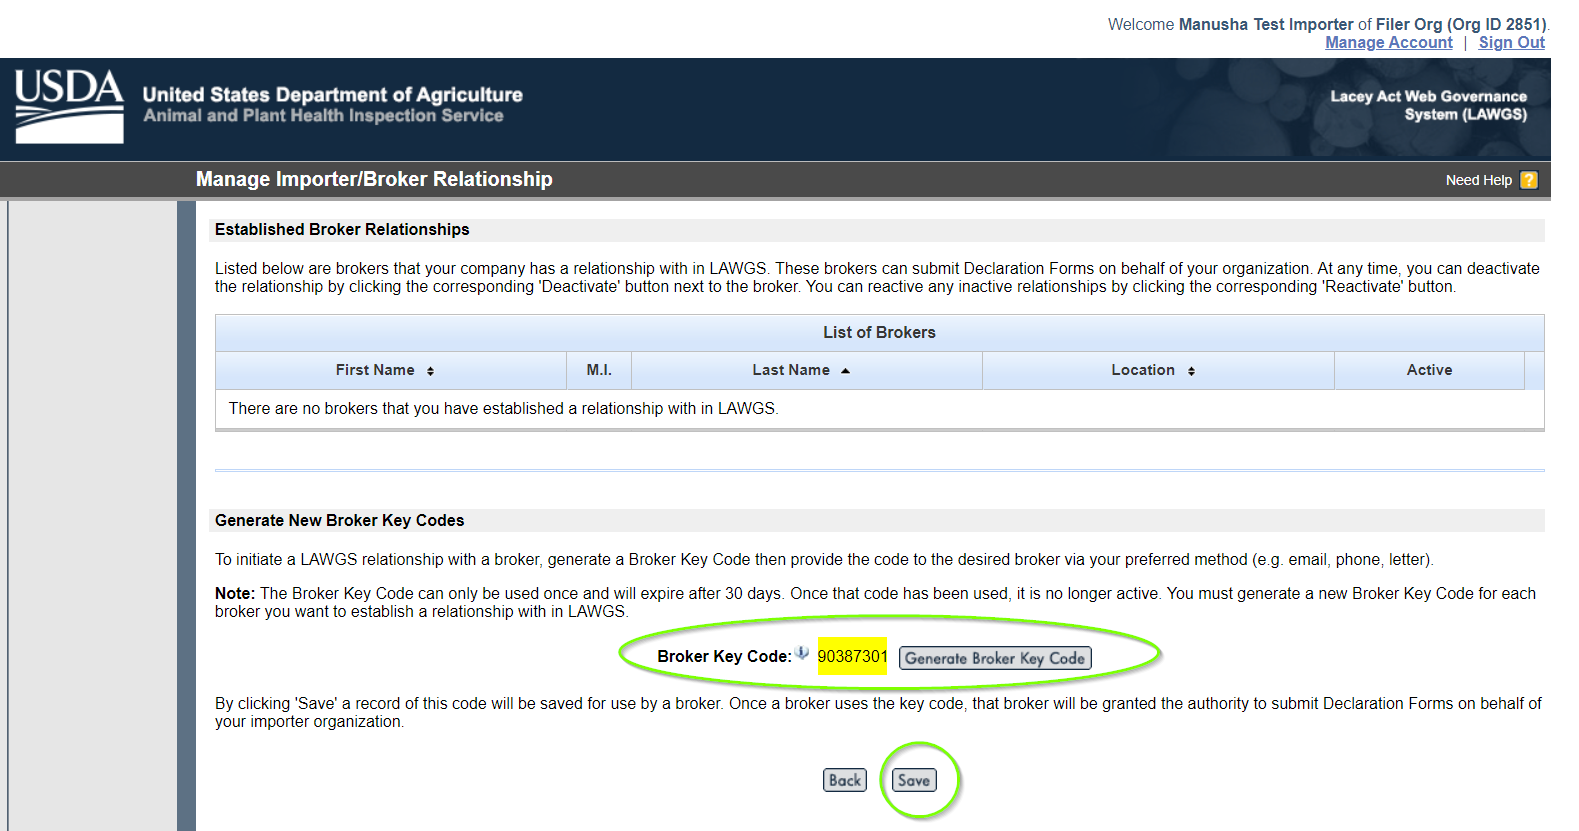
Step 4: Click “Save” button to save the Broker Key code.
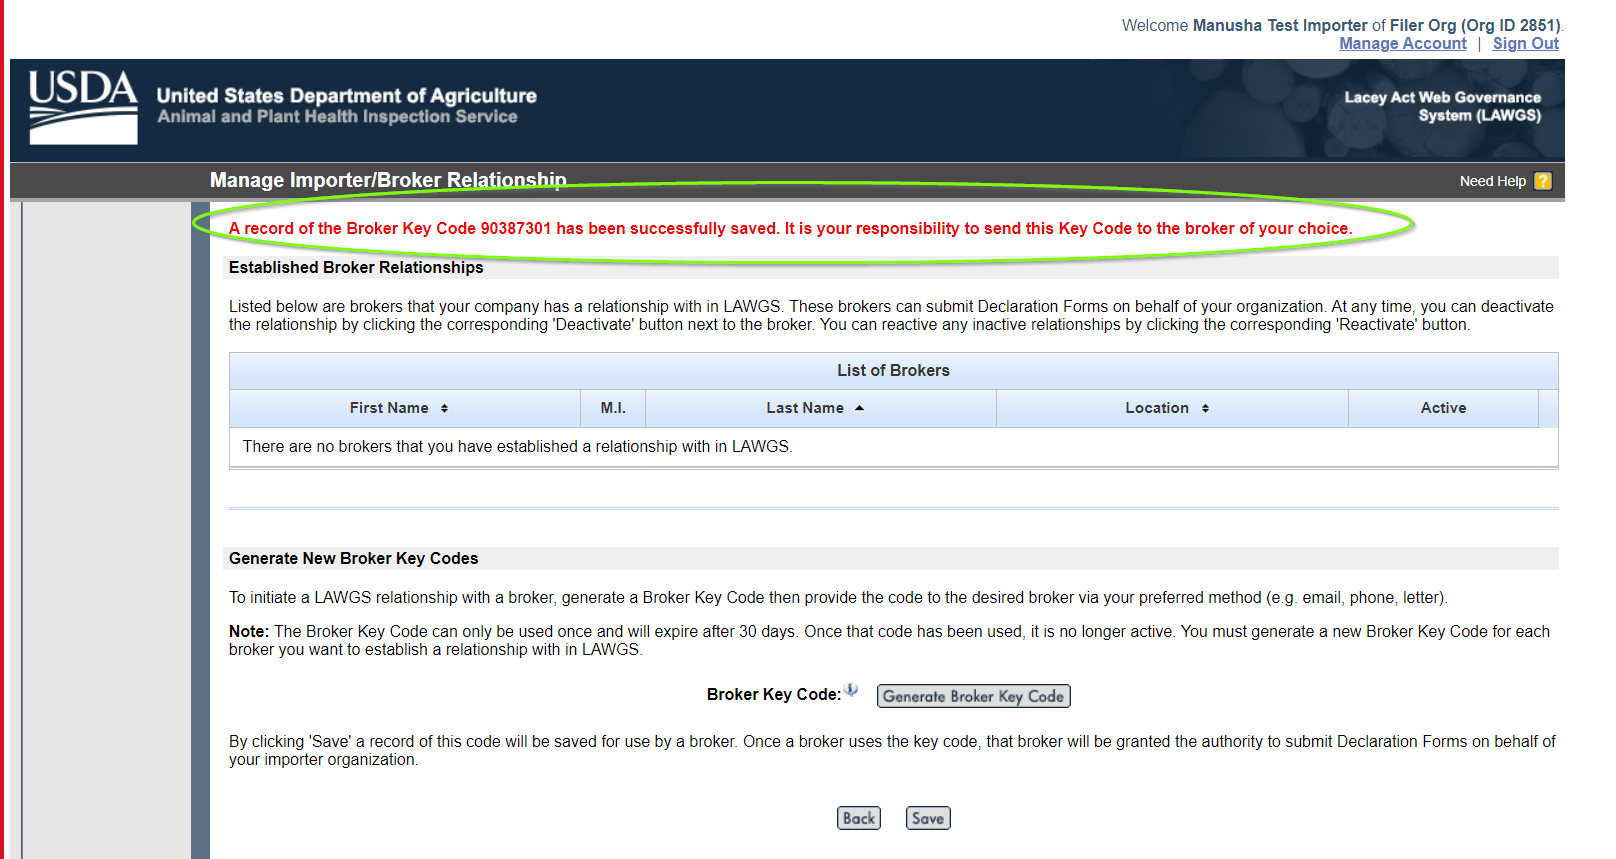
Step 5: A message will be displayed saying that the Broker Key Code has been successfully saved. You can send this code to the broker of your choice.
Step 1: All Users must be e-Authenticated to gain access to USDA APHIS sites.
Link: https://www.eauth.usda.gov
Step 2: Please enter email address.
Step 3: The confirmation has sent to your email address. Follow the link to complete the registration process.
Step 4: Click “Continue Registration” from your email.
Step 5: It will open the link with USDA eAuthentication Customer Account Registration form. Please fill out and click “Submit” button.
Step 6: Once you submit the form, it will direct you to the window called “Account Registration complete”. Click “Log in to your application” button or use the below link to login to LAWGS using your eAuth user id and Password.
https://lawgs-training.aphis.usda.gov/lawgs/faces/login_initial.jsf
Step 7: Login to your application using the below link:
Link: https://lawgs-training.aphis.usda.gov/lawgs/faces/login_initial.jsf
Please use your eAuth login credentials to “Log in with your password”.
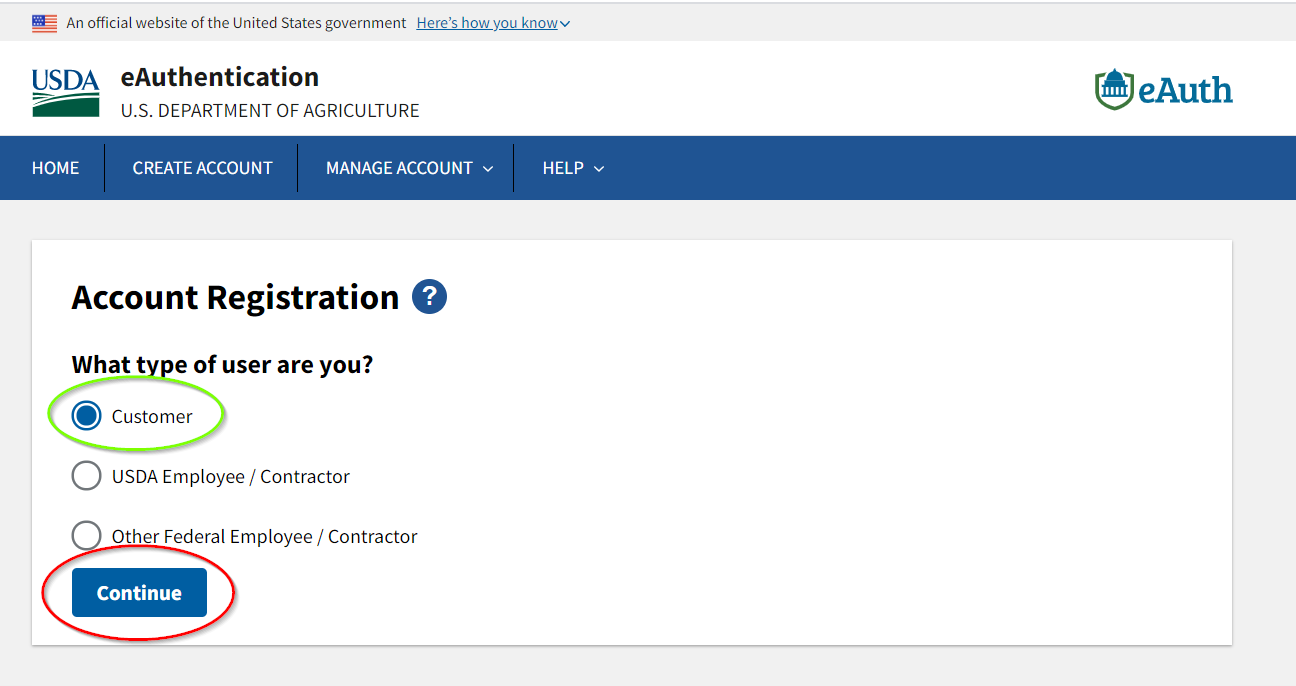
Step 1: Use option 1 to create Applicant Organization for Broker Org
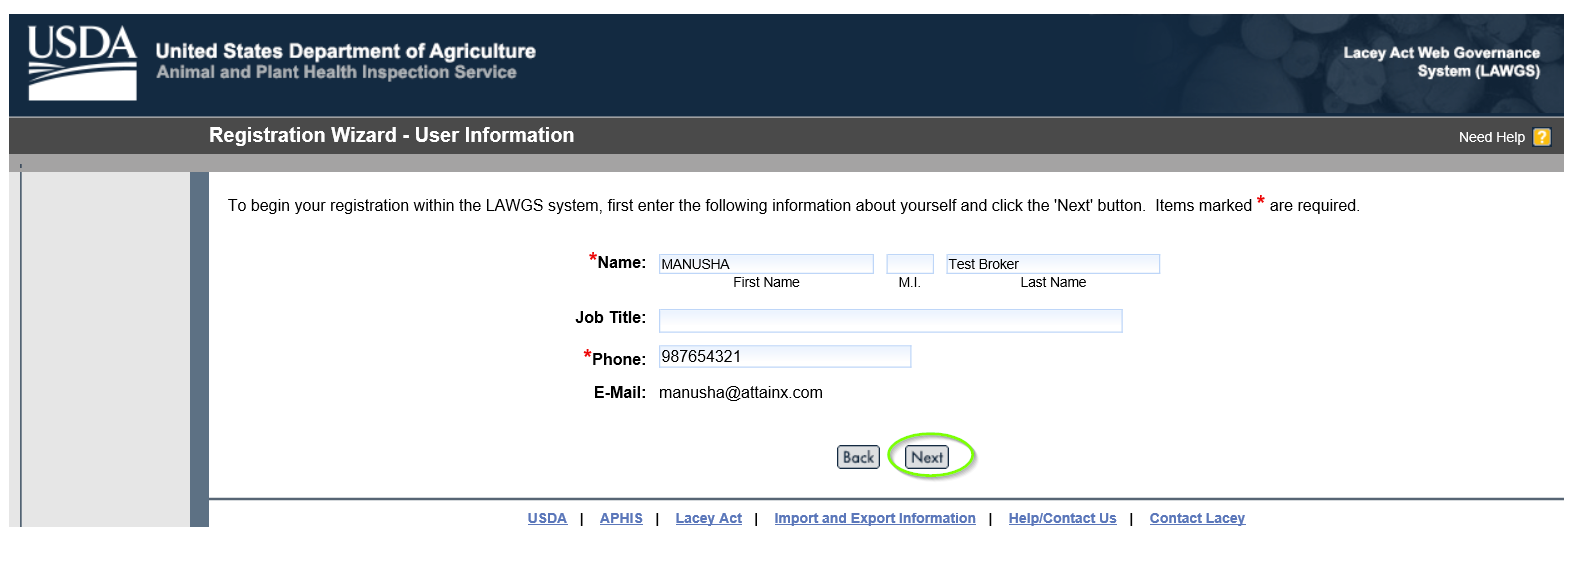
Step 2: Fill the mandatory fields and click next.
Step 3: Please make sure to click “Create a New Organization’s Account within LAWGS and click “Next”.
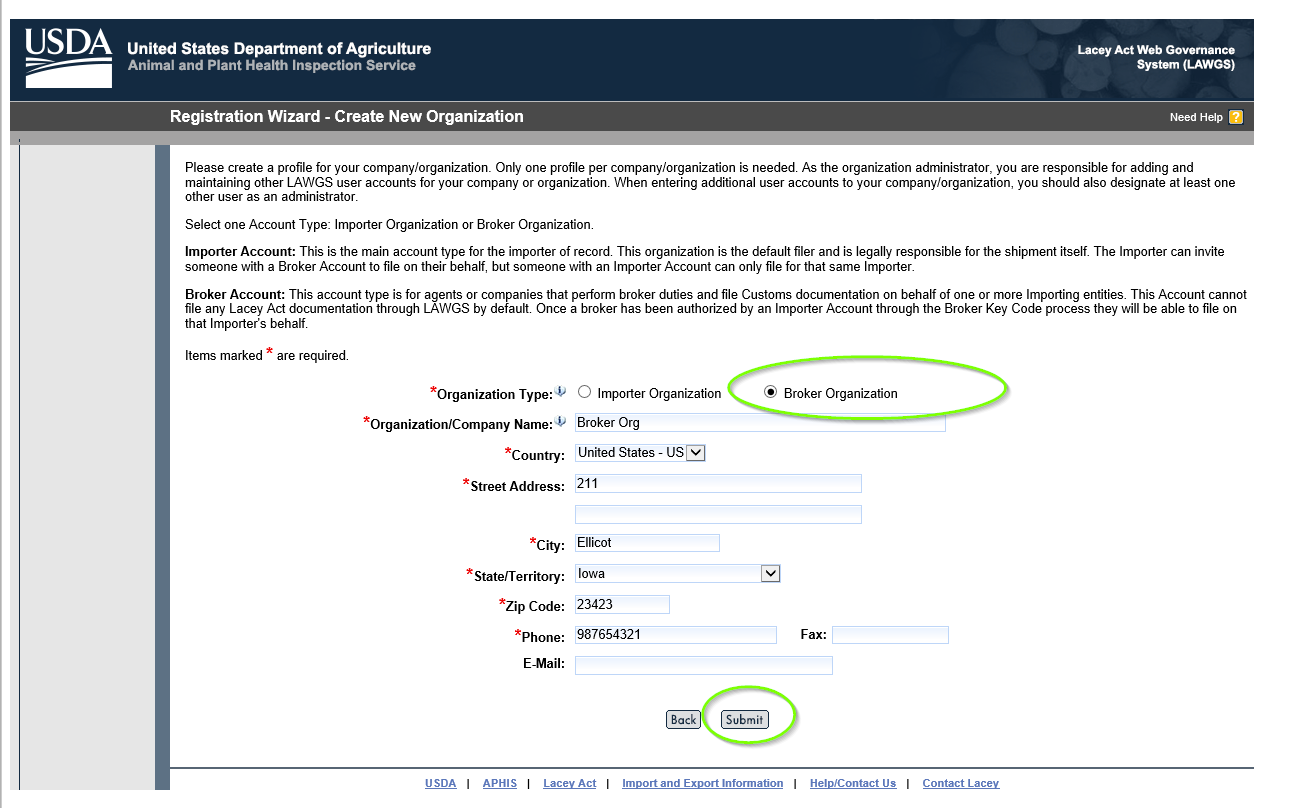
Step 4: Select one Account type “Broker Organization”, fill the rest, and click “Submit”.
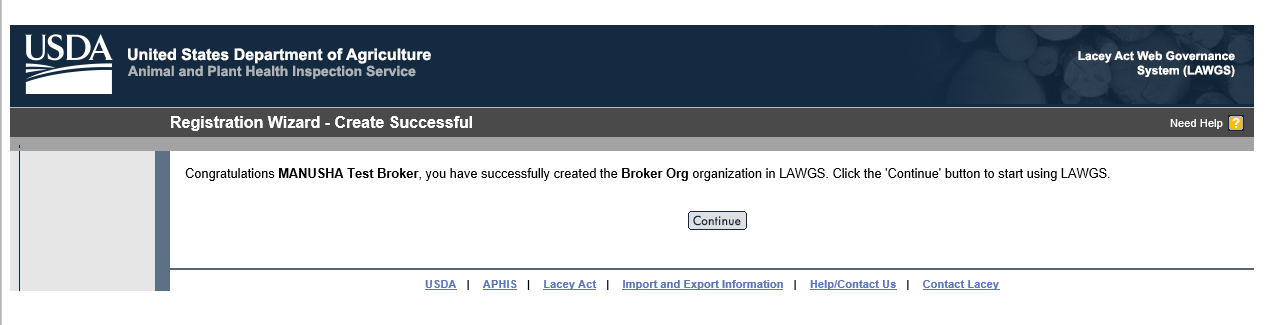
Step 5: Broker user organization has created and click “Continue” to start using LAWGS.
Step 6: Manage Broker/Importer Relationship
Click “Manage Account” on top right corner.
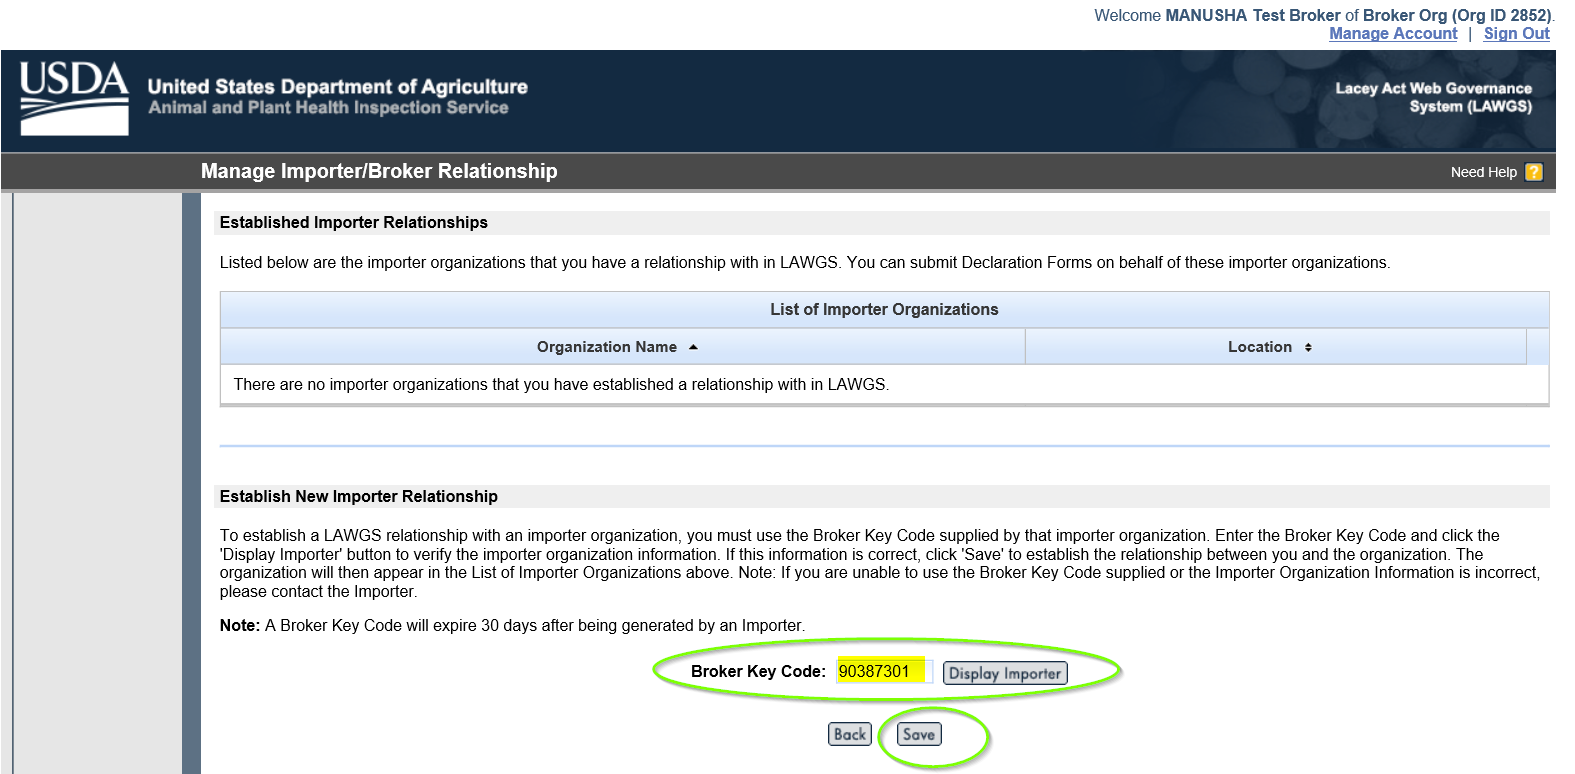
Step 7: Click “Manage/Broker Relationship” and click “Next”.

Step 8: Establish New Importer Relationship
Use the Broker Key Code which is supplied by the importer organizations and click “Save”.
Please make sure to save the Key code.
Step 9: A message will be displayed in red colour. Yo may now create and submit Declaration forms on behalf of the Filer Org which is the importer organization. You can also see the List of import organizations that you have a relationship with in LAWGS. Click “Back” to LAWGS Home screen.

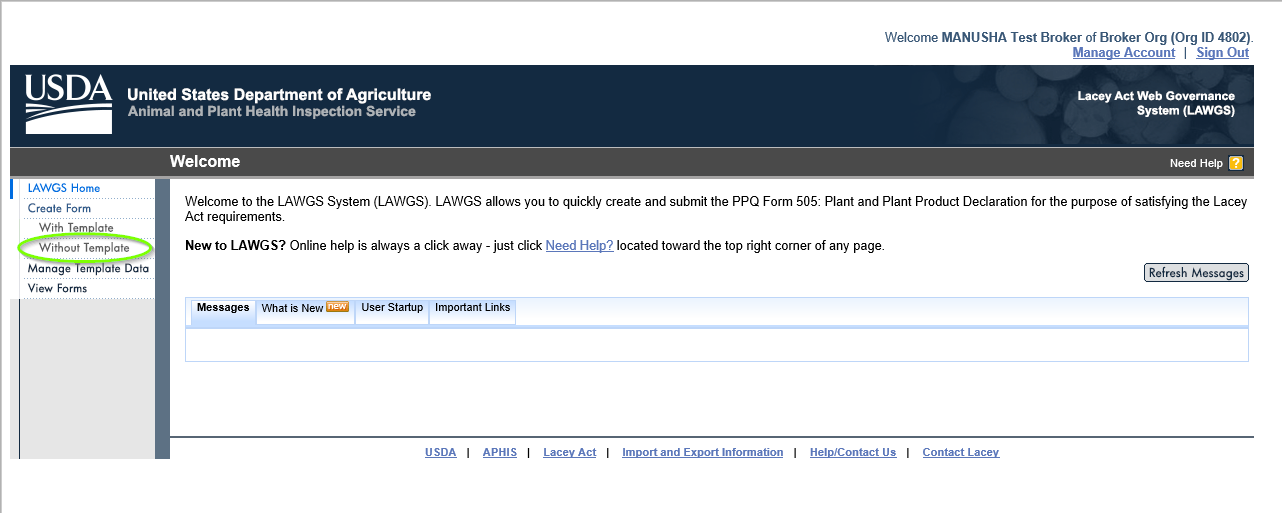
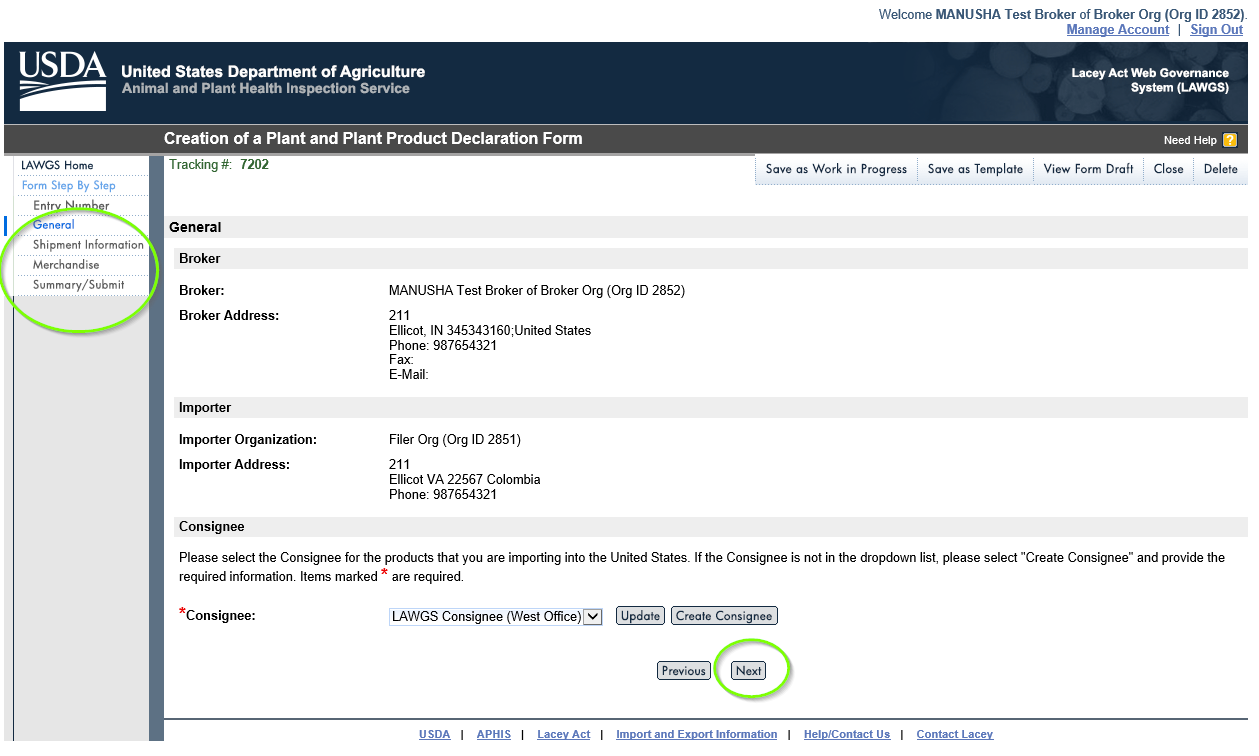
Step 10: Creation of Plant and Plant Production Declaration Form
Click “Without Template”
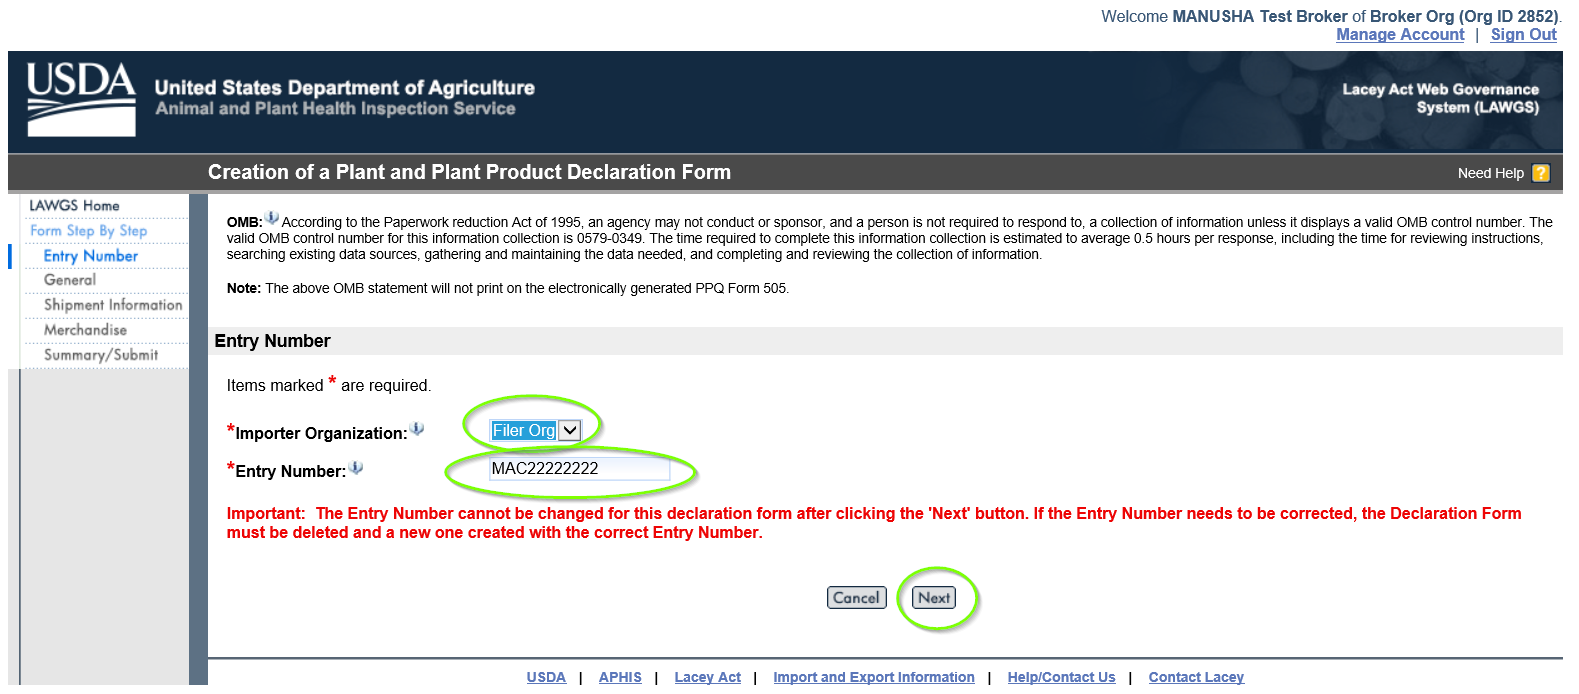
Step 11: Select the Importer Organization from the dropdown menu.
Type the Entry number and click “Next”.
Step 12: Create a Consignee
Step
13:
Enter the Consignee details and click “Save & Back”
button.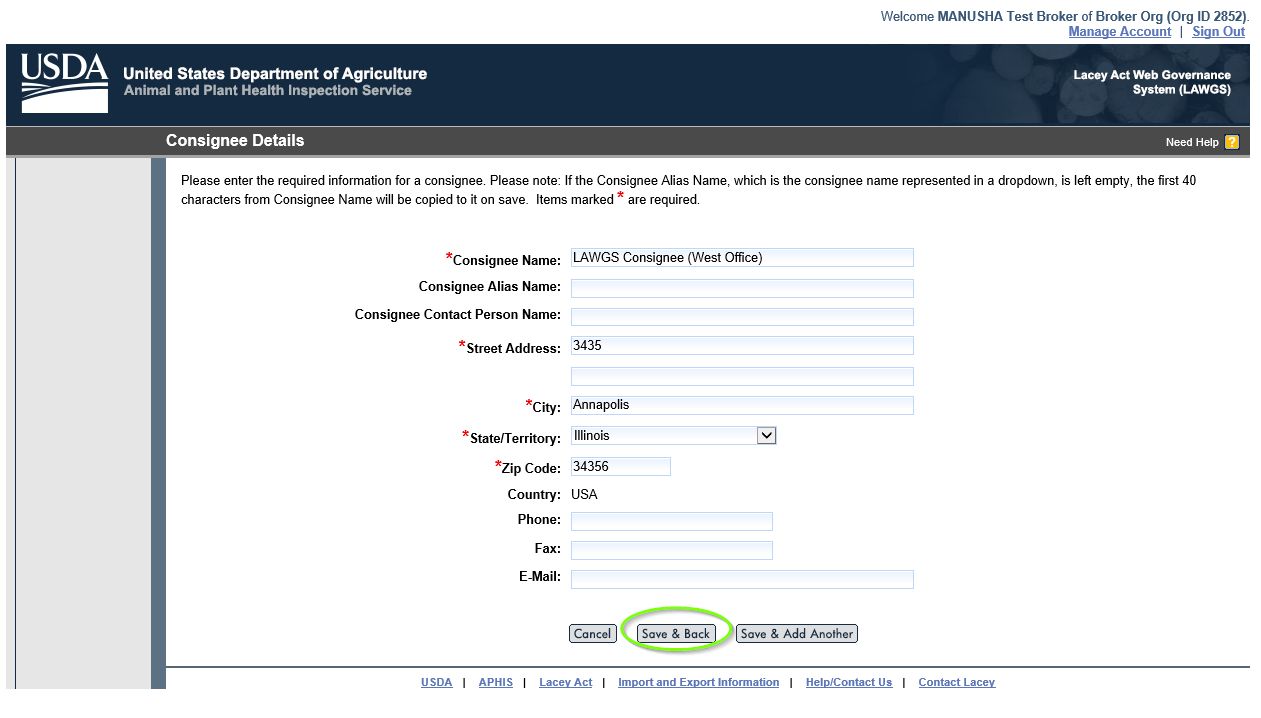
Step 14: Select the Consignee for the product that you are importing to the United States and click “Next”.
Step
15: Enter
the Shipment information and click “Next”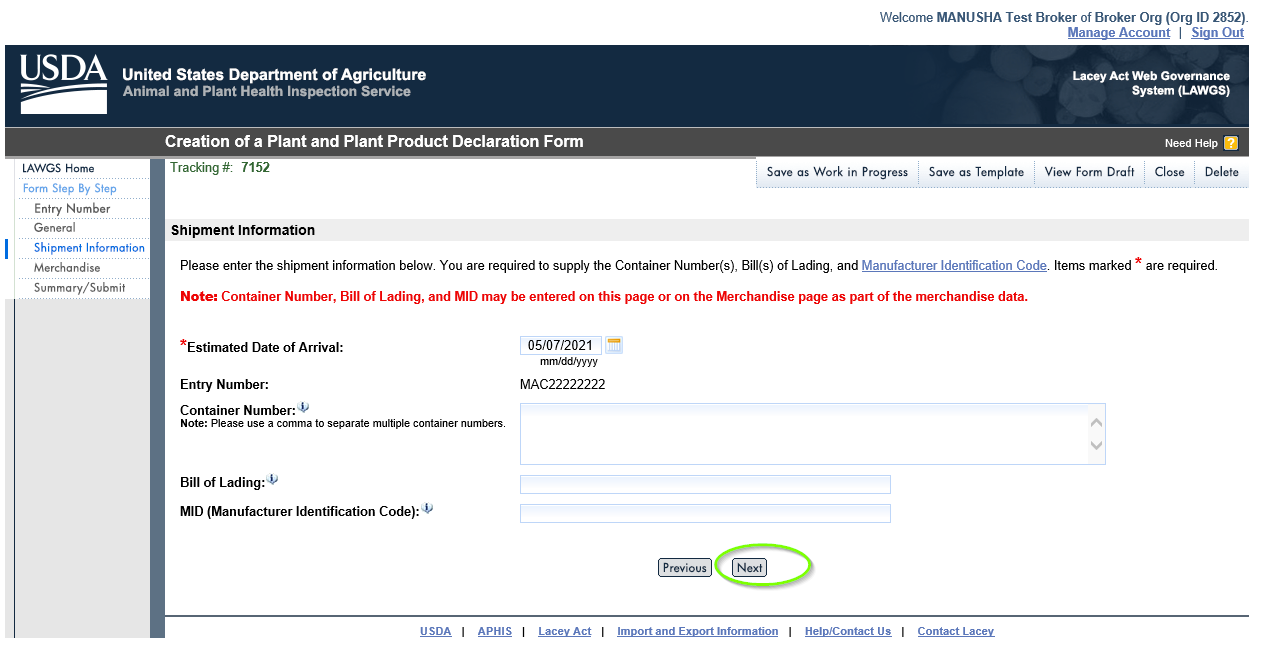
Step 16: Merchandise Information
Please add the “Description of Merchandise” and Choose Option 1 or Option 2 to provide Merchandise information.
Click Option 1: Enter Merchandise Manually, fill the fields and click “Enter Row Details”.
Step 17: Select Special Use Designation and click “Generate rows”.
Step 18: Click “Save”
Step 19: Click “Next”
Step 20: Check the “box” and Click “Submit Form”.
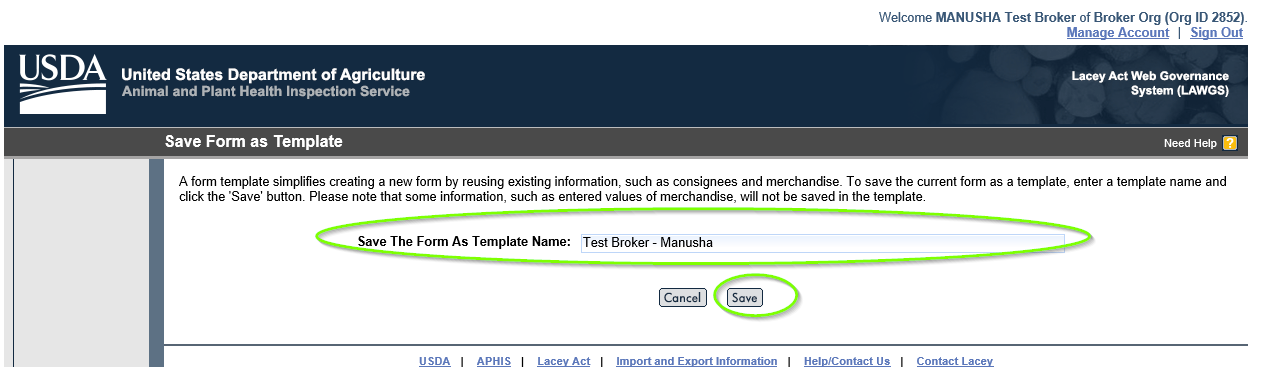
Step 21: Save as Template
Please save it for your future templates also save the tracking number.
Step 22: Write the file name and Click “Save”.
Step 23: A message will be displayed in red colour that your Template was created successfully. Click “Manage Template Data”
Step 24: Click “Manage Form Templates”
You can see the templates that you have created under List of Templates.
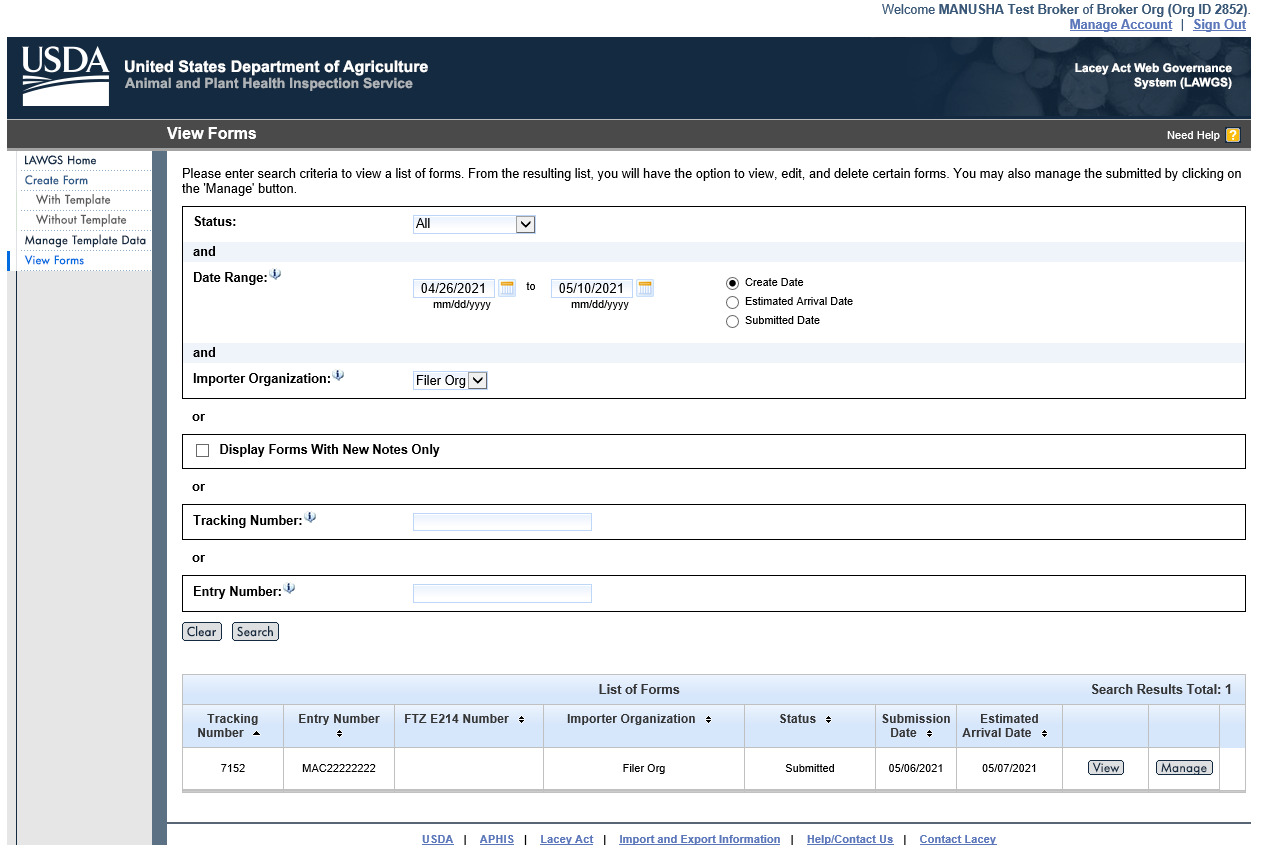
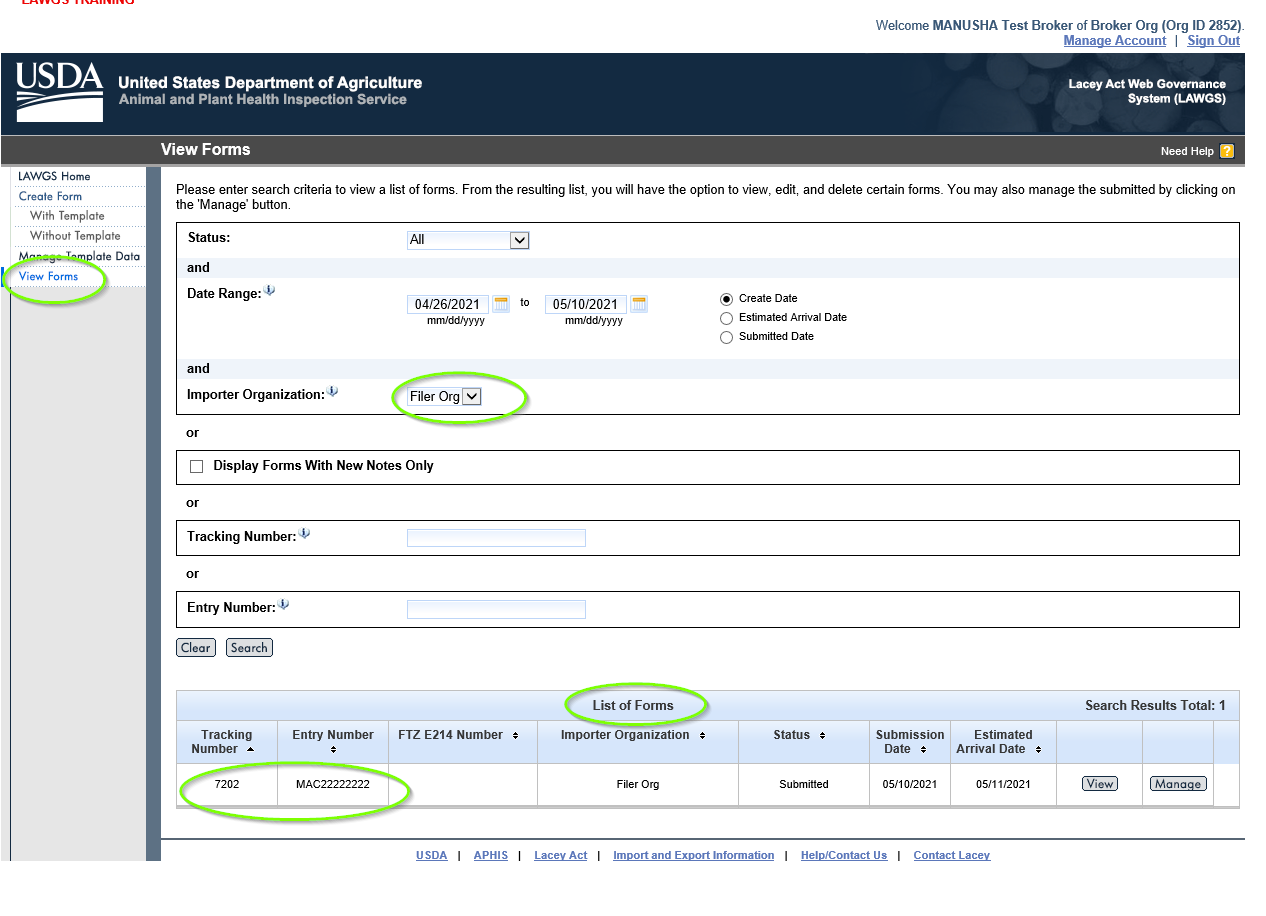
Step 25: Click “View Forms”
Please enter search criteria with Importer Organization to view a list of forms.
Step 27: Click “View” button to add notes.
Step 28: Add notes and then click “Save”.
Step 29: Click “Manage” to manage the submitted form.
Step 30: Choose the desired Process “Generate Excel”.
Click “Select”.
Step 31: Choose the desired process “Generate PDF”.
Click “Select”.

Step 32: Choose the desired process “Replace Declaration Form” Click “Select”.
Step 33: Do you want to replace the declaration form?
Click “Do not Replace”, if you choose not to replace.
Step 34: Click “Cancel”
Step 35: You will be direction to View Forms window.
Step 36: Click “Replace” button to replace the declaration form.
Note: The replacement will have the new Tracking ID. The original will be marked as replaced and will be no longer accessible.
Step 37: Follow the same process of Creation of Plant and Plant production form submission.
Step 38: Make changes where you would like to update or replace the information, check the box, and then click “Submit Form”.

Step 39: The new tracking number has created and click “Save as Template” to save for future reference.
Step 40: Click “View Forms” to view the replaced form. Below you can see the form with update tracking number and the submission date as Today.
Version |
Date |
Description |
Responsible Party |
0.1 |
05/07/2021 |
Initial adoption of LAWGS Importer and Broker ORGs Screen shots |
Manusha Chennur |
|
|
|
|
|
|
|
|
|
|
|
|
| File Type | application/vnd.openxmlformats-officedocument.wordprocessingml.document |
| Author | Ben Brumm |
| File Modified | 0000-00-00 |
| File Created | 2022-04-09 |
© 2026 OMB.report | Privacy Policy