LOI2-BIO-19 - Integration of salivary analytes into the NCS: Evaluation of Feasibility, Efficiency, and Benefits
Biospecimen and Physical Measurements Formative Research Methodology Studies for the National Children?s Study (NICHD)
Attach S1 Goal 2_Home Visit Saliva Collection Guide
LOI2-BIO-19 - Integration of salivary analytes into the NCS: Evaluation of Feasibility, Efficiency, and Benefits
OMB: 0925-0647
Attachment S1 Goal II Home Visit Saliva Collection Guide OMB #: 0925-0647
Expiration Date: 01/31/2015

HOME VISIT SALIVA COLLECTION GUIDE
TABLE OF CONTENTS
Illustrated Table of Kit Materials …………………………………………………………………………………………………………….2
Child Safety Warning ………………………………………………………………………………………………………………………………3
Home Saliva Collection Kit ………………………………………………………………………………………………………………………3
Home Visit Outline ………………………………………………………………………………………………………………………………….5
Demonstration – Adult Passive Drool Collection …………………………………………………………………………………….6
Demonstration – Adult Oral Swab Collection ………………………………………………………………………………………….7
Demonstration – Infant/Child Oral Swab Collection ………………………………………………………………………………..8
Packing and Shipping Samples ………………………………………………………………………………………………………………..9
Contact Information ……………………………………………………………………………………………………………………………..14
ILLUSTRATED TABLE OF KIT MATERIALS
Image |
Item Name |
Intended Use |
|
Oral Swab |
Adults, children 6+ years old |
|
Child Oral Swab |
Children (ages 1-5), animals, elderly, incapacitated adults |
|
Infant Oral Swab |
Infants (ages 0-11 months), incapacitated adults |
|
Oral Swab Storage Tube
Includes Tube, Basket, and Neutral-colored lid |
Storage of samples collected with the oral swabs |
|
Color-coded Oral Swab Storage Tube Caps |
SST color coding |
|
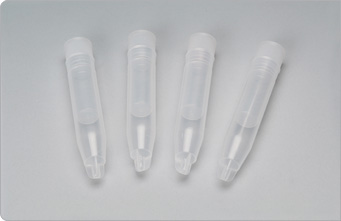
2.0 mL screw cap O-ring, Type 1
|
Passive drool collection |
|
Color coded lid inserts
|
Passive drool collection color coding |
|
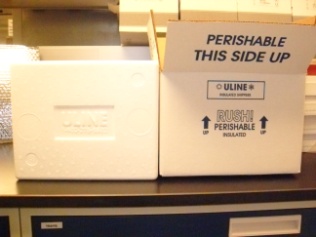
Uline insulated shipping box 8 x 6 x 4 1/4" – inner box 11 x 9 x 7 1/4" – outer box |
Shipping frozen/cold samples |
|
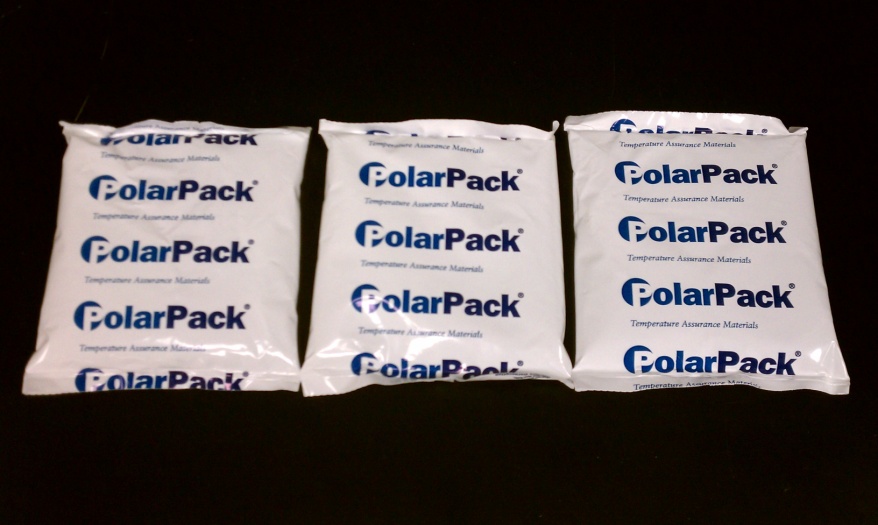
Polar Packs |
Keeping samples cold during shipping |
|
Sample collection tube barcode labels |
Labeling saliva samples |


Other Materials (Not Shown)
Straight disposable drinking straws (cut into 2-3inch lengths)
Plastic zip lock bags (sandwich and gallon size)
Nitrile gloves (nonsterile, size medium)
Home saliva collection documents (instructions, forms, etc.)
Temperature monitor
Multi-alarm clocks (optional, will possibly be used for Wave 2 only)
CHILD SAFETY WARNING:
Do not leave
children unattended with any part of this collection kit.
The
pieces may be a choking hazard.
HOME SALIVA COLLECTION KIT
One family collection kit should include:
Home Visit Saliva Collection Guide to be used by home visitor
4 Collection forms – Home Visit Demo (for home visitor); Mother, Child*, Infant* (to be left with mother)
Saliva Collection Diagrams to be left with mother
Saliva Collection Do’s and Don’ts to be left with mother
Sample Packing/Shipping Instructions to be left with the mother
Choking Hazard Warning to be left with mother
3 Sarstedt screw cap 2mL cryovials with 1 white cap/insert and 2 colored caps/inserts
3 2-3” sections of plastic drinking straws
8 Swab Storage Tubes with 2 white caps/inserts and 6 colored caps/inserts
5 Child* Swabs
5 Infant* Swabs
3 Adult Swabs
5 Nitrile gloves
1 Shipping Container –2 piece insulated shipping box
2 Polar Packs - to be included in insulated shipping box
22 Barcode labels – duplicate labels for: mother demo (2); infant/child demo (1); mother self-collections (4); infant/child collections by mother (4)
5 Zip lock bags – 1 for passive drool collection materials; 1 for child/infant swab collection materials; 1 for adult swab collection materials; 1 (gallon size) for storing polar packs in freezer; and 1 (gallon size) for collection forms
1 Temperature monitor
1 Timing device in zip lock bag (optional for Wave 2)
*Infant: age 0-11 months; Child: 1 year and up. Please utilize either “child” or “infant” materials depending on the child’s age.
HOME VISIT OUTLINE
Remove “child” OR “infant” materials, leaving only the set of materials appropriate for the age of the child
Place cold pack(s) in the participant’s freezer
If a temperature monitoring device is included with the kit, instruct the participant to leave it in the shipping container. No participant interaction is required for this device.
Provide overview of saliva collection
Do’s and Don’ts
Review “Do’s and Don’ts” sheet
No major meals at least 1 hour before collection
No teeth brushing at least 45 minutes before collection
No snacks or drinks (including dairy) at least 20 min before collection
If a participant (mother or child) must eat between the first and second morning collection, try a small snack rather than a full meal. No dairy.
If participant has had a snack or drink within the hour before collection, mouth should be rinsed at least 10 minutes prior to collection. No mouth rinsing should occur any closer to the collection time than 10 minutes prior.
Troubleshooting:
Sometimes imagining a favorite food and/or gently moving the jaws in a chewing motion can help stimulate saliva.
If the participant does eat during the recommended waiting time, still collect the sample at the scheduled time and make a note of how long before collecting the participant ate.
If the participant is sick, has active allergies, or oral health problems, this should be noted in the comments column of the collection sheet.
Sometimes a sticker or other small treat/diversion to reward children will help improve cooperation in saliva collection, the mother may use this method if she wishes.
Timing of sample collection
Review collection sheets
Plan out collection times for the following day with participant.
Immediately upon waking
30 minutes after waking
Just before lunch
Just before dinner
Fill in the “planned collection time” column on the Mother and Child/Infant collection forms.
Reminder System:
Wave 1 (First set of 66 mother-child dyads): No system of reminders
Wave 2 (Second set of 66 mother-child dyads)
Set an alarm (cell phone, clock etc)
Leave post-it notes or similar reminders in helpful places (on alarm clock, child’s bedroom door, refrigerator)
Interviewer may have the option of leaving a clock with programmable alarms for participant use (to be returned in package with collected samples)
Demonstrate sample collections
Review collection materials for drool (straw) vs. swab methods of collection.
Review Saliva Collection Diagrams.
Demonstrate how to use collection sheet and color coding system to match collection time to tube/method.
Affix labels for demonstration sample collection.
Describe both methods of sample collection.
Have mother self-collect samples (drool/straw method and swab method), freeze both immediately after collection, and discard straw in trash bin.
Have mother collect sample from child/infant, immediately freeze sample, and discard glove in trash bin.
Have interviewer affix remaining labels to properly colored tubes and the duplicate. labels to the corresponding box on each collection form.
Discuss sample storage, packaging, and shipping
Review Packing Guidelines document.
Instruct participant on how to properly pack and ship the samples according to guidelines.
Leave directions for home pick up OR dropping off samples at post office or FedEx/UPS store.
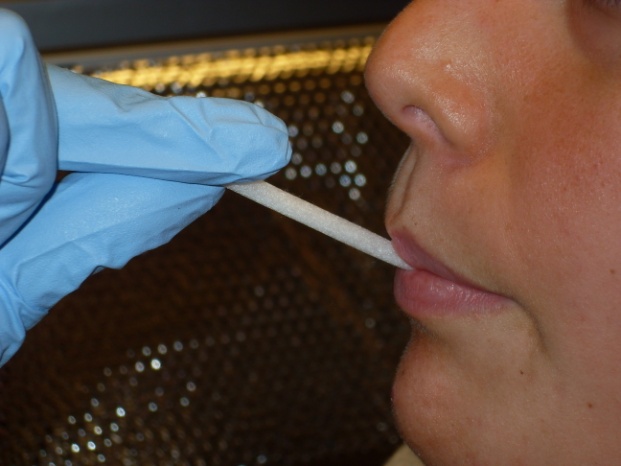
DEMONSTRATION
– ADULT PASSIVE DROOL COLLECTION (“Straw method”)
Use
2mL Sarstedt cryovial with WHITE cap
Instruct research participants to allow saliva to pool in the mouth. Some find it helpful to imagine eating their favorite food.
With head tilted forward, research participants should drool down the straw and collect saliva in the Sarstedt 2mL Cryovial. It is normal for saliva to foam, so we advise using a vial with twice the capacity of the desired sample volume.
Repeat as often as necessary until sufficient sample is collected. One milliliter (mL), excluding foam, is adequate for most tests.
Cap tube and discard straw in trash bin.
Demonstrate how to affix the label specifying mother collection to the cryovial, mark the collection time in the appropriate box on the home visit collection form.
Demonstrate how to place the cryovial into the first mailer with a cold pack from the freezer.
For next day’s self-collections: once the sample has been taken immediately place the labeled tube into the participant’s freezer. Once all samples have been collected they may then be packaged for mailing.
Mother should repeat these methods the following day for self-collections. Mother should be instructed to submit 2 passive drool samples and 2 oral swab samples. All child samples will be swab method.
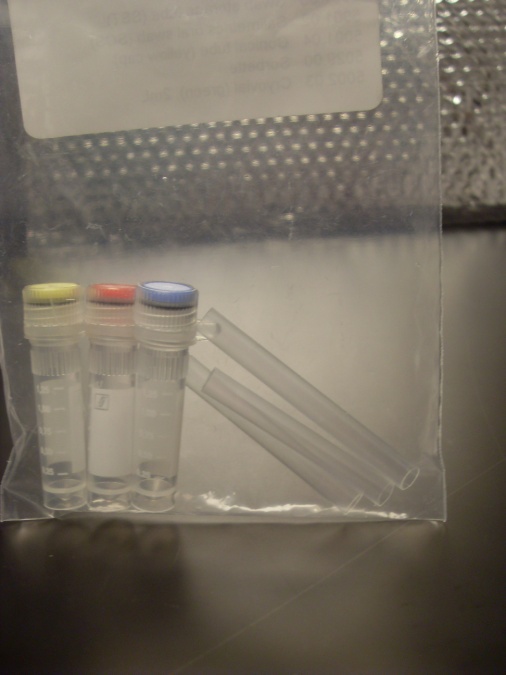
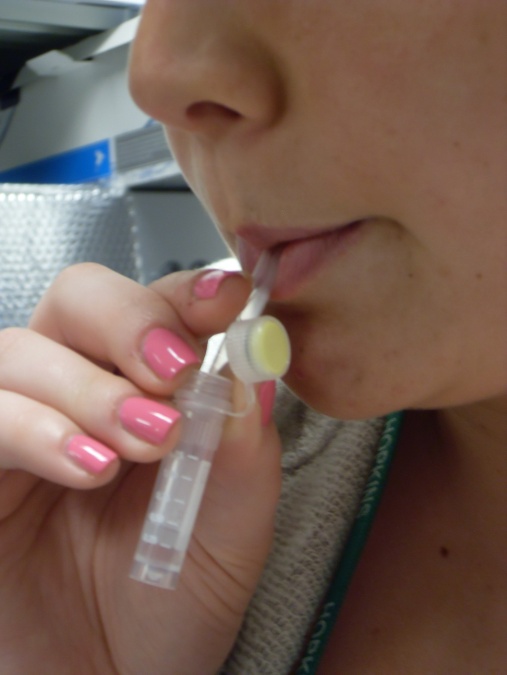

Materials: Sarstedt 2mL
cryovial, 2” length of drinking straw
Passive drool collection
method
Saliva may form bubbles in
tube during collection. We recommend at least 1mL of sample (not
including the volume of the bubbles)
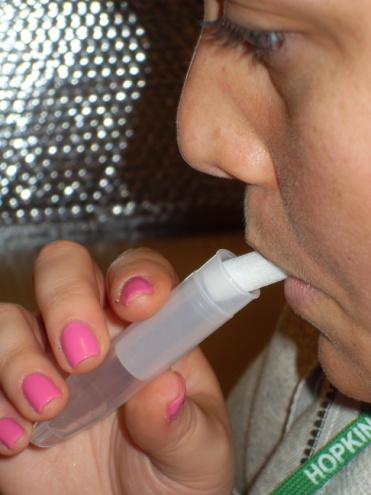
DEMONSTRATION - ADULT ORAL SWAB COLLECTION (“Swab method”)
Use Swab Storage Tube with WHITE cap
Have the participant tilt her head forward and allow saliva to pool on the floor of her mouth for several minutes, or until several milliliters have accumulated.
Have the participant uncap the swab storage tube. Do not remove the basket insert from the tube. Place the oral swab under the front of the tongue to absorb the pooled saliva. Keep the oral swab in place for 2 minutes to insure that it is saturated.
Have the participant return the saturated oral swab back into the basket of the swab storage tube and replace the cap.
Affix the proper label for mother collection time (2-4) and mark the time in the appropriate box of the mother collection form.
Once the sample has been taken immediately place the labeled tube into the participant’s freezer. Once all samples have been collected they may then be packaged for mailing.
*We recommend shaking the swab directly from the tube and into the mouth (under the tongue) without the participant touching the swab with her hands when possible. After the 2 minutes have the participant spit the swab back into the basket of the swab storage tube.
If collecting a sample using the adult oral swab, advise the
participant to try to avoid touching the swab with her hands if
possible.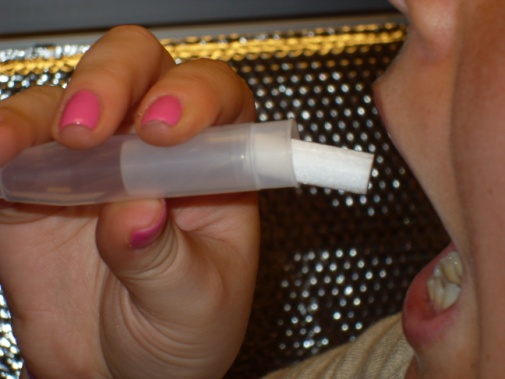
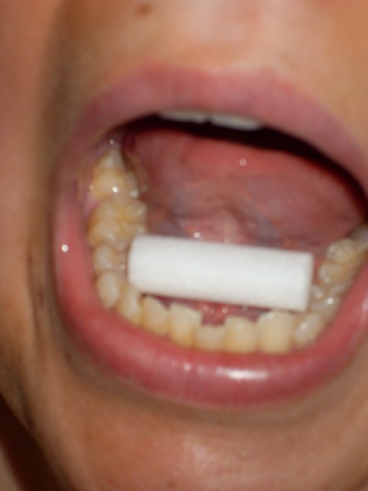
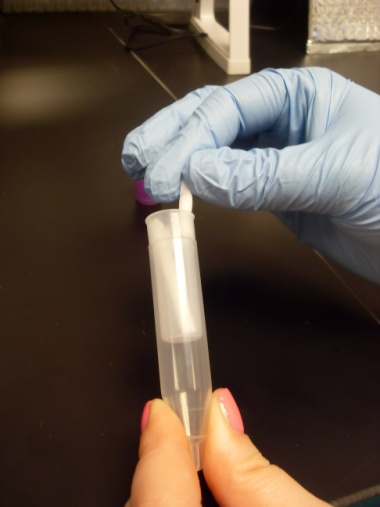
DEMONSTRATION – INFANT/CHILD ORAL SWAB COLLECTION
Use Swab Storage Tube with WHITE cap
Instruct the participant to put on one nitrile glove (only required for hand holding swab)
2. Have the participant hold one end of the child or infant oral swab* in the gloved hand and insert the other end of the swab into the child’s mouth. DO NOT LET GO OF THE SWAB WHILE IT IS IN THE CHILD’S MOUTH.
3. Hold the swab in the child’s mouth for two (2) minutes. Remove the swab and immediately place the swab into the basket insert of a swab storage tube, then cap the tube. The participant should be able to squish the entire swab into the basket. It is ok if the swab is folded or bunches.
4. Discard glove in trash bin.
5. Demonstrate how to affix the label specifying child collection to the swab storage tube and how to mark the collection time in the appropriate box of the home visit collection form.
6. Demonstrate how to place it in the mailer with a cold pack from the freezer.
7. For next day’s self-collections, once the sample has been taken immediately place the labeled tube into the participant’s freezer. Once all samples have been collected they may then be packaged for mailing.
Repeat this method for child’s saliva collection the following day.
*For infants younger than one (1) year old, use the infant oral swab. For children aged one (1) year and up use the child oral swab. See page 2 for illustrations.
Materials: Swab Storage Tube, Infant Swab OR Child Swab, latex glove
(not pictured)
Infant/Child swab collection method
Fold the Child/Infant Swab to fit it into the basket of the Swab
Storage Tube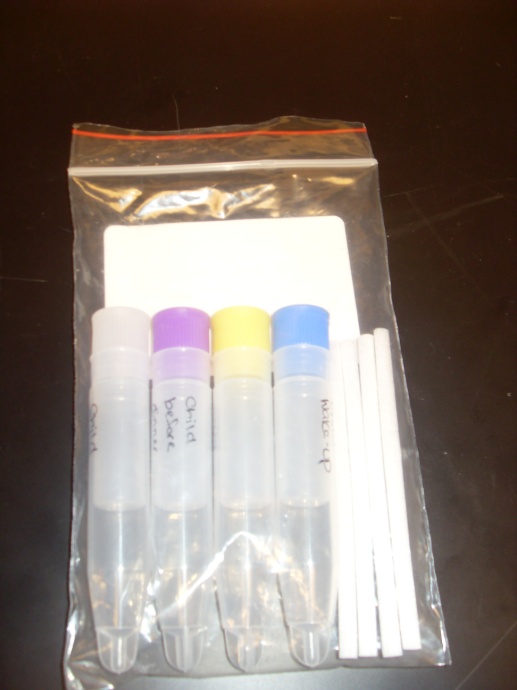
PACKING AND SHIPPING SAMPLES
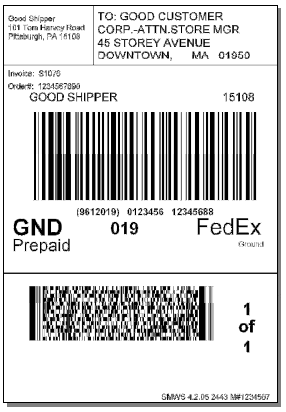
Preparing Shipping Labels
Participants will need to use either FedEx or UPS standard overnight shipping.
*Please note that shipping companies are VERY strict about packages being shipped on the actual shipping date on the label. For example, if the participant intends to collect samples on Monday the 15th, in order to ship the samples on Tuesday the 16th: you must generate a shipping label that marked with the date of the 16th, and the package must be shipped dropped off/picked up on the 16th. FedEx/UPS will refuse to accept the package on any other date! BE SURE TO EXPLAIN THIS CAREFULLY TO THE PARTICIPANT.
Communicate with the participant prior to the home visit in order to establish a firm a shipping date.
Option 1 – Print shipping label prior to home visit:
Fill out shipping information online and print a shipment label from either FedEx or UPS with the shipping date confirmed on the phone and print it out at your location. Take the label with you and affix it to the box at their location. MAKE SURE THE PARTICIPANT UNDERSTANDS HOW IMPORTANT IT IS TO SHIP ON THE SHIP DATE THAT IS ON THE LABEL.
Option 2 - Print out a shipping label during the home visit:
You will need a laptop/tablet with a data connection (WiFi or 3G) and a portable printer (these retail for about $200 plus the cost of ink) for this option
Fill out shipping information online and print a shipment label from either FedEx or UPS with the shipping date confirmed during the home visit, print it out at their house, and affix it to the box before you leave. MAKE SURE THE PARTICIPANT UNDERSTANDS HOW IMPORTANT IT IS TO SHIP ON THE SHIP DATE THAT IS ON THE LABEL.
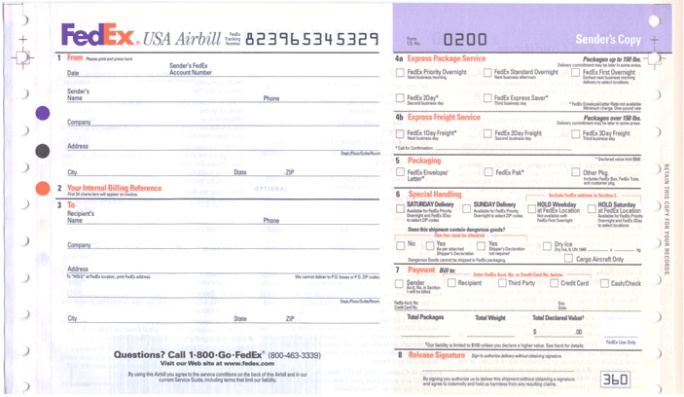
Option 3 - Fill out a blank airbill by hand during the home visit:
YOU CAN ONLY USE FedEx FOR THIS OPTION, otherwise this is the most flexible option
Fill out blank airbill during the home visit. You can either:
Fill out the shipping date and have the participant ship on that date OR
Leave the shipping date blank and have the participant fill it out on the day the package is actually dropped off or picked up for shipment.
Packing Samples
Saliva samples are considered Class B Exempt Human Specimens for shipping and shipping containers should be marked as such.
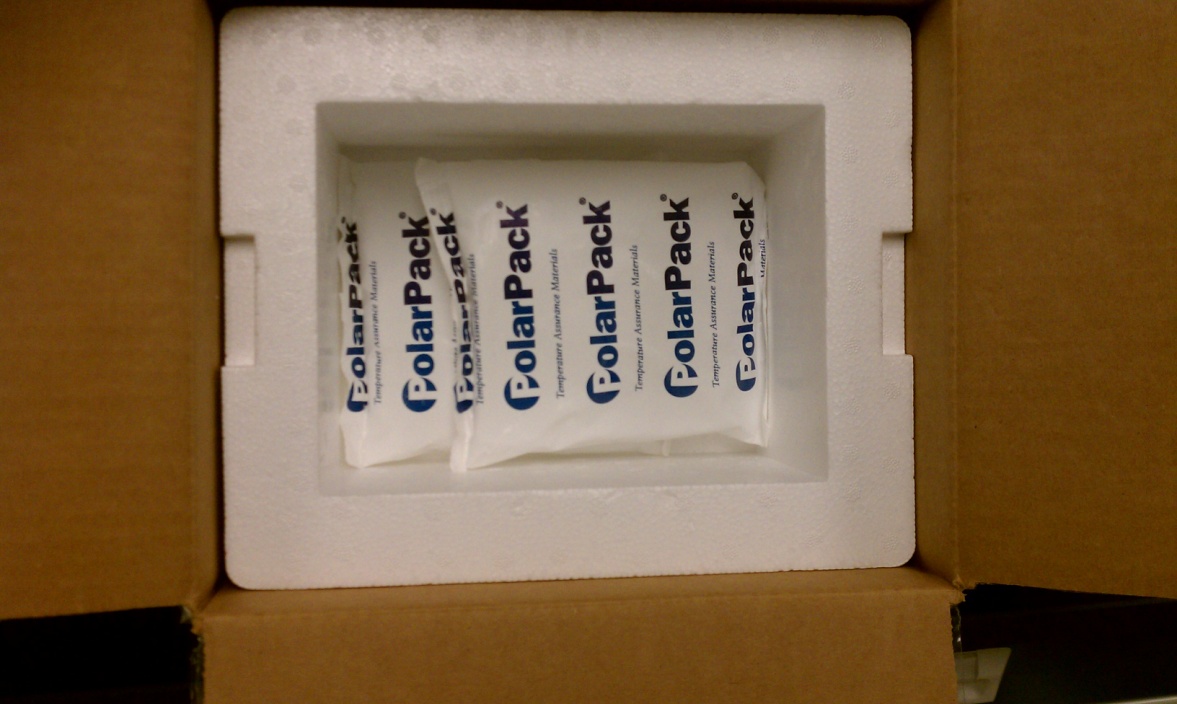
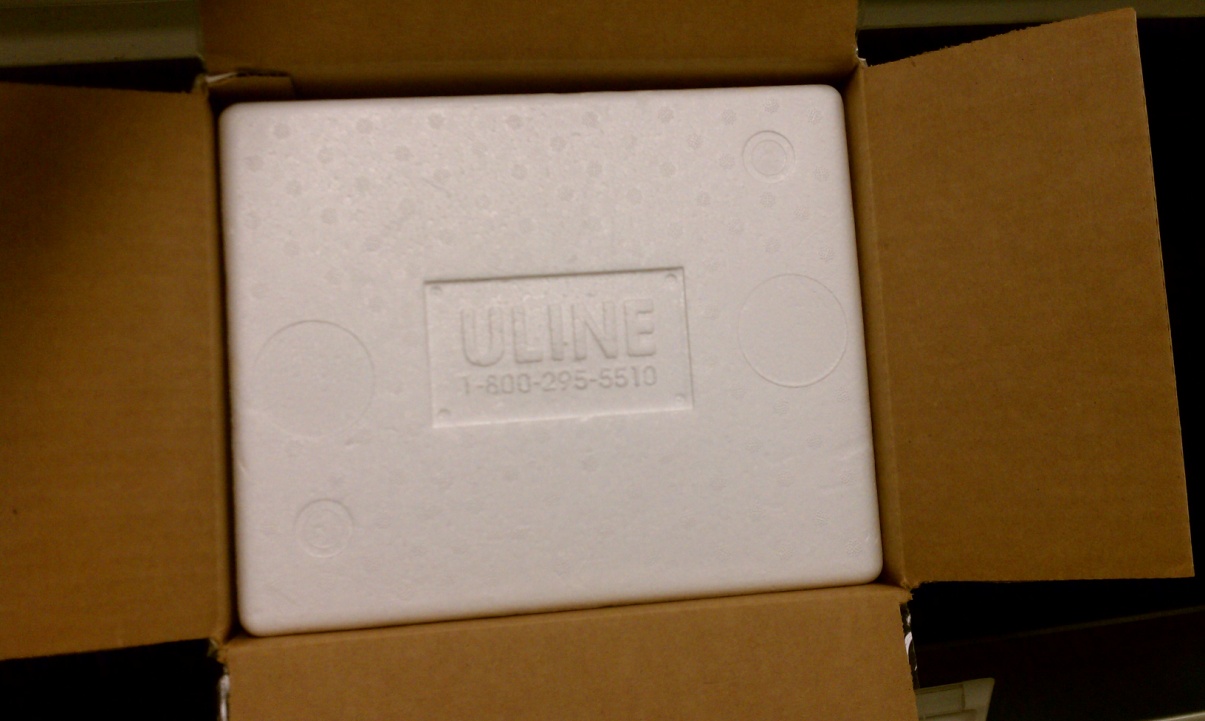
In order to maintain cold temperatures while accounting for any potential, unplanned factors that increase the time that the samples are outside of a freezer environment, a method has been devised to keep the samples frozen/refrigerated for up to 60 hours. This method requires a 2 piece insulated shipper with 2 cold packs. The insulated shippers (Uline S-9903) and three completely frozen 12 oz Polar Packs will keep samples frozen/refrigerated for up to 60 hours. We would prefer having samples unpacked and in a freezer within 24 hours, but in case of delivery delays the samples will be ok for up to 60 hours.
Each family will receive the following:
U-line insulated shipper (styrofoam box inside cardboard box)

Three 12oz. Polar Packs
Pre-paid and filled out shipping label for selected carrier (UPS, FedEx)
Before leaving the family on the home visit day, place all 3 polar packs in their home freezer. They need to be frozen a minimum of 24 hours before shipping to ensure proper temperature regulation.
If the family is uneasy about the polar packs touching the inside of their freezer, you may place them all inside a large zip lock bag before placing them in the freezer.
Please lay the polar packs flat during the duration of freezing or they will not fit into the insulated shipper correctly.
Remind them to place all samples in the freezer immediately after collection.
Place the shipping label on the box for them before you leave.
Go over the correct way to pack the shipper with them before leaving and leave a copy of the packing guidelines as a visual aid.
Place frozen samples inside ziplock bag.
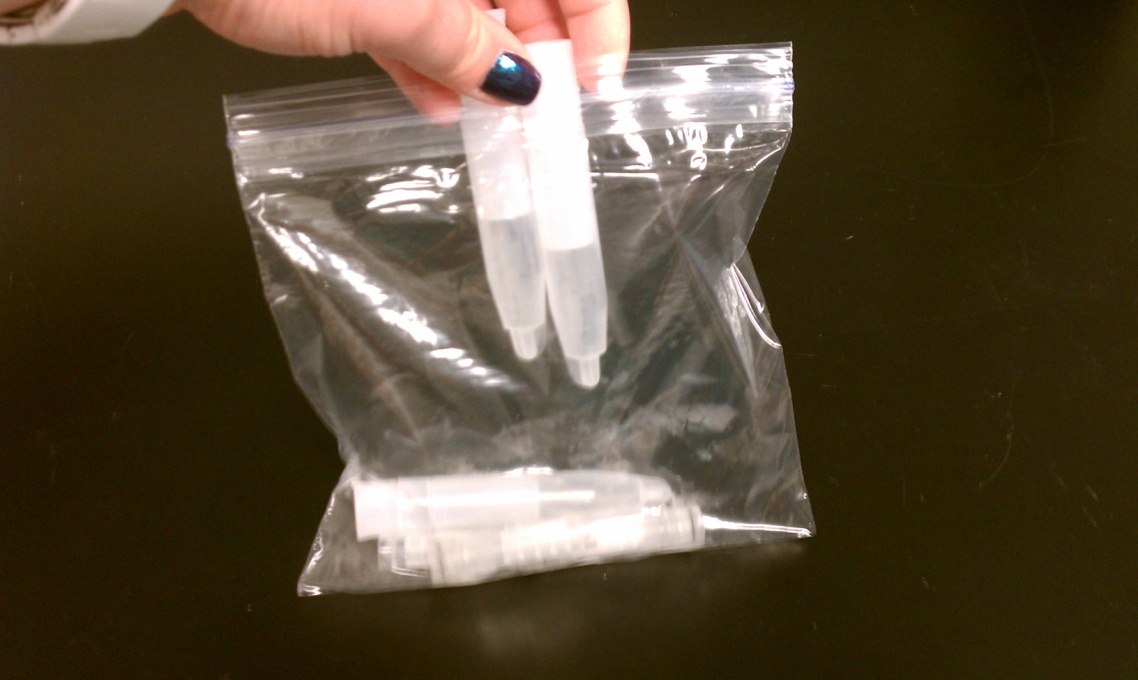
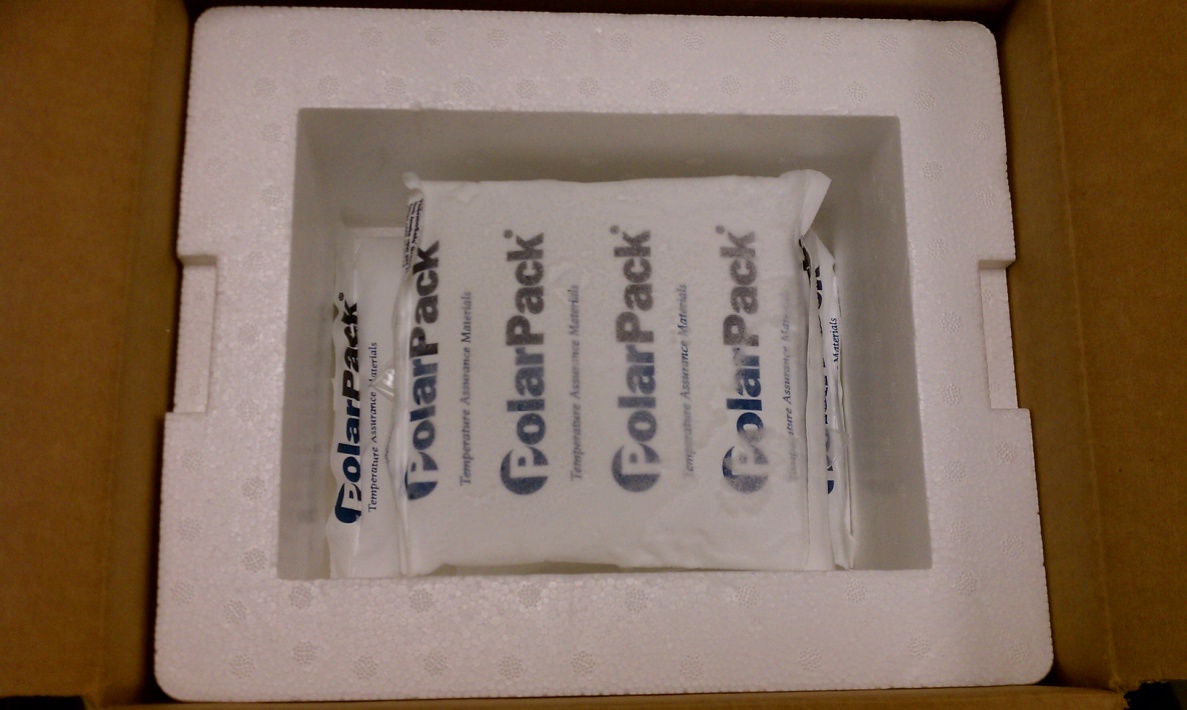
Place 2 frozen Polar Packs on bottom of insulated shipper.
Place bag of samples (and optional temperature device) on top of Polar Packs
.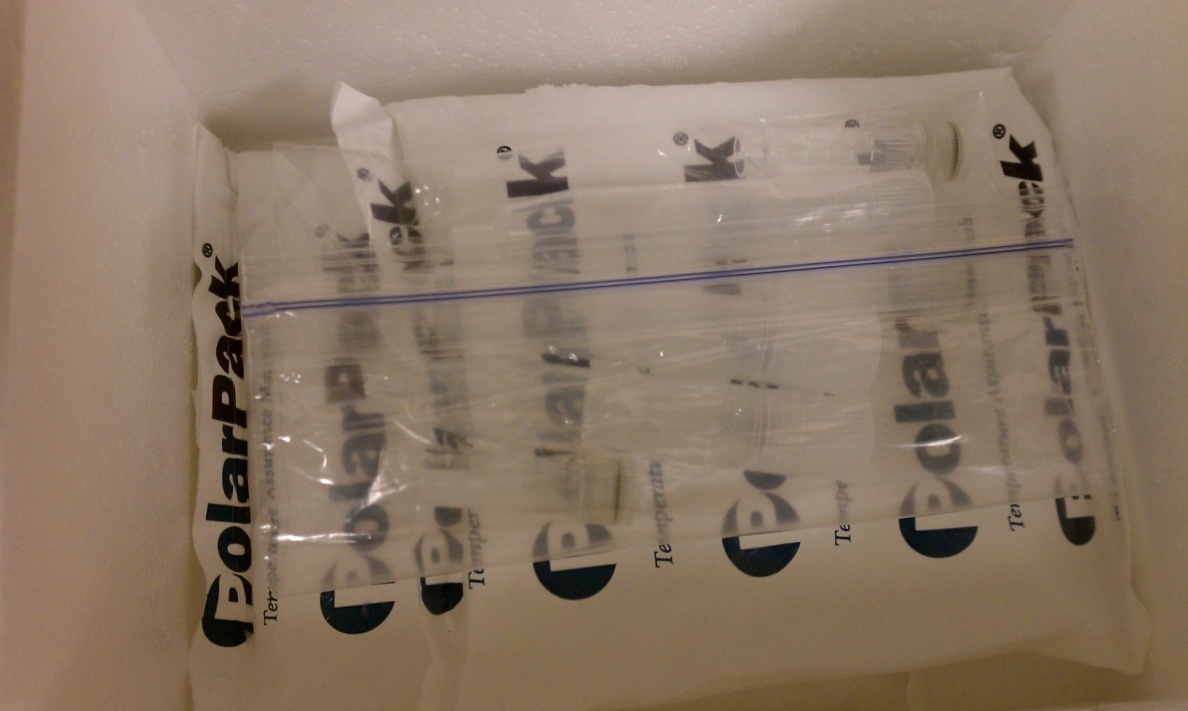
Place remaining frozen Polar Pack on top of samples.
Place collection forms, in ziplocked bag, into container.
Place Styrofoam lid on shipper
.
Close cardboard flaps. Seal all edges with packing tape.
If a temperature monitoring device is included with the kit, instruct the participant to leave it in the shipping container. No participant interaction is required for this device.
Also remind moms to wait as long as possible on shipping day to pull samples and polar packs out of the freezer and pack up the insulated shipper. For example, if the shipper is scheduled to be picked up at noon, wait to pack the shipper until 11:45. Or if the mom is dropping off the shipper, wait to pack until right before she leaves. Also, if convenient for the mom, have them drop off the shipper as close to the pickup time as her schedule permits (keeping the samples frozen as long as possible). However, if she needs to drop off the samples before work and they won’t get picked up until 5pm, that is ok. The extra cushion time provided should cover this extended shipping time.
A full insulated shipper weighs 5 lbs. Use this weight when preparing a shipping label.
Participants will need to use either FedEx or UPS standard overnight shipping.
Drop Off/Pick Up
Ground vs. air
delivery: Any UPS drop location can accept packages for both ground
and air delivery. However, only a subset of FedEx locations accept
packages for ground delivery. Therefore, if the participant is
shipping via FedEx ground, they need to drop the package off at a
FedEx location that accepts packages for ground delivery.
Drop off must be timed so that the package will be both accepted and
shipped off that day. For example, most FedEx locations will only
delivery packages by ground if they have been dropped off at the
FedEx location by 3 pm, whereas air delivery packages often are
shipped the same day even if dropped off by 5 pm. This is very
important. If the samples are dropped off too late, they will sit
overnight at room temperature, possibly even 24 hours, before being
shipped. Ideally, samples are shipped, unpacked, and placed in the
Center for Interdisciplinary Salivary Bioscience Research (CISBR)
freezer within 24 hours; however if the samples have been packed
properly, they may stay cold for up to 60 hours in the case of
delays.
The participant may take the package to a local FedEx/UPS drop location or the post office and drop it off.
Since the shipment is prepaid, all that is required is for the participant to drop the package off
FedEx and UPS drop locations can be actual stores or in other stores like Kinkos, Staples, Office Depot
Simply pick up the package from the participant the day after the samples have been collected.
If samples are being stored at a local site before being sent to CISBR, then they simply need to be transported by cooler to the local site and stored in a freezer until they are sent to CISBR.
If samples are being sent immediately to CISBR, the interviewer can make the shipping label the day of shipping (so that the shipping date is correct) and drop it off at a local shipping location for either FedEx or UPS.
FedEx/UPS can pick up the package from the participant’s home.
For an extra fee you can schedule a pickup at the participant’s residence from all both carriers.
FedEx and UPS can pick up within a specified window of time.
You can either schedule a pickup for the participant on the ship date if you have a pre-printed label, OR
You can have the participant call you the day before they are ready to ship (day of collection) and you can schedule a pickup for them on the following day, OR
You can have the participant call and schedule a pickup themselves.
CONTACT INFORMATION
Study Coordinator:
Anjali
V. Sivan, MPH
Center for Interdisciplinary Salivary Bioscience
Research
Johns Hopkins University School of Nursing
1909
McElderry St., Room 302A
Baltimore, MD 21205
Office:
443-287-4581; Fax: 410-502-1043
Email: asivan1@jhu.edu
Principal
Investigator:
Douglas A.
Granger, Ph.D.
Center for Interdisciplinary Salivary
Bioscience Research
Johns Hopkins University School of
Nursing
525 N. Wolfe Street, Room 466
Baltimore MD,
21205
Office: 443-287-0583; Fax:
443-287-0544
Email: dgrange2@jhu.edu
Public reporting burden for this collection of information is estimated to average 15 minutes per response, including the time for reviewing instructions, searching existing data sources, gathering and maintaining the data needed, and completing and reviewing the collection of information. An agency may not conduct or sponsor, and a person is not required to respond to, a collection of information unless it displays a currently valid OMB control number. Send comments regarding this burden estimate or any other aspect of this collection of information, including suggestions for reducing this burden, to: NIH, Project Clearance Branch, 6705 Rockledge Drive, MSC 7974, Bethesda, MD 20892-7974, ATTN: PRA (0925-0647*). Do not return the completed form to this address.
| File Type | application/vnd.openxmlformats-officedocument.wordprocessingml.document |
| Author | Jessica Bayer |
| File Modified | 0000-00-00 |
| File Created | 2021-01-31 |
© 2026 OMB.report | Privacy Policy